Table of Contents
Welcome to our guide to the new Marvel Rivals Map for Season 2 - Hellfire Gala: Krakoa! Here, we will explain the layout of the Map, and learn about each section so you can take advantage to defeat your enemies.
The 2099 Hellfire Gala is underway, and Emma Frost is dazzling in her finery, expertly mingling with the crowd. With guests being properly entertained and the Mutants’ guards down, the timing is perfect for Ultron to crash this invite-only event! It’s up to the Quiet Council to get these unruly invaders under control, and their guests safe.
Move with grace and precision across the Gala to stop the imminent infection being spread by Ultron and his robots.
Can you keep your cool and elegance in the face of disaster?
Map Type: Domination
Krakoa is a king of the hill style mode consisting of 3 maps. It launched at the start of Season 2 with Emma Frost and the Hellfire Gala. The maps are a bit over the top, containing numerous paths and rooms that aren't really useful. The running theme of these maps are teleporters. There are 3 sets of teleporters on each map, all giving you quick access to different, set locations on the map. In this guide, we will go over various routes you can take, as well as tips and tricks, including how to use those teleporters. Since the map is a bit over-designed, we won't cover every single room or path you can walk since they all connect back to the central routes.
Map 1: Cradle
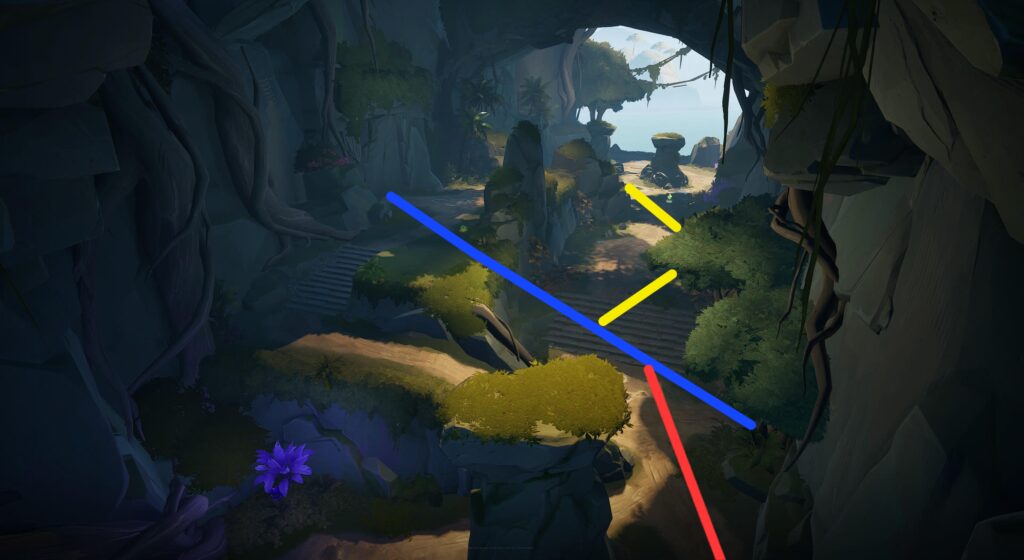
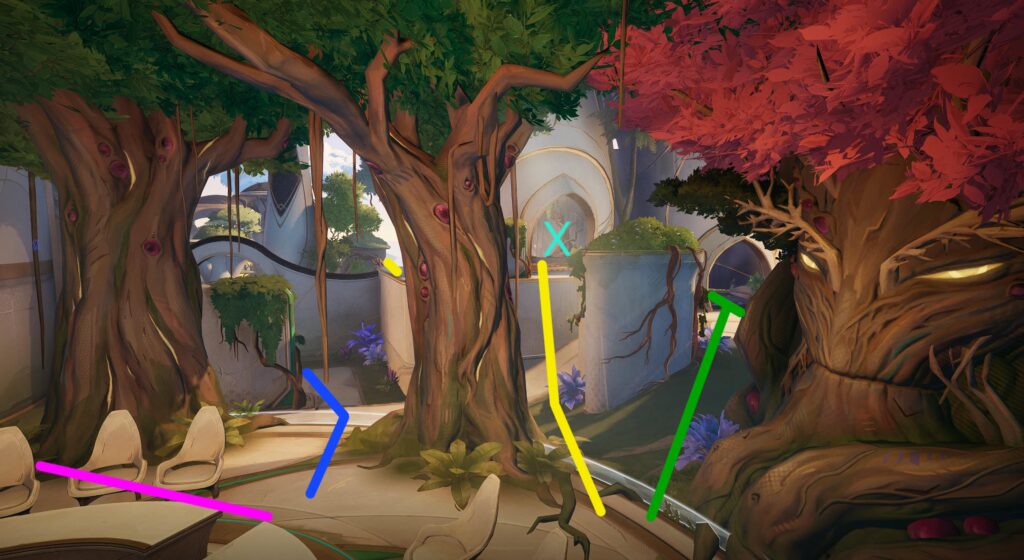
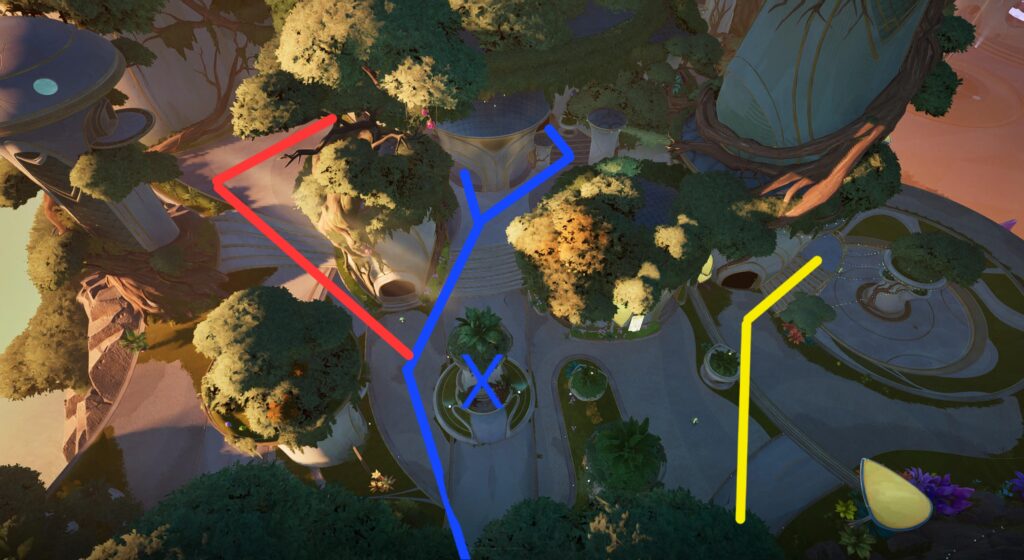
This map centers the theme around Cerebro in the middle of a cave. There are 3 main routes you can take from the spawn:
- Blue: The typical path players will use by default
- Red: A more "secret" route that cuts through the north edge of the map
- Yellow: The discreet route that hugs the south walls of the map to wrap around the objective.
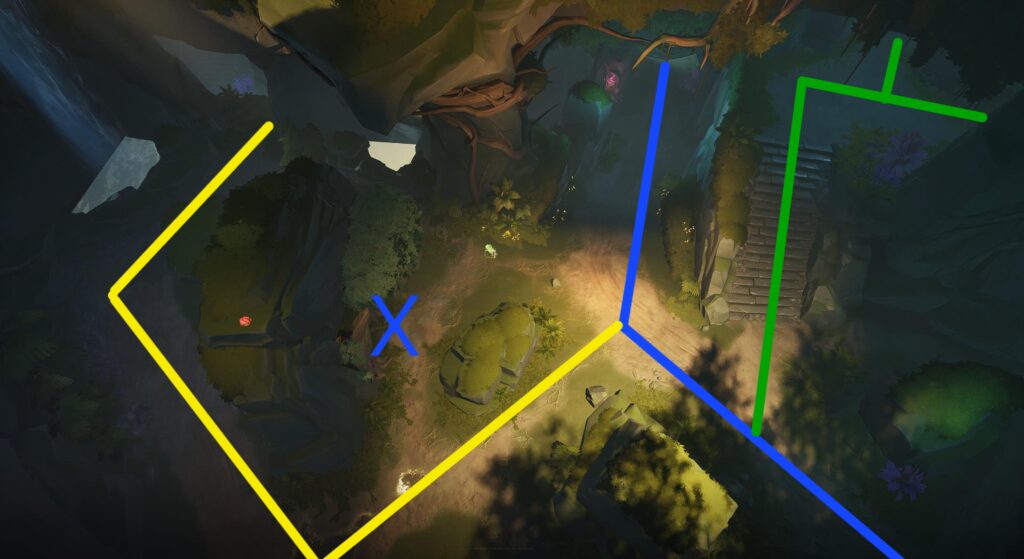
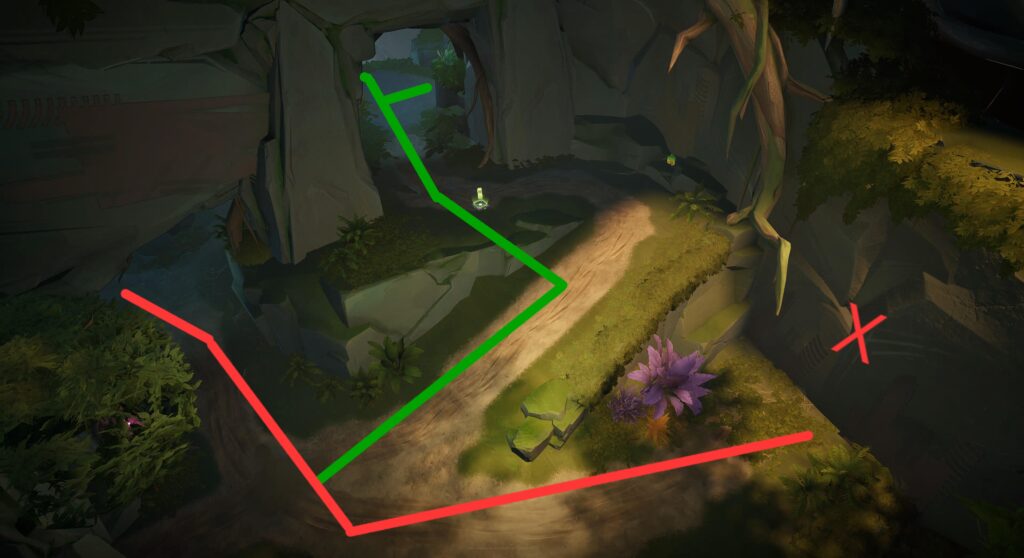
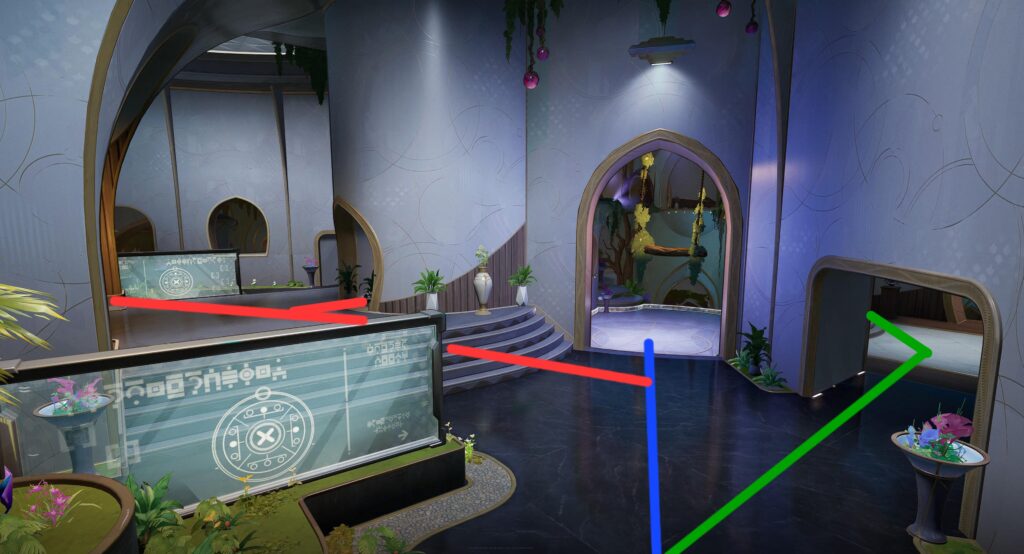
At a top-down view of the spawn, this image shows you some branching paths as you enter the map. The Green route is an alternate path that connects with red to reach the northern area of the map above the objective. The X highlights a portal you can use that fast tracks you to the objective.
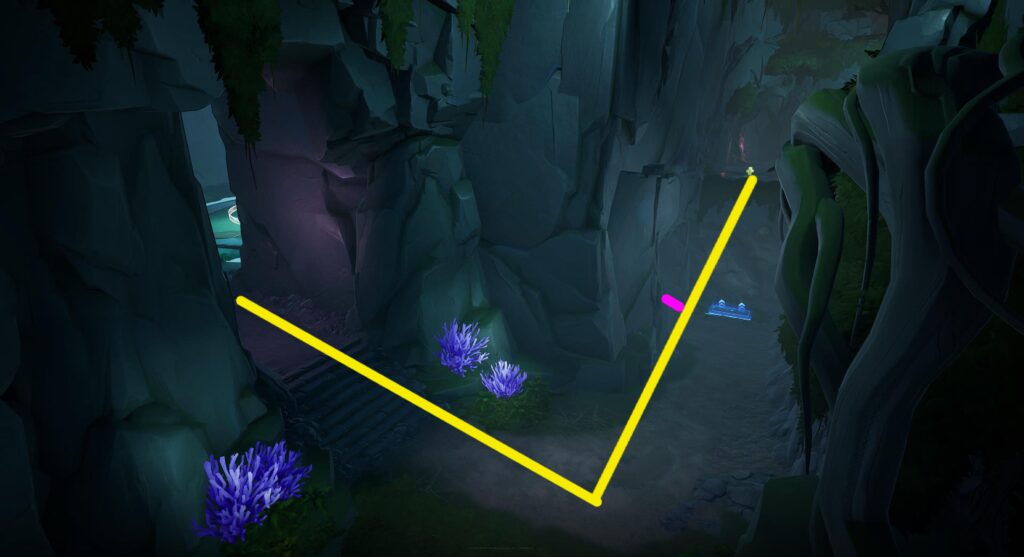
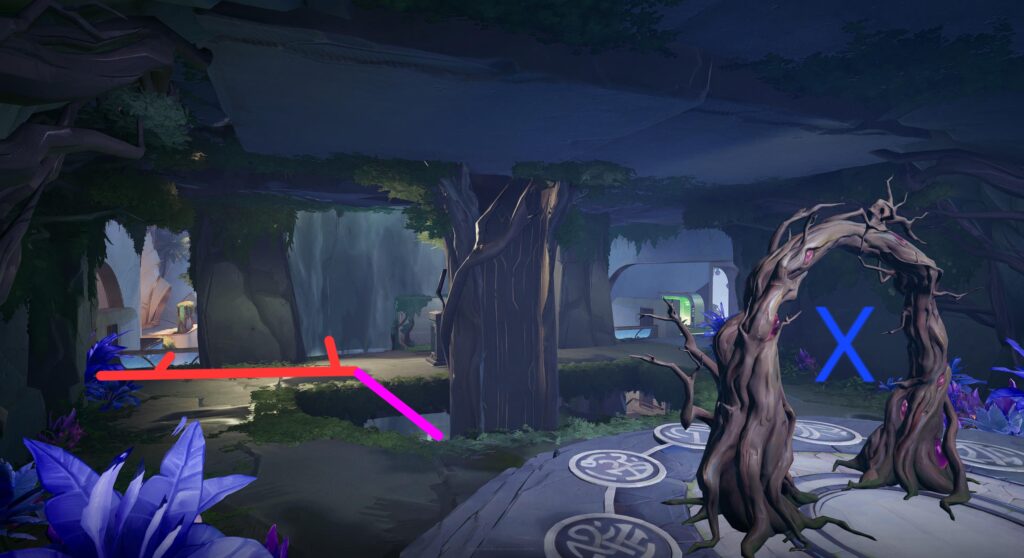
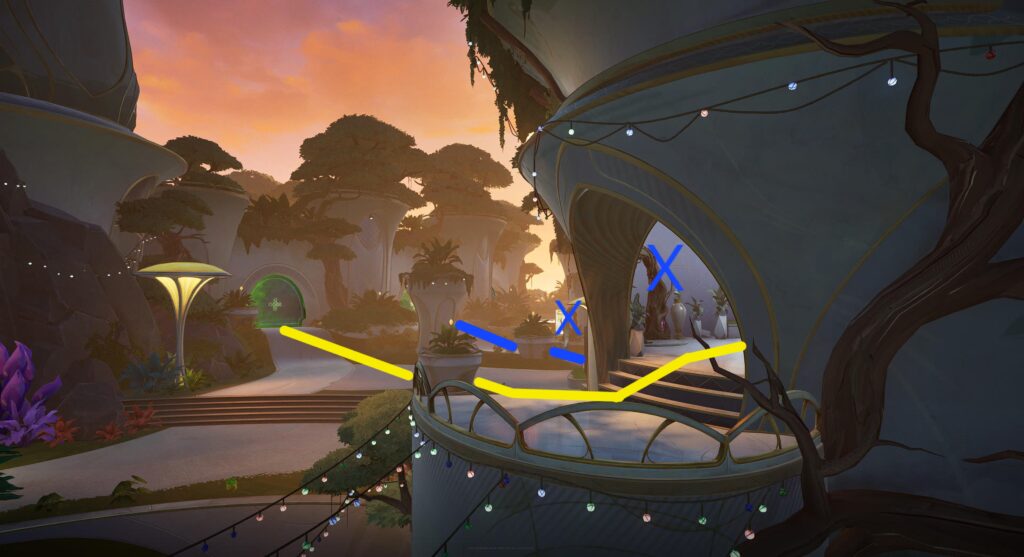
That southern yellow route cuts through this alley and wraps around the objective. It also connects to the underside of the objective where the pink route is.
As the yellow route connects to the spawn, the other side of the X teleporter can be seen here. The pink route branches off here, moving to a hole in the floor that leads under the objective.
Moving under the objective, the pink route can use the jump pad to move back up, backtrack to the yellow route, or move to the X teleporter.
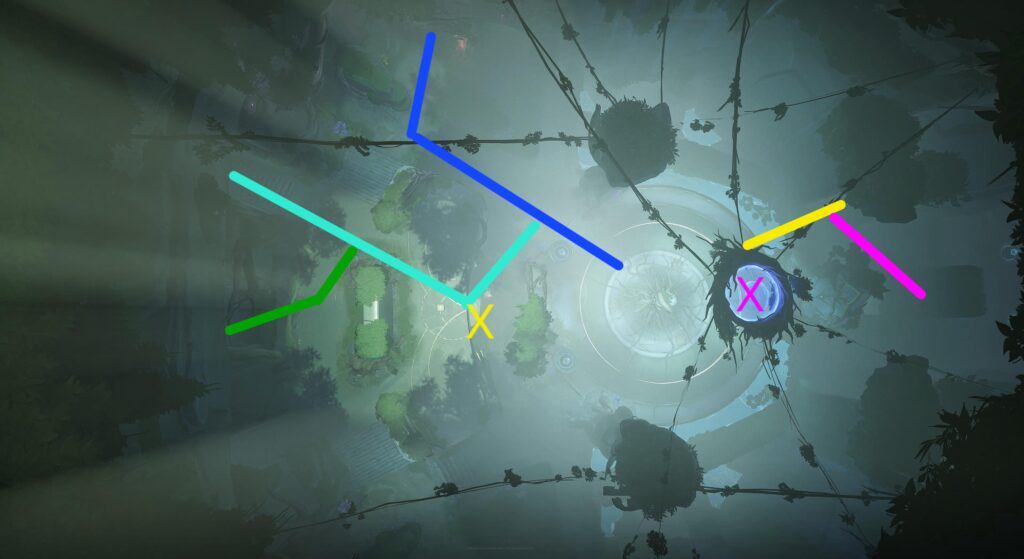
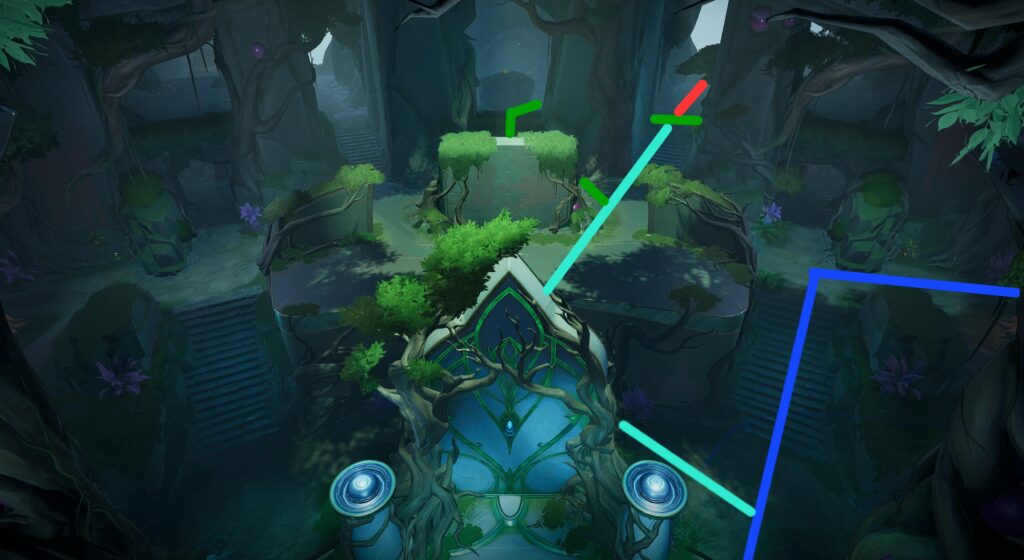
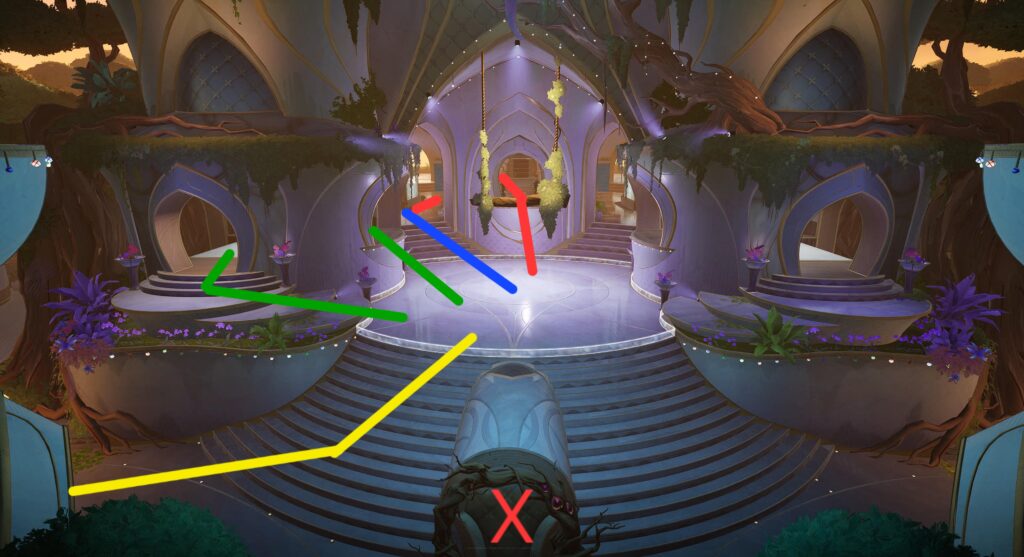
This image is a top-down view of the objective room. You can see where the ends of the blue, yellow, and pink routes meet at the objective. The X suspended in the air marks the other end of the underground portal. You can also see the ends of the teal and green paths, as well as the end of the X portal. The next images will cover those routes in close detail:
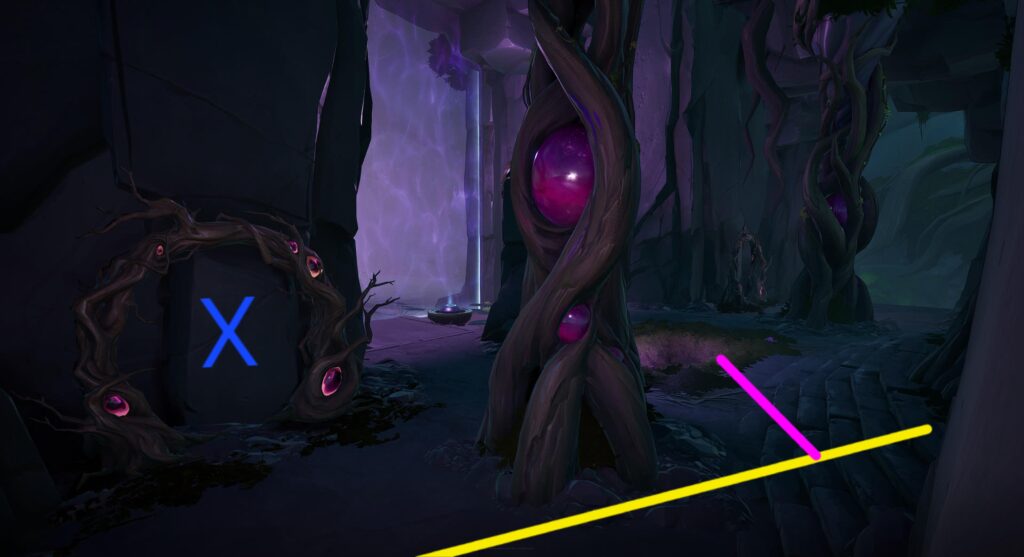
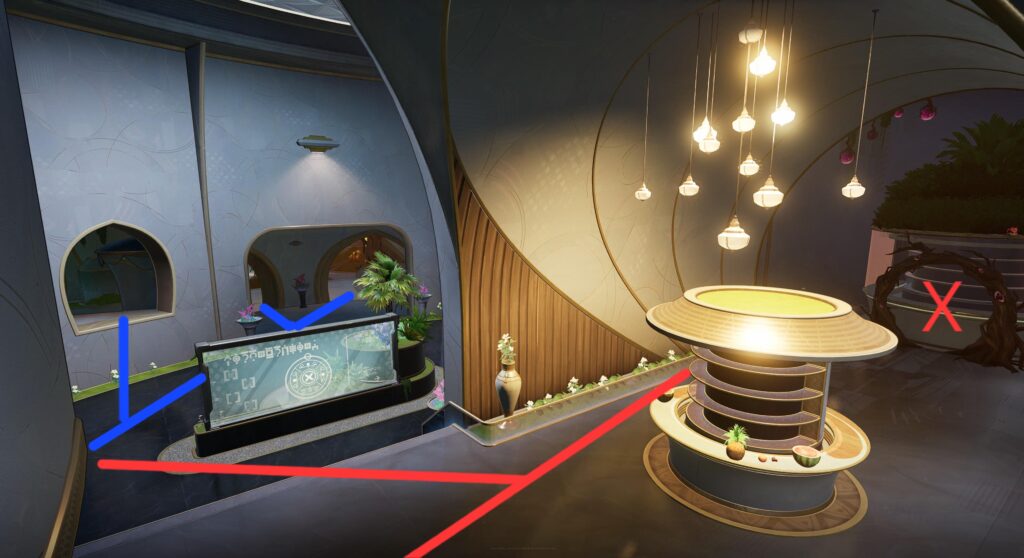
Back near the spawn, the red and green routes connect together. The green route takes you down a more conventional route to the top of the objective. The red route brings you to a hidden path! The X highlights a breakable wall that covers the other side of this path.
The hidden red route is much more discreet, but doesn't really give you a huge advantage. It's part of what makes this map over-designed. It does hold a health pack though, which can be helpful in a punch.
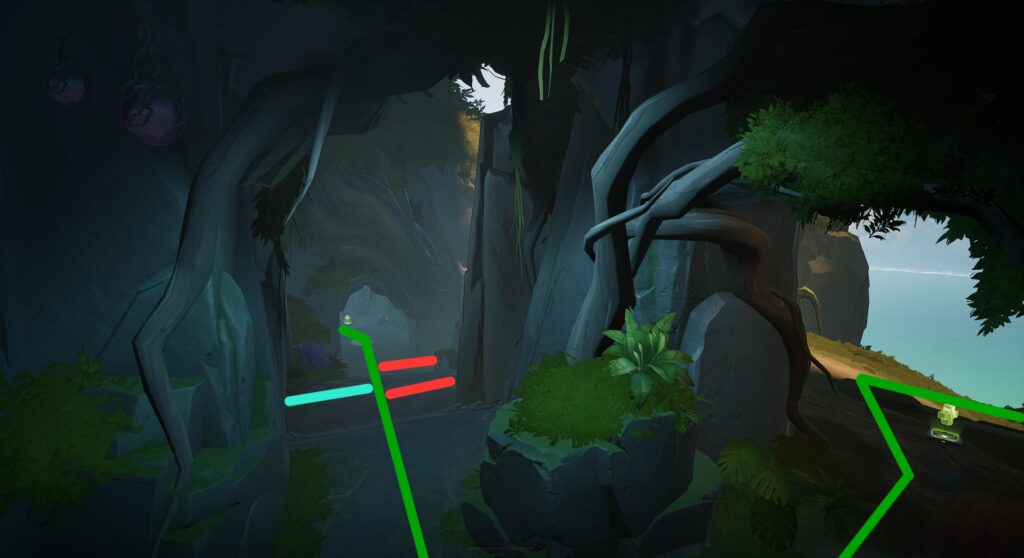
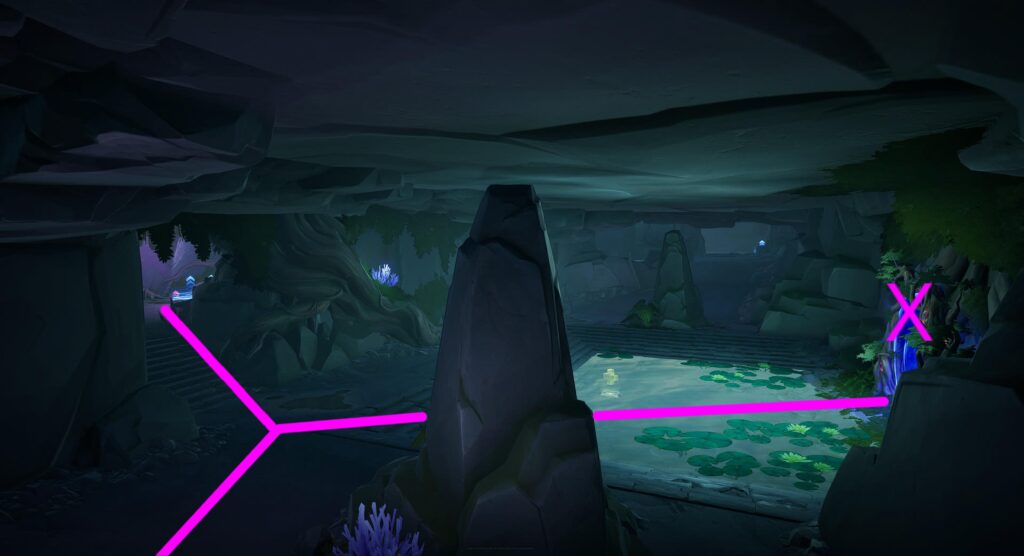
Moving back to the green route, you can see where this more conventional route leads to. It connects to that hidden red route's ending, as well as connects to the teal route that leads to the objective.
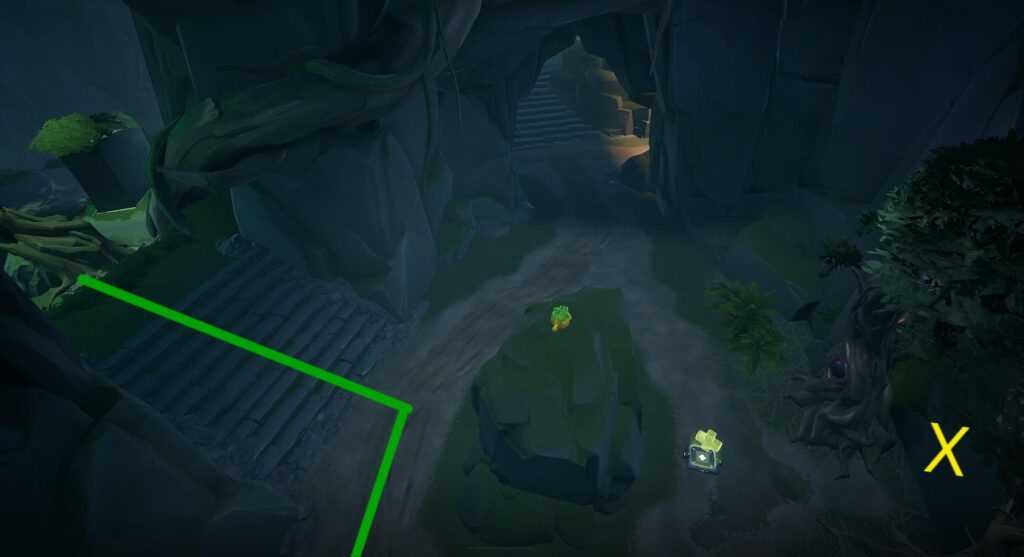
At the end of the green route, you will find the X teleporter and a nice health kit.
This image gives you a better angle on how these northern routes connect to each other and reach the objective.
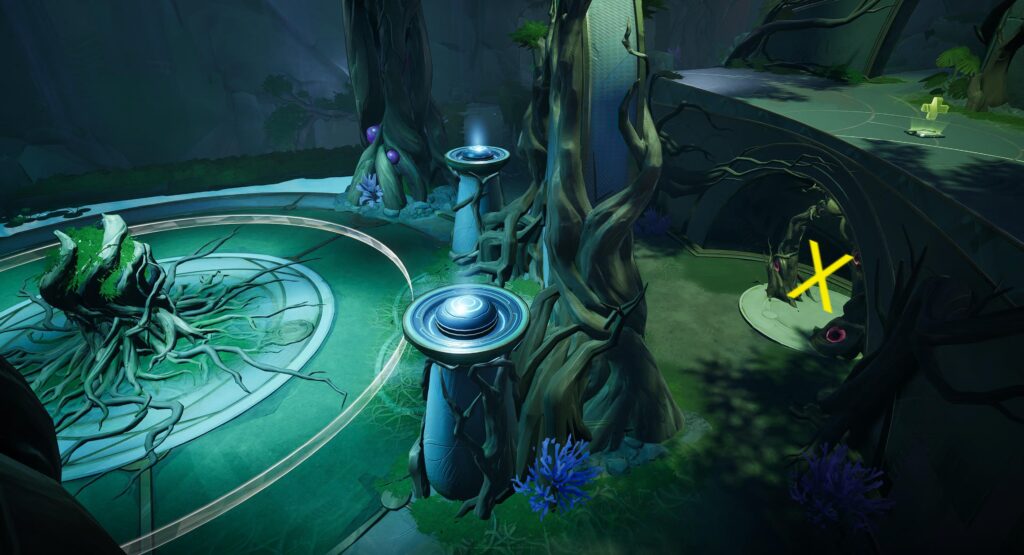
In the same area, this shows you that X teleporter that sits close to the objective. If you are under pressure while fighting for the point, use this teleporter to move to that health kit on green route.
Map 2: Grove
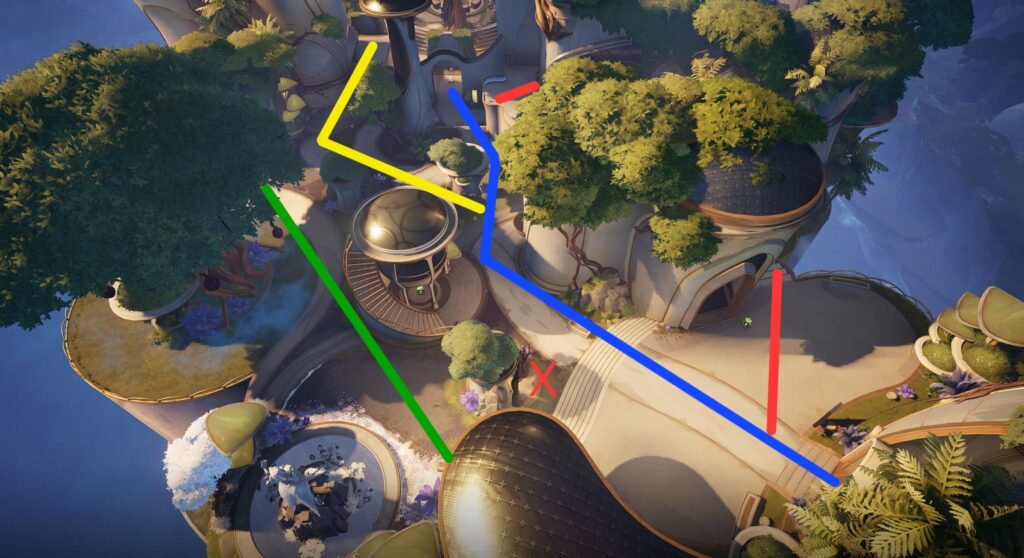
This map takes place in a much more open area, focued around a large tree in the center. From here, you have a few routes to take from the spawn:
- Blue: This is the typical route players naturally take to reach the objective
- Red: This moves through the south portion of the map through the building interior
- Yellow: This slight variation takes you to the objective parallel to blue, but on high ground and next to a portal
- Green: The northern flanking route
The X off the blue route marks the start of the spawn teleporter.
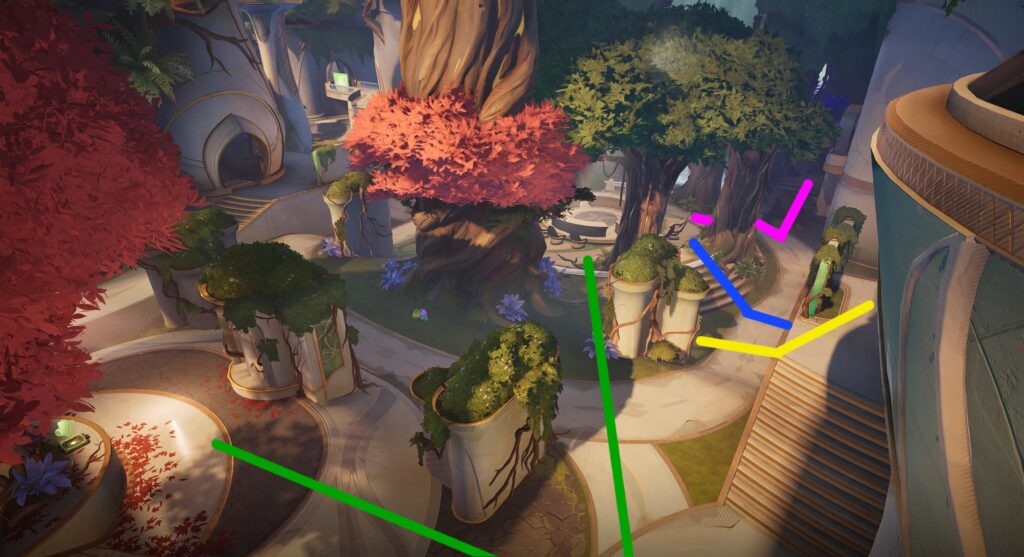
This is a closer look at the branching paths past the spawn. The X shows the end of the spawn teleporter, allowing you to essentially skip a large walk once it activates.
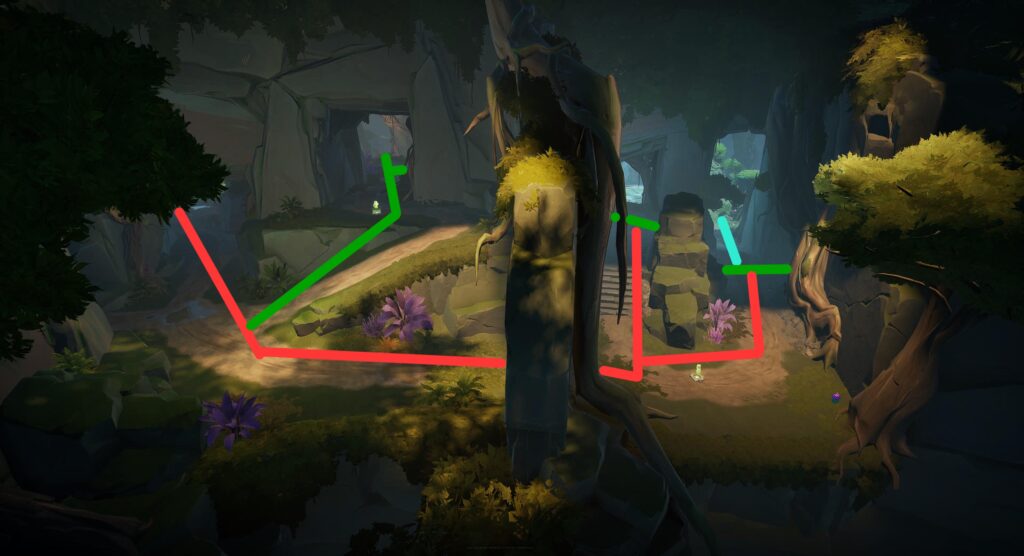
From the objective, you can see where each of the routes end. The X highlights another teleporter. The other side is actually the mirrored teleporter on the exact opposite side of the objective. You would use this as a quick flanking option to the opponent's side.
Here you can see how the green route gives you wider flanking options on the north side of the map. Just at the end of the path is a health hit hiding under that tree.
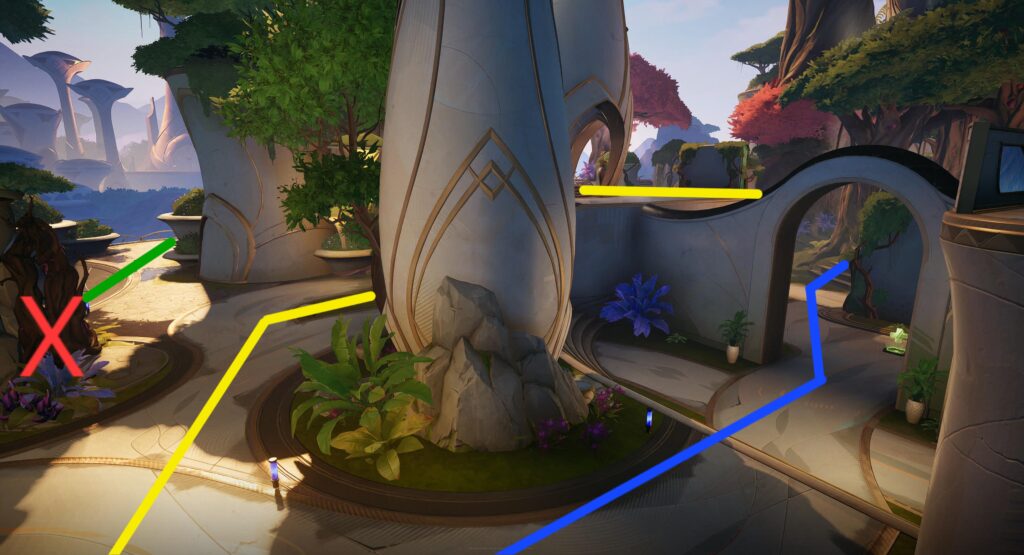
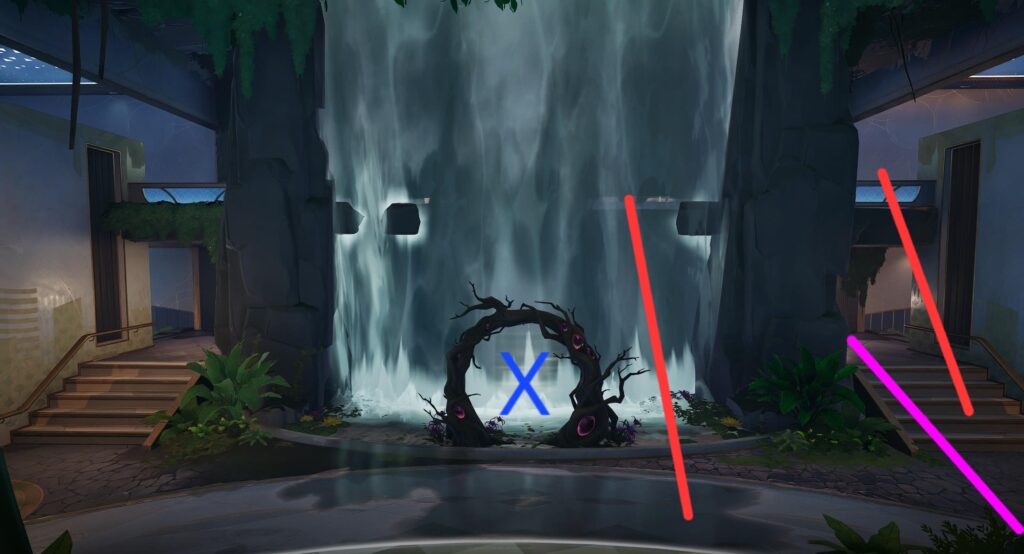
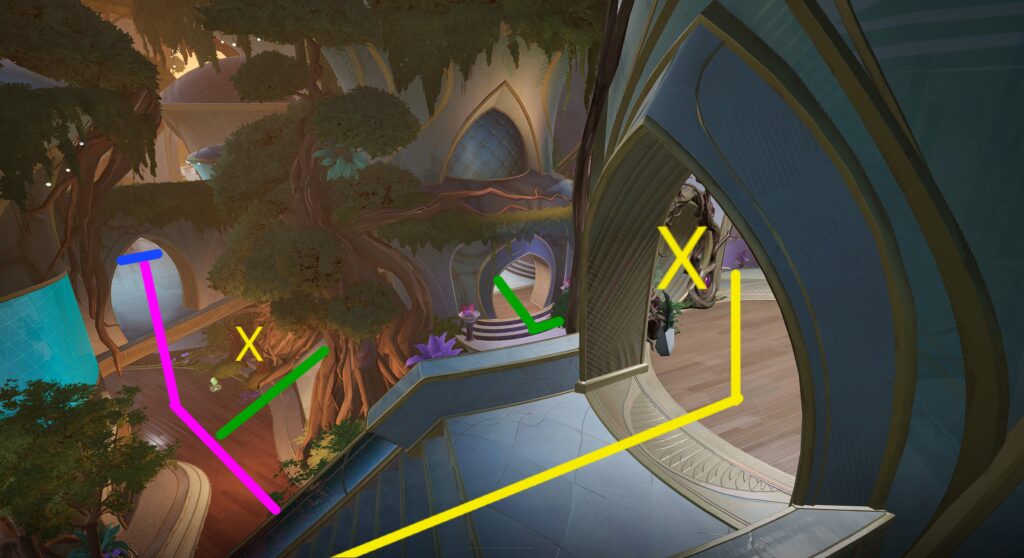
Back on the southern side of the map, you can see where the red route ends on the upper floor of the building. It gives you 2 openings to jump down to the objective: over the ledge and through the waterfall. The pink route takes you to the ground level of the building. The X is the top side teleporter, which connects to the base of the waterfall.
On the opposite side of the waterfall, this shows the endings of the same routes, as well as the other side of the X teleporter.
Map 3: Carousel
The last of the three maps is an indoor-outdoor hybrid. Similar to the other maps, the red are 3 primary routes to take, and a X teleporter at the spawn:
- Blue: The typical route players naturally take every match
- Red: The northern route that wraps around and above the objective
- Yellow: The more "outdoorsy" route that passes through small, open rooms
Inside the building, you get a new green route that acts as a sort of hub between multiple routes. The red route also reconnects here from the top of the map.
Here at the objective, all of the main routes converge on the capture point. The lower X is a teleporter that connects to the north most portion of the map's center.
Here is the other end of the X teleporter, which connects to the red route.
Moving back to the spawn, this yellow route takes a wide turn away from the others. This area of the map is mainly useless as no combat ever makes it out this far. The two X show the start and end of the spawn portal. It basically let's you skip the yellow route's walk.
If you continue down the yellow route, you will end at the top of this tower that overlooks the objective. It also houses the X teleporter, which takes you down to the second X teleporter on the ground level. The pink route is a connecting path between blue, yellow, and green.
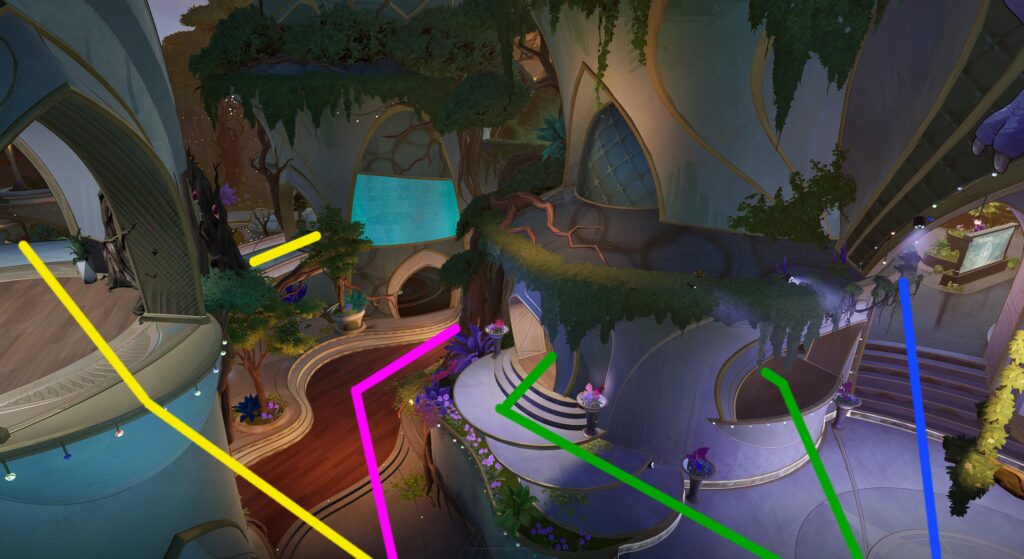
To get a better understanding of how the pink route connects to the others at the objective, this image gives you a better angle.
Achievements
Players can complete the following Achievements in this Map:
- Unwanted Guests
- Out of Service
- Head of the Table
- The Hidden Womb