Table of Contents
Welcome to our guide to the Marvel Rivals Map - Yggsgard: Royal Palace! Here, we will explain the layout of the Map, and learn about each section so you can take advantage to defeat your enemies.
Beneath the sky-shutting canopy of the World Tree, Yggdrasill, lies the golden glory of Asgard, realm of the gods, now overgrown with the roots and flora. However, the throne-seizing scheme of Loki, god of mischief, threatens the ever-lasting prosperity of this kingdom and all of the Ten Realms.
Map Type: Domination
Royal Palace is a 3-Map game where teams fight on symmetrical maps to capture the center capture point. Whichever teams wins 2 out of the 3 maps wins! This guide will cover each map in detail, highlighting routes you can take, as well as other helpful tricks and tips.
Map 1: Bifrost Garden
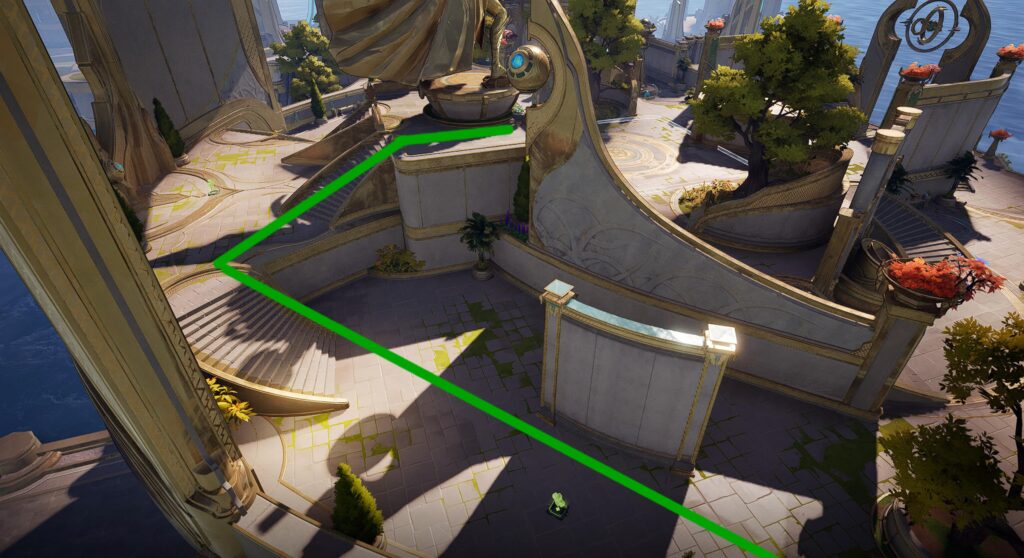
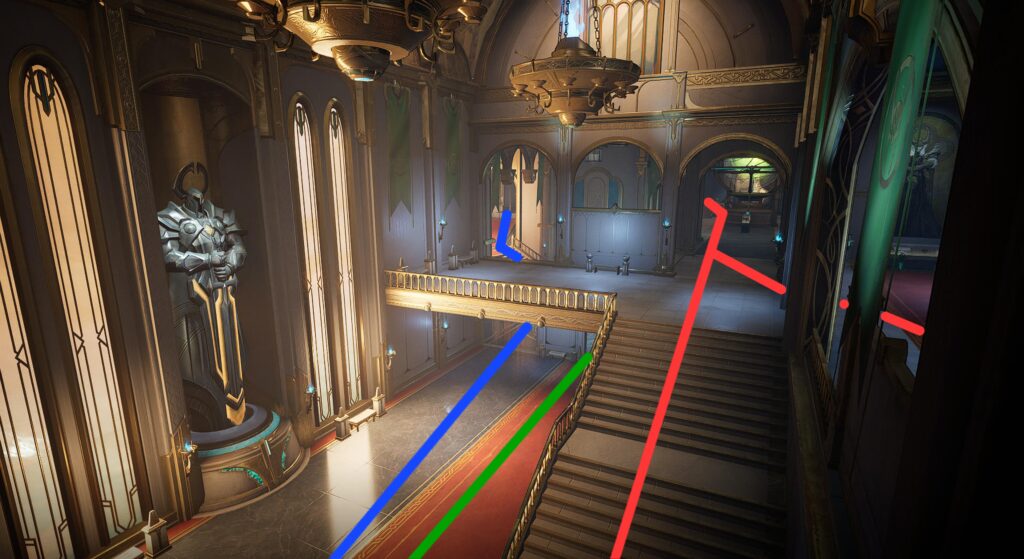
Bifrost Garden is the only map of the 3 that is set outdoors. This makes it ideal for flying, swinging, and other arial characters. Domination maps are much simpler than convoy style maps, so routes are simpler overall. For this section, there are 3 routes to know:
- Blue: This is the primary route most players take naturally to the objective.
- Red: The least used route. It cuts directly to the side of the spawn and follows the map edge, giving you a more discreet path to the objective.
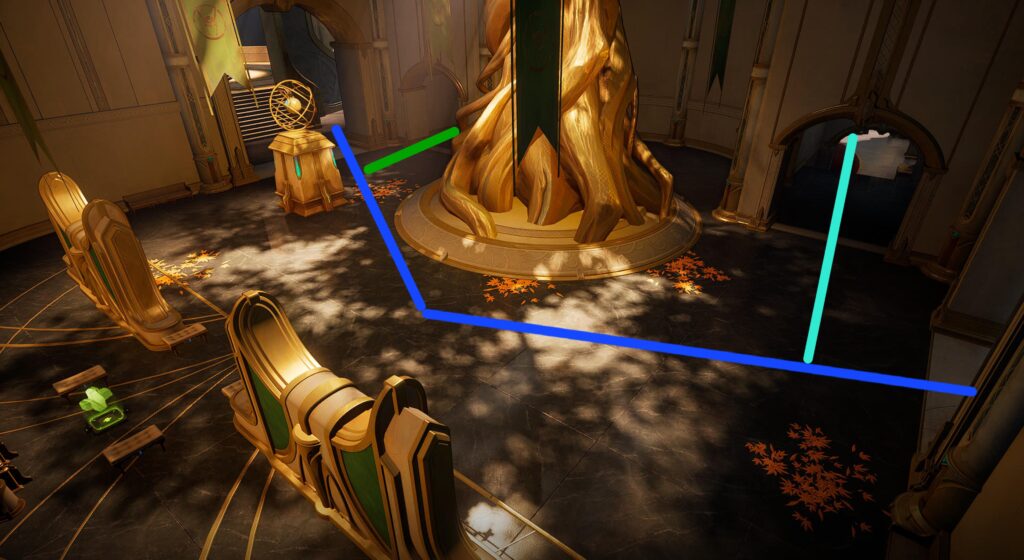
- Green: The high ground route of the map. It cuts to the lower part of the map that leads to stairs that climb up the statue in the center. Most used alternate path.
Each of these routes can be taken directly from spawn, so you can mixup your line of attack that your opponent won't easily predict. The center objective has 2 trees parallel to each other. It makes for a decent spot to hide a spider-nest for Peni Parker, or store healing bubbles from Jeff the Land Shark for your team to retreat to.
This shows a closer view of the red path leaving from the spawn. It's significantly more discreet than the other routes, which is great for divers looking to pressure the backline by surprise. Flying characters may also use this as a way to approach the objective from a lesser-watched angle.
On the opposite side of the map, this closeup of the green route shows how you gain a vantage points over the objective. There are 2 health kits you can utilize on this path, which is perfect for divers to recover at.

Not only does the statue offer higher ground over the objective, but it also is completely destructable! Strategists may want to break a small opening to retreat into during an ultimate from someone like Star-Lord.
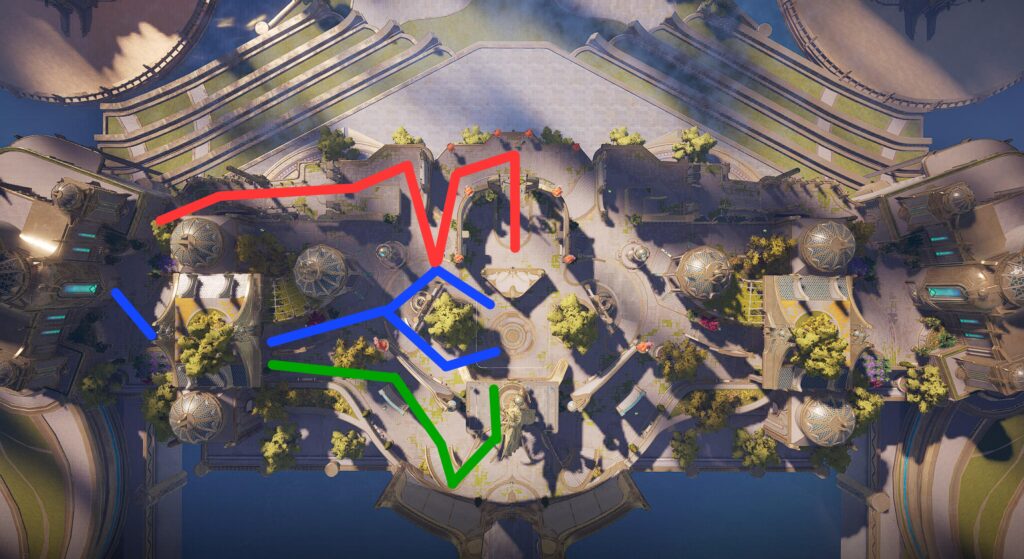
Map 2: Throne Room
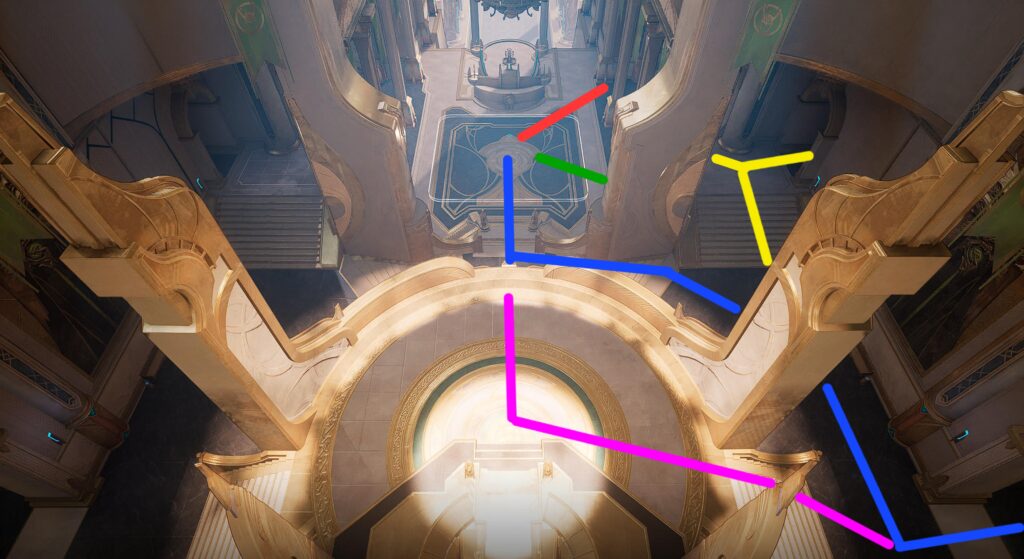
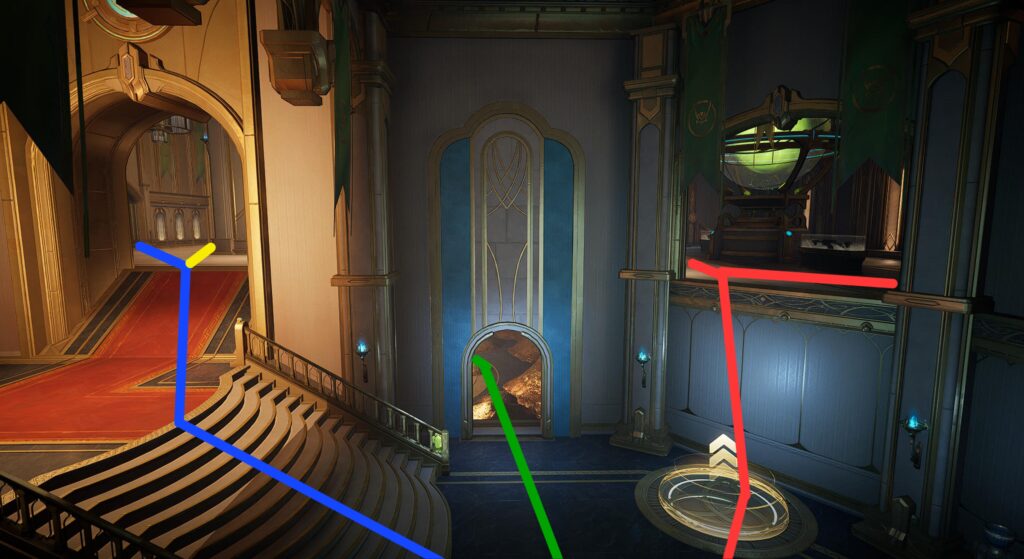
The Throne Room has a bit more options avalible for mixing up routes to the objective. There are 3 primary routes, with several branching paths:
- Blue: The typical route players take to the objective.
- Red: The alternate route players will naturally take.
- Green: A hybrid route between the primary two, but it cuts through the center to a room and narrow cooridor.
In this image, you can also see the pink path, which is a slight change from the blue route. You would use this to gain a high vantage points over the objective. It's also a fantastic spot for The Punisher to set up his turret. The yellow path it's a more hidden upper path, which will be covered in more detail in a moment:
From the spawn point, you have the 2 primary routes you can take to reach the objective. There isn't much to cover here. Battles never extend this close to the spawn, so it's mainly an area you are just passing through.
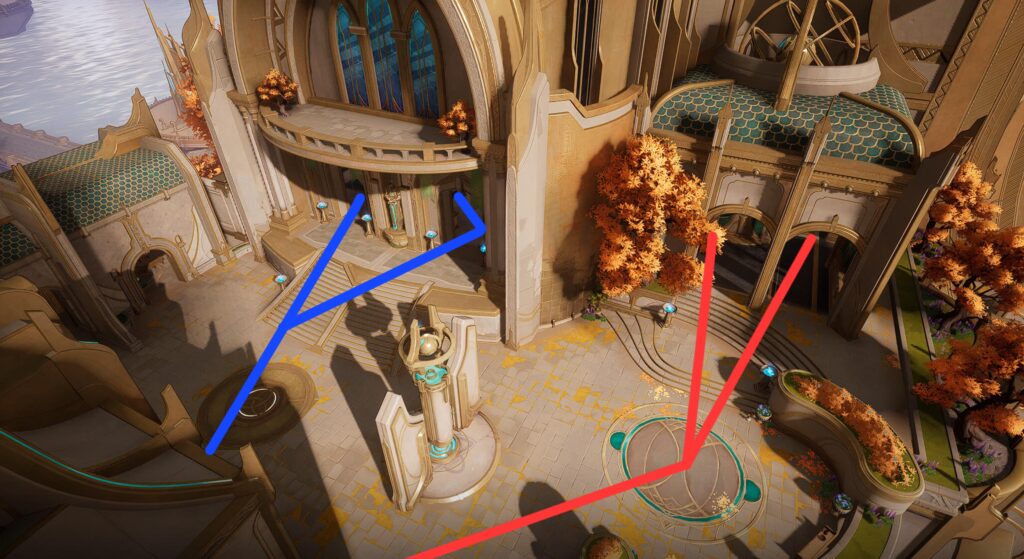
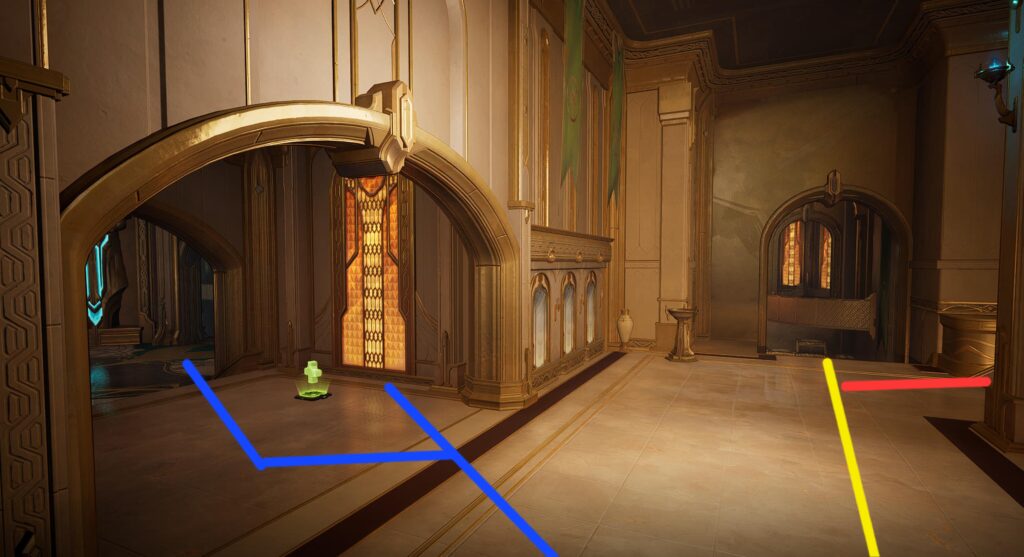
If you choose the red route, there are several branching options at your disposal:
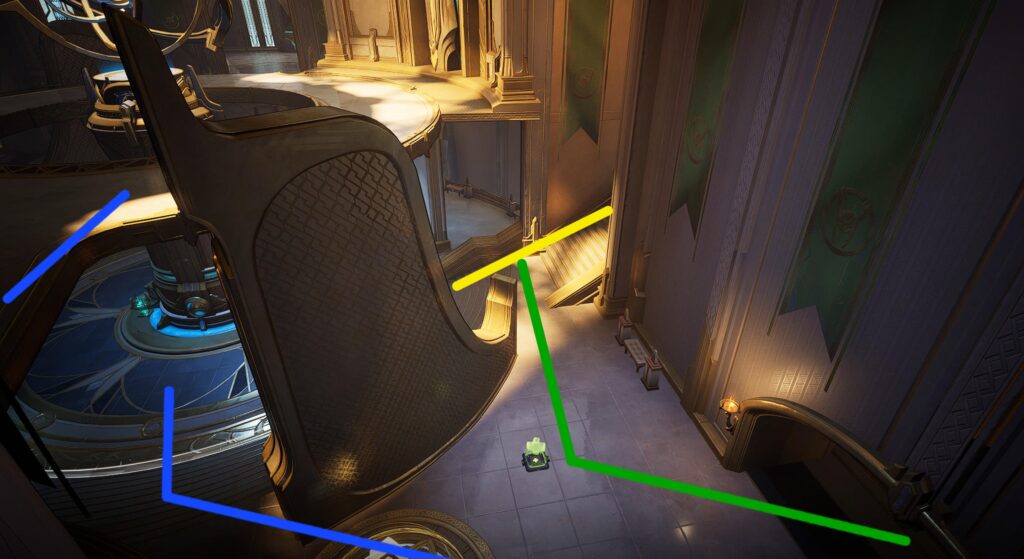
- Green: The hybrid path to the objective. It houses a health kit, and a connecting path to the blue route.
- Yellow: This jumps on top of the green routes room. If you have a character that can scale the wall, it can give you a balcony view of the objective.
- Teal: This is purely a connecting route between red and blue.
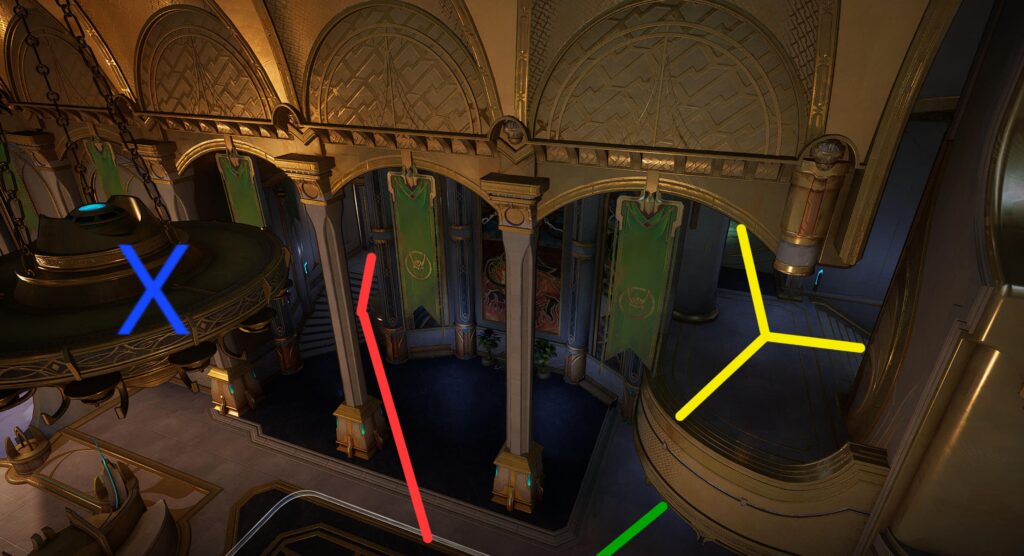
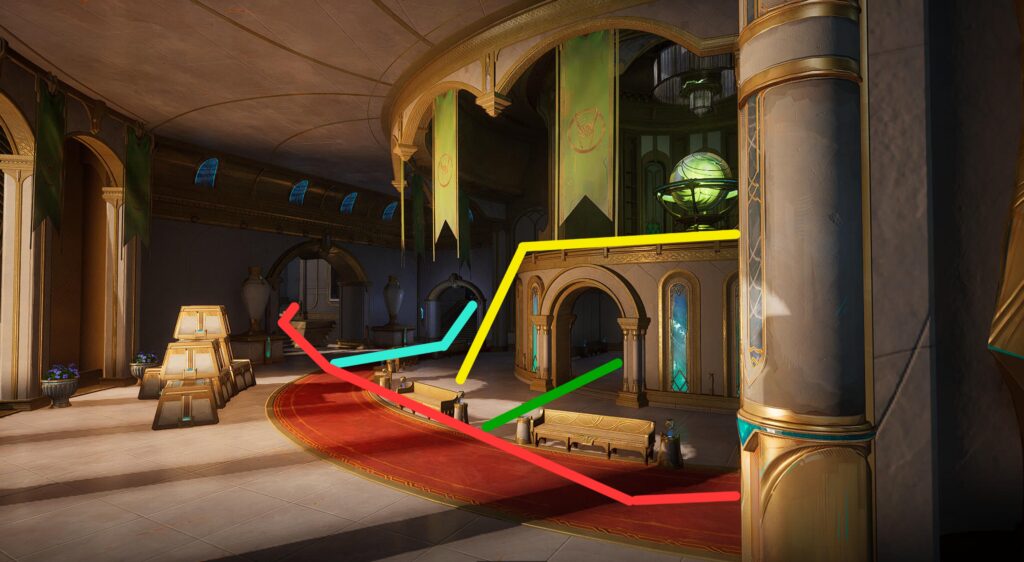
This a arial view of the objective showing where those routes end. While the yellow route ends at the balcony, you can either jump down to the objective, or jump to the X. This chandelier is a great spot to hide a Rocket Raccoon revive station, but the chandelier can be shot down. It's also a good vantage points for snipers or someone like Squirrel Girl to post up at.
Back on the blue path, you can see how it connects to the other routes. You will sometimes see battles extend into this room, so there is a health kit along the wall you may need to use. Divers may also use it as a quick way to heal without your team's help.
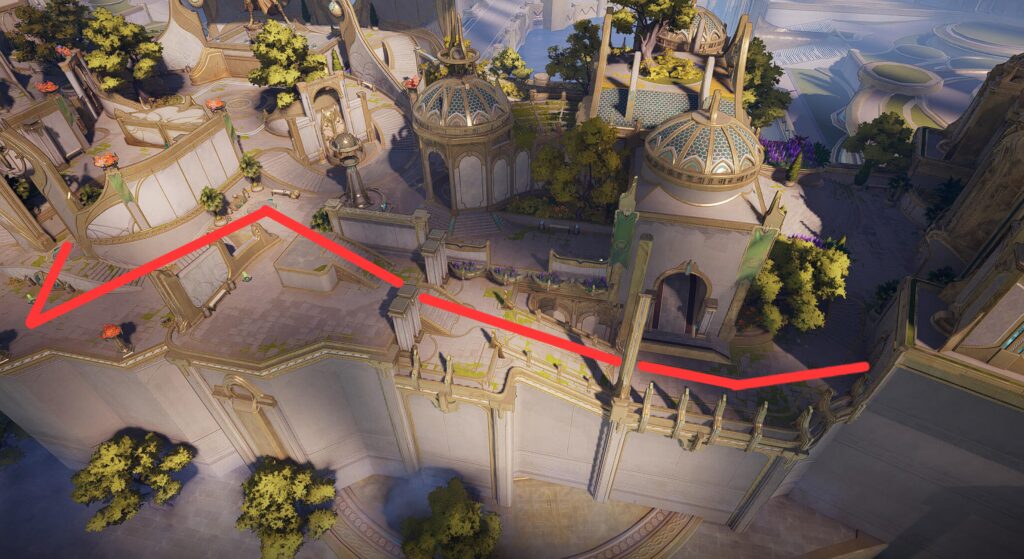
Map 3: Odin's Archive
Odin's Archive is possibly Rival's worst map. It's a bit convoluted and cramped, but it still has several routes for you to utilize:
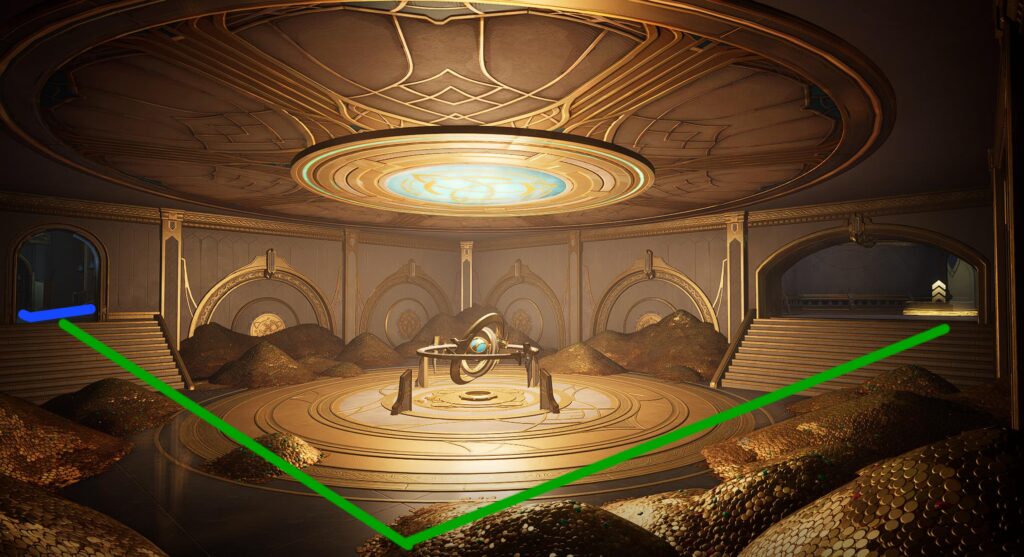
- Blue: The typical route from the spawn players naturally use. It cuts upstairs, then jumps down to the objective.
- Green: Similar to the main route, but it takes the low ground to reach the objective.
- Yellow: A slight variation from Blue, but it gives you a unique vantage points on the objective.
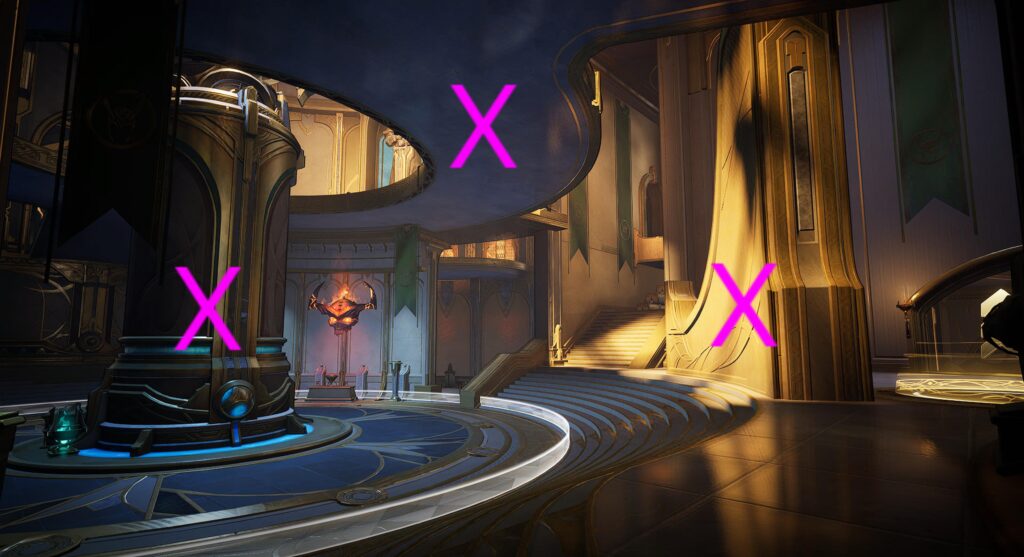
With this map being so cramped, the X marks destructable environments at the objective that really open up the space. They do respawn over time, but it is much easier to secure the objective if these are knocked down.
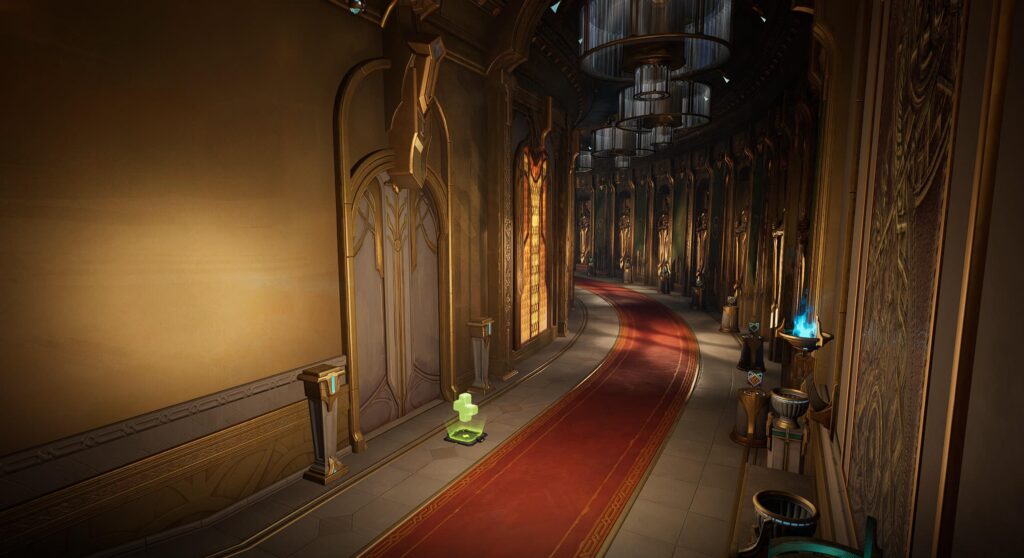
From the spawn, you have 3 options. You can see the beginning of the Green and Blue routes from before, but the Red route is new. This takes you to a more hidden flanking route that is very underutilized, which will be showcased in a moment:
This is immediately after the previous image, but it gives you a clearer view of where these 3 paths diverge from one another.
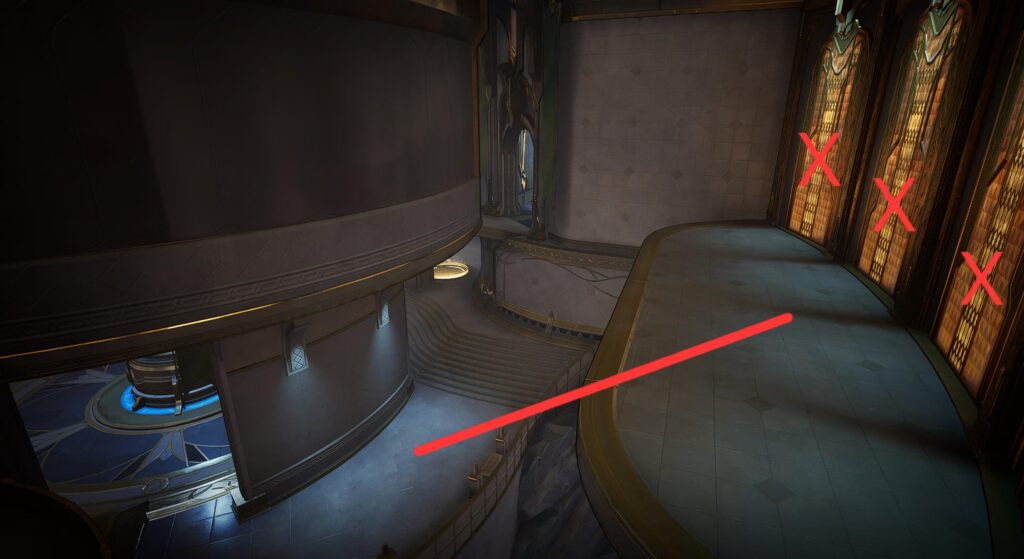
Following the blue route brings you to the upper level. You can shoot the glass to jump down to the objective, or stay on the high ground and approach the objective from above. The yellow path goes down a flight of stairs to that unique angle on the objective. It also has a connection with that hidden red path:
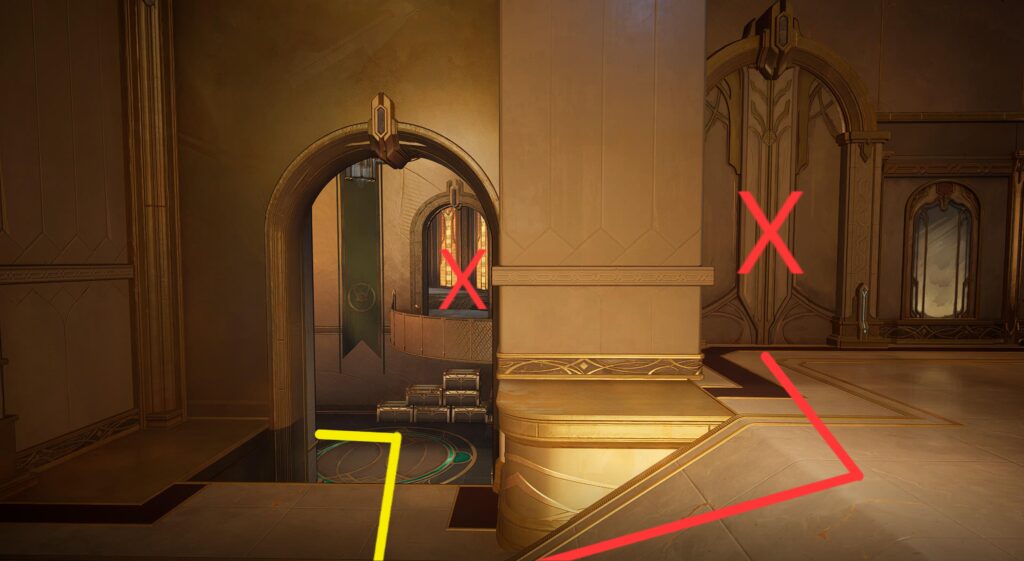
While it may look like a wall or closed door, you can shoot the X and reveal a hidden path. Alternatively, you can follow the yellow path and jump up the balcony to access the hidden path through a different destructable door.
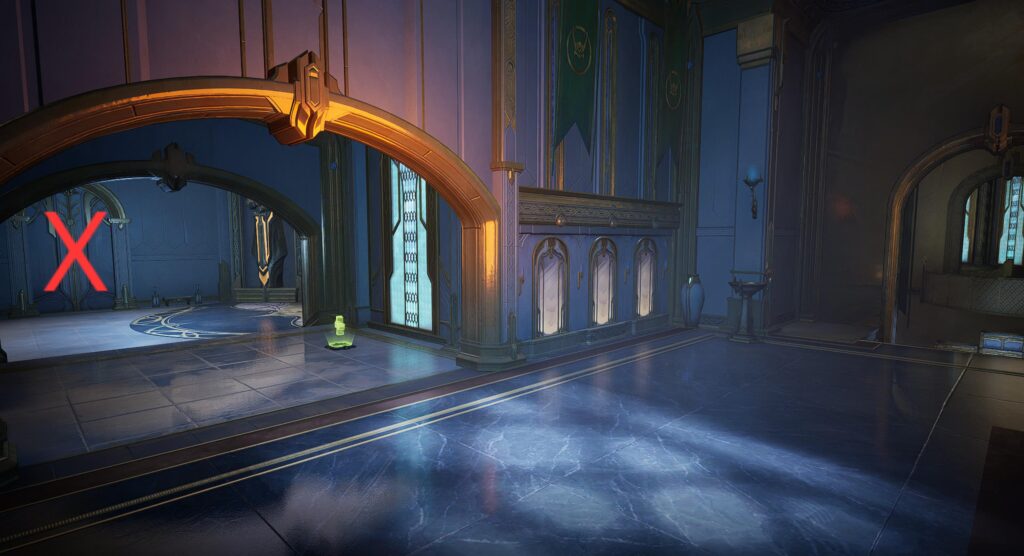
This hidden path wraps around the edge of the map, housing a couple of health kits along the way. You can bust through the glass to reveal a balcony, which will be shown next:
The balcony overlooks the objective, but an unbreakable wall prevents you from seeing most of it. You can jump down to the objective, or try to get an angle on the opponent's back line from here.
If you continue all the way down the red path, you come to another destructable door. Breaking it will take you to the opponent's side of the map where the blue path moves through. The wall is destructable on both sides, so you can definitely use the red route from the blue if you would like to.
Finally, this is a view of that lower level green route. It contains nothing of importance and is purely a filler space to the objective. It can be a great spot to hide a Rocket Raccoon revive station though!