Table of Contents
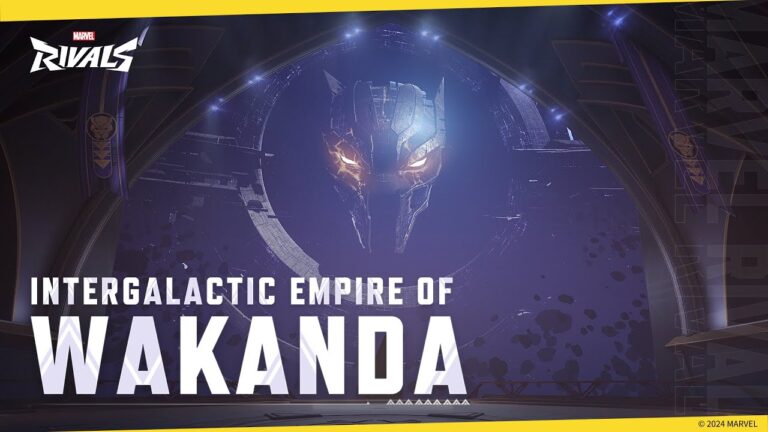
Welcome to our guide to the Marvel Rivals Map - Intergalactic Empire of Wakanda: Hall of Djalia! Here, we will explain the layout of the Map, and learn about each section so you can take advantage to defeat your enemies.
From a single Vibranium meteorite, Wakanda rose to greatness. Now, at the heart of the galaxy, they’ve uncovered the homeland of that very mound.
But no matter how far it's technology advances, Wakanda's strength will always be its people. Wakanda Forever!
Map Type: Convoy
Hall of Djaila is the convoy map frequently confused with the other Black Panther map, Birnin T'challa (domination). It consists of 3 sections: a capture point, and 2 escort checkpoints. This map is the simplest of any convoy map, but there are still plenty of things to learn about. This guide will break down each section to highlight different routes you can take, as well as some helpful locations you can use. Everything will be from the perspective of attackers, but defenders can utilize these routes as well.
Section 1: Capture the Convoy
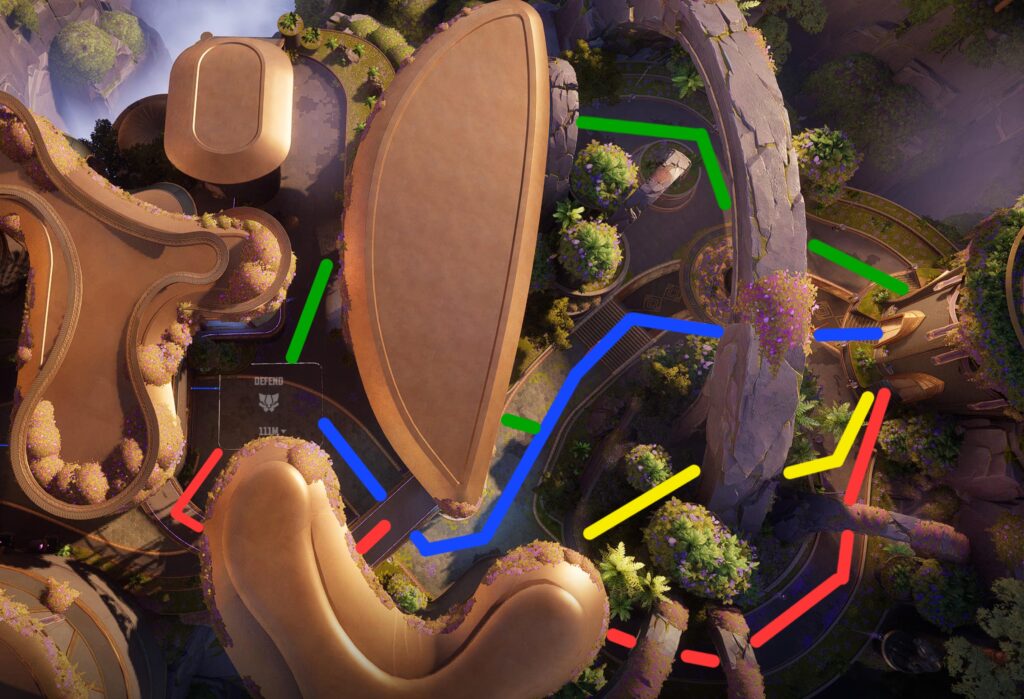
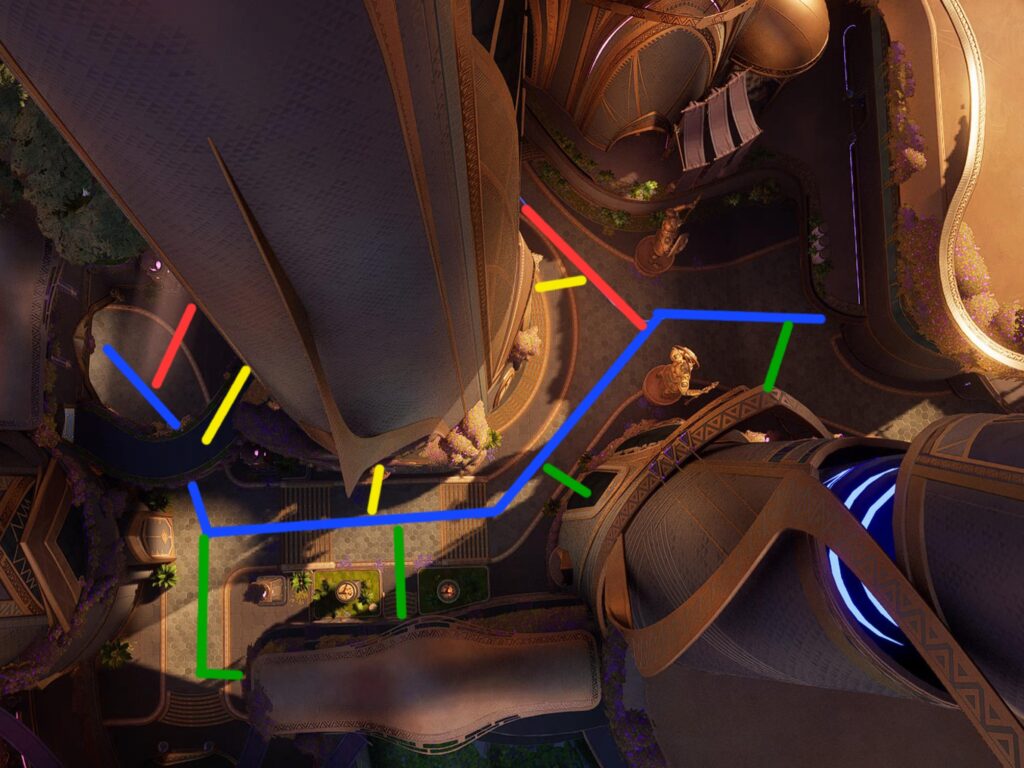
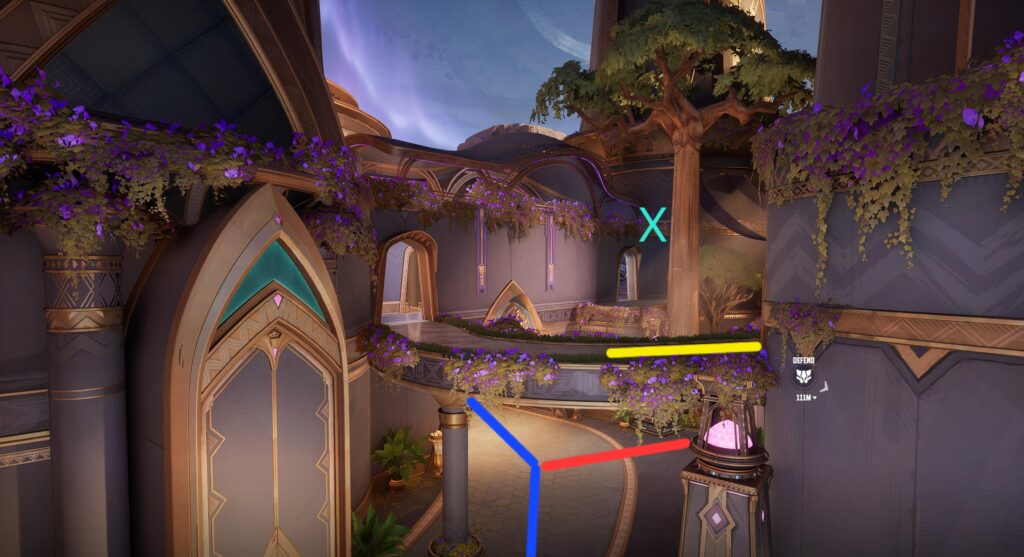
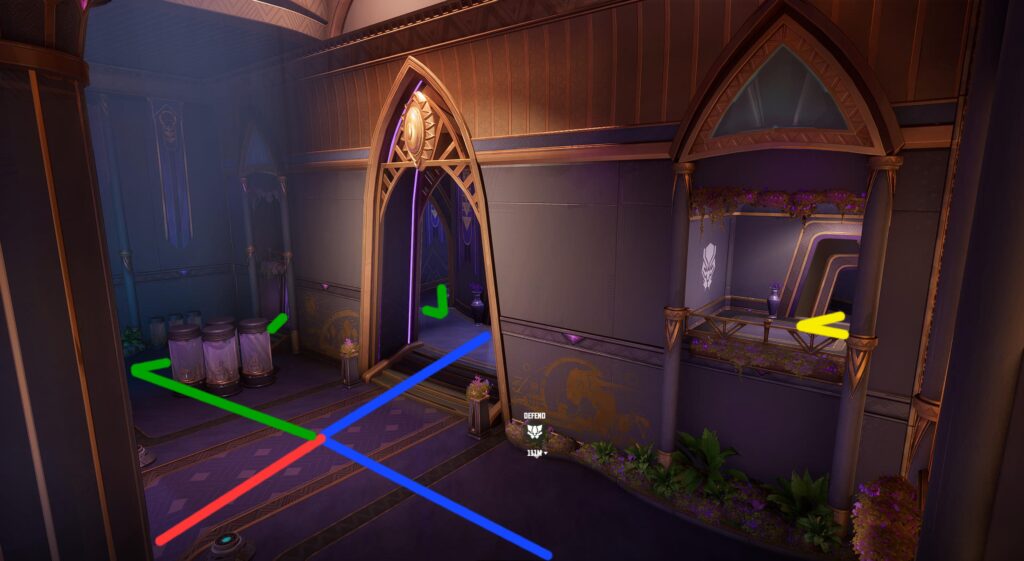
The start of this map is an open courtyard with a number of branching paths. The blue path is the typical route players take to reach the objective every match. There are three other routes you can immediately take from the spawn:
- Red: A secluded path that can lead you into the edge building. It offers coverage so the defenders can't see you, making it harder for them to adjust to your flank.
- Yellow: This route cuts through the garden-like platform. While it doesn't lead you anywhere special, it does put you in a position to punish defenders who push too far up at the start of a match.
- Green: As the second most common route, this route wraps around the far right of the spawn to pressure the objective from the right side. It also brings you to the center building.
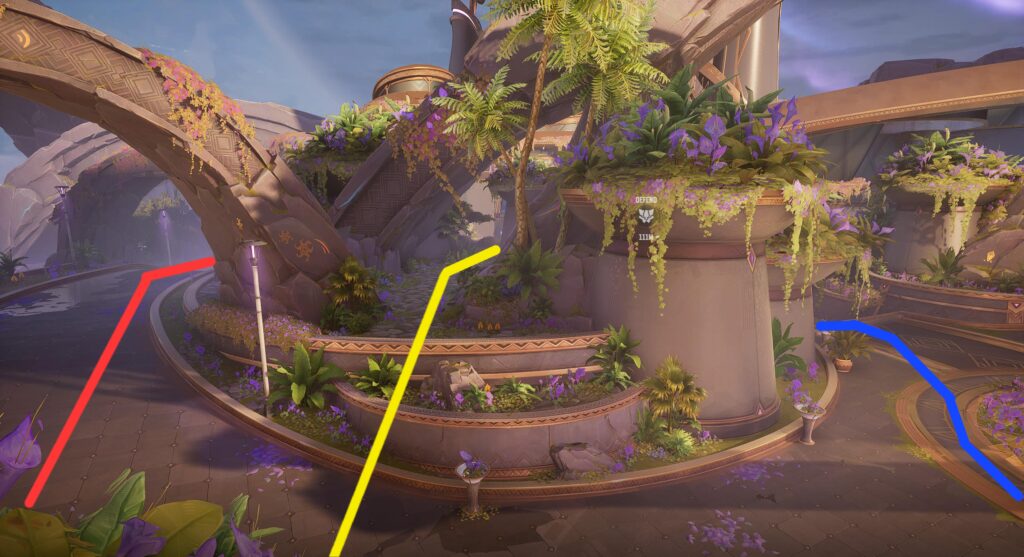
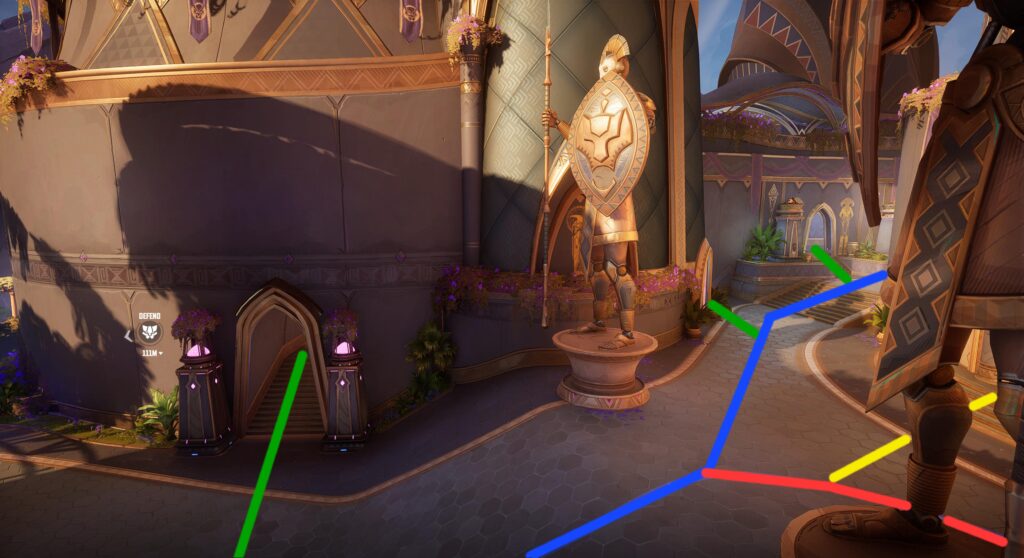
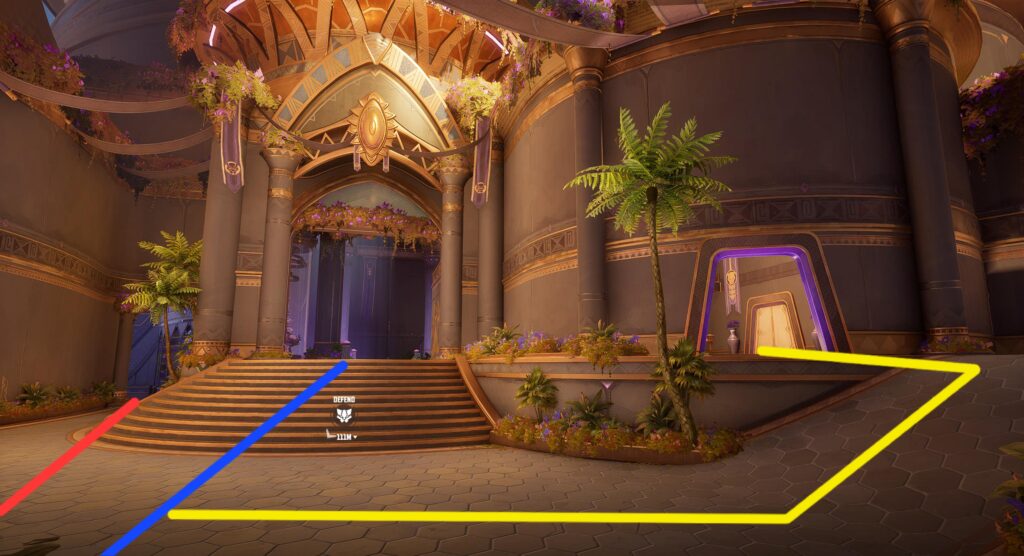
This image shows a clearer display of the starting routes. As you can see, the yellow route isn't very obvious at first, but puts you in a good position to pressure defenders at the corner of the blue route.
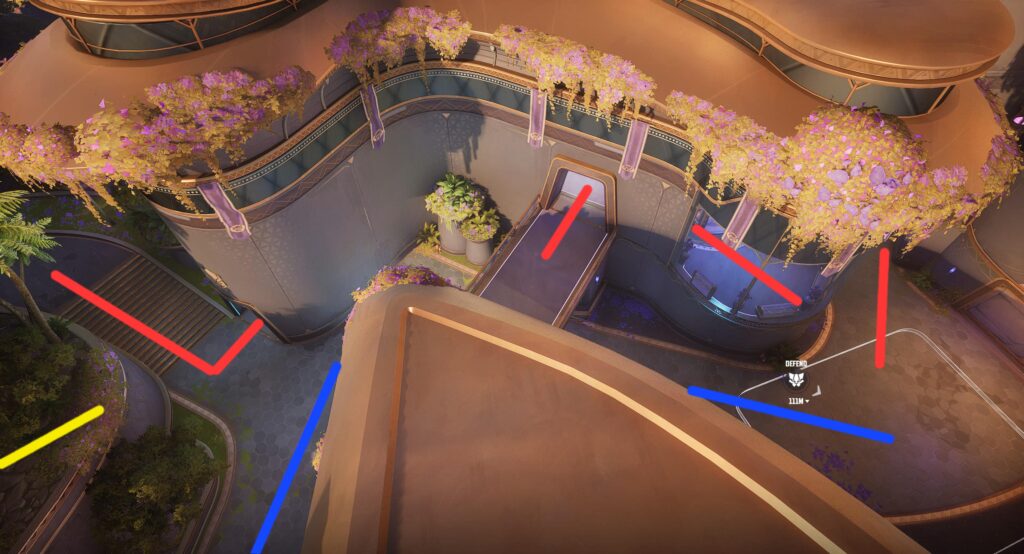
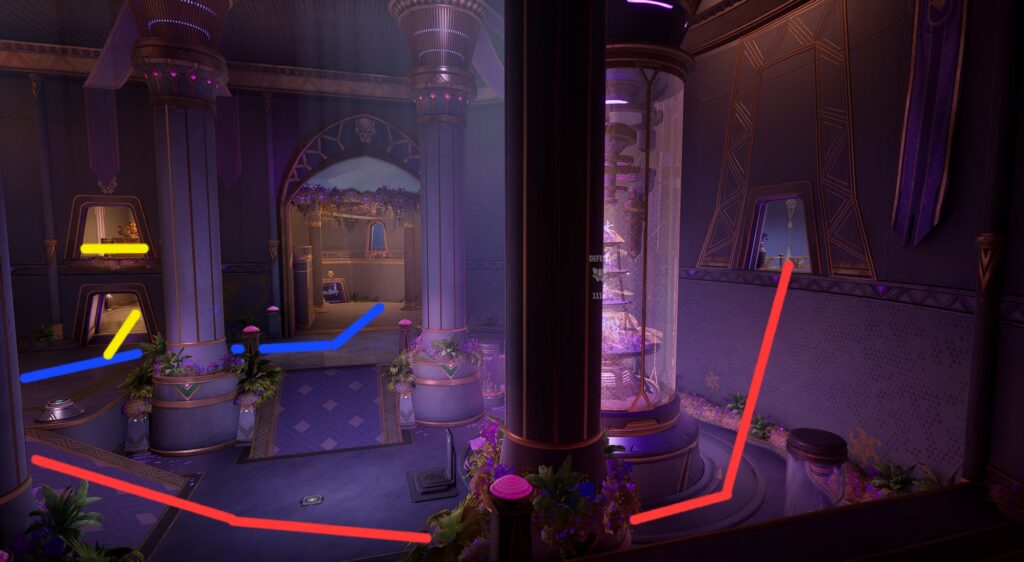
To better understand the benefits of using the red route, this image shows all 3 options the route gives you when pressuring defenders. You can use the bridge, go through the glass, or exit the building and push the objective from behind.
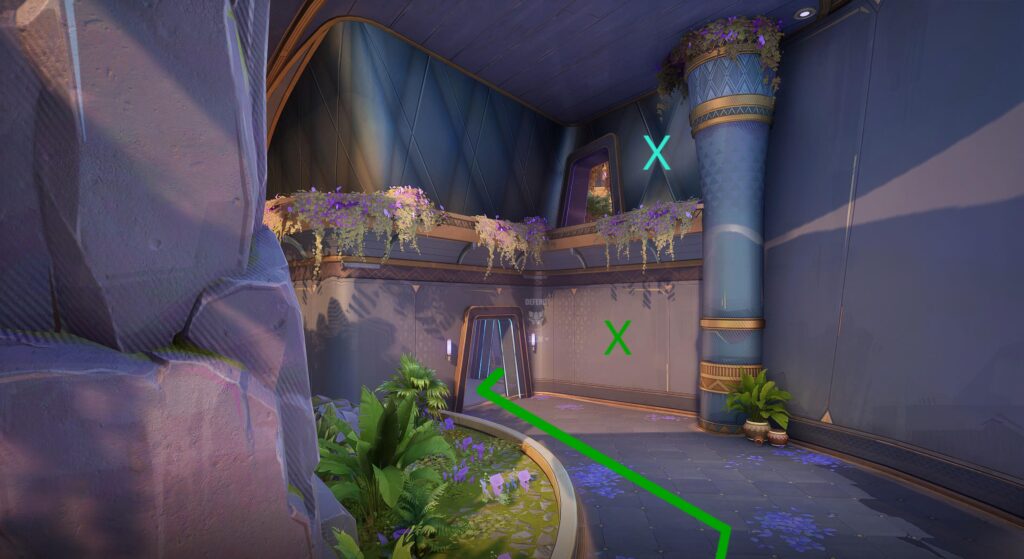
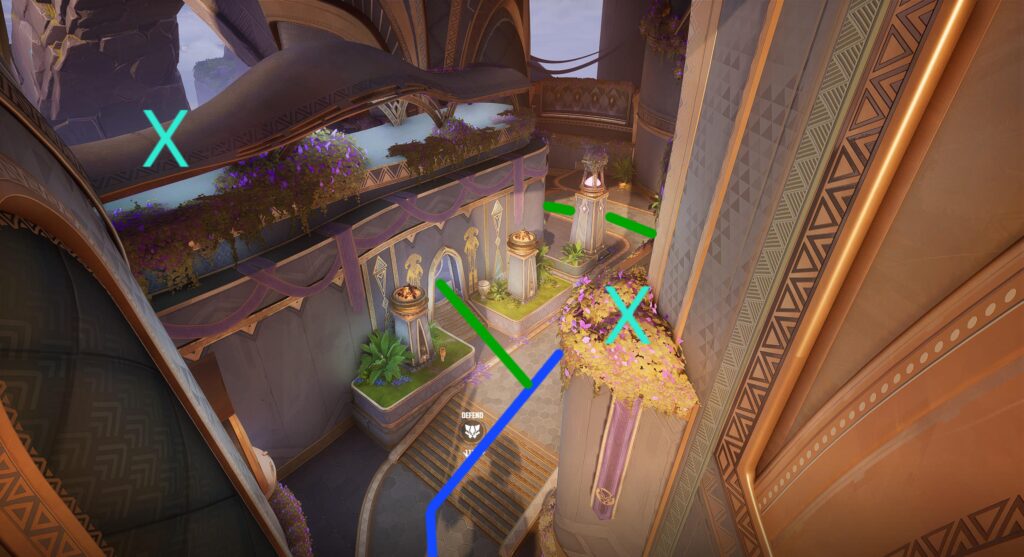
This green route cuts through the building to push the objective. The X highlights a destructable wall that players don't use enough. It gives you more lines of site to the objective and prevents defenders from focus firing the doorway. The X is a decent option for flying characters to discreetly push the objective without busting through the wall or going through the building.
Section 2: Moving the Convoy
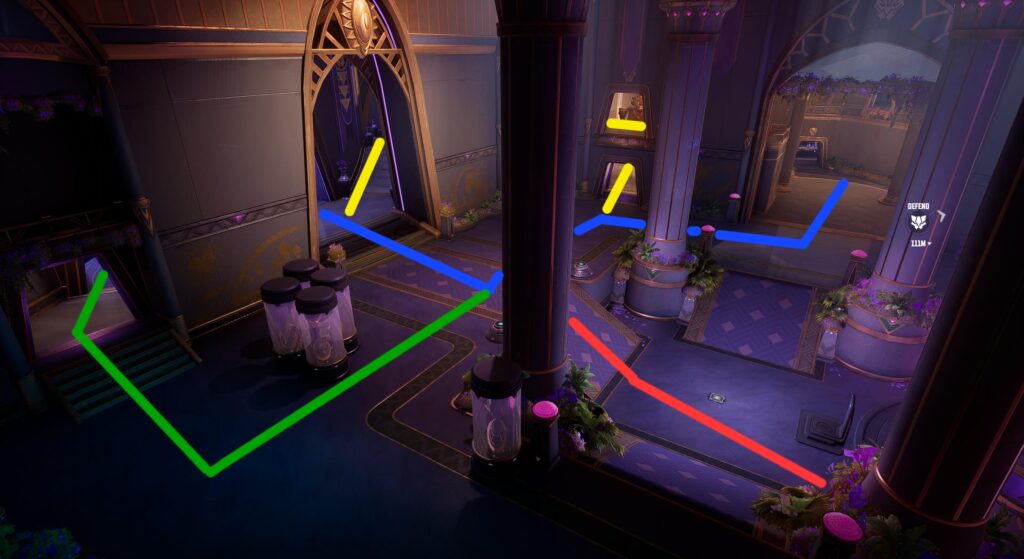
At this point, the objective has been captured and begins to move. It follows the blue path, so most players will follow this route. Similar to section 1, the green and red routes are left and right flanking options. The yellow route again cuts through the middle to offer a more discreet option.
This image highlights the very underutilized green route. Players often use the later portions of the building, but the start of this route gives you a range of different flanking opportunities. It also houses a couple of health packs, making it a great option for divers to retreat to.
Slightly further up from the previous image, this highlights two very helpful vantage points you can use. Characters like Loki and Punisher can climb to the top of the building and put significant pressure on opponents. They will have to look up (and away from your team) in order to stop you. The X on the small ledge may not seem like much, but it's just big enough to place a Peni Parker Spider-Nest, as well as a Loki clone. Divers might also sit on this ledge and wait for a prime opportunity to jump down onto attackers.
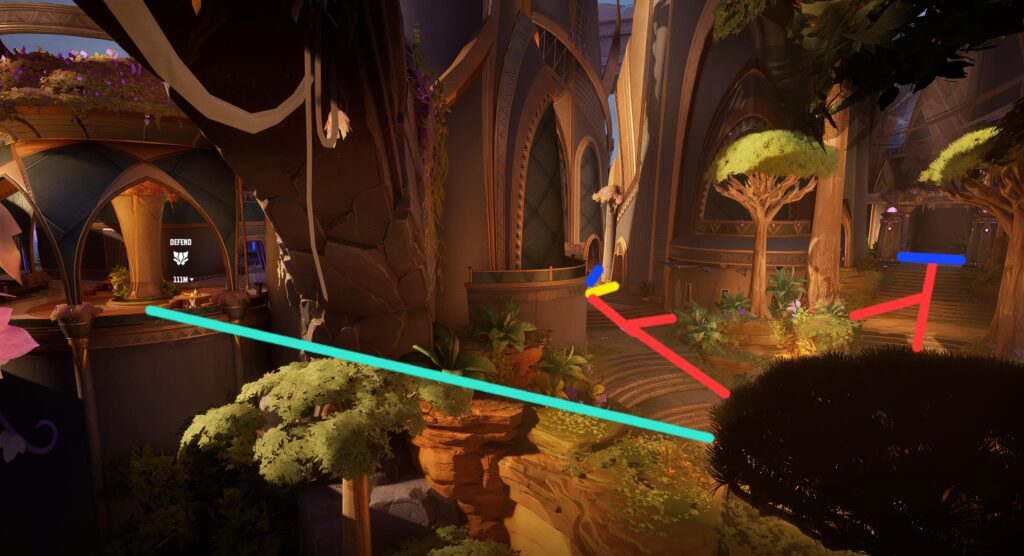
On the opposite side of the section, you can see where the red path wraps around the building to flank the right side. If you are a flying character or someone like Spider-Man, you can move across the teal path as a hidden flank option.
This image is at the end of section 2. You can see where the yellow path cuts through the building to give you access to the upper bridge. It can be destroyed, but it can still be a useful option even without the bridge. The X highlights an under-used balcony that overlooks the end of this section. Defenders can post up here with characters like Namor or Punisher to put immense pressure on the objective.
Section 3: Entering the Hall

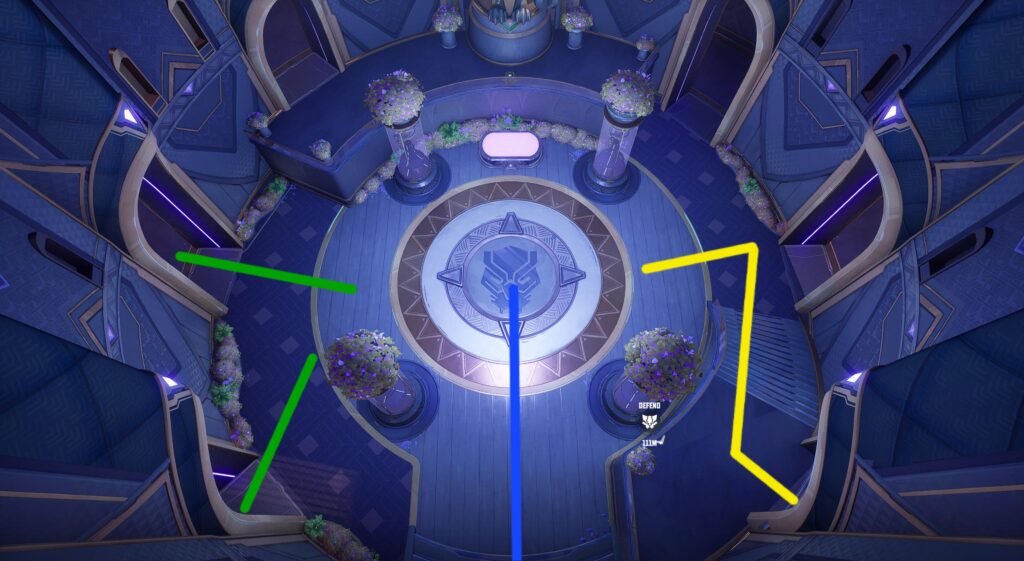
For the final stretch of the map, the objective must move into the building to the finish line. This is an aerial view of the outside area, with the blue path showing the convoy's path. Keeping on theme, the red and green path are left and right flanking options, and the yellow is a cut through the center.
The red path is this section's under-used route. It cuts through a hallway along the left side of the building. The path ends at a tall ledge, so you can only go this way if you have a character who can scale the wall.
Once you climb the ledge, you will immediately come to a door opening that is hidden by the cylinder object in front of the door. You can either jump down and follow the red path as a flanking route, or destroy the object to gain a vantage point that reaches all the way to the final room.
As for the rest of this area, the red path reconnects with the blue, along with yellow and green. The yellow path cuts through a small room with a staircase. If you use it, you can move through a couple of small hallways and enter the final room from the right flank. If you don't use the stairs, the path reconnects with the convoy. The green path is a simple left flank to the objective.
Here is a different angle of the room where you can see that upper yellow path. It also has that balcony, which is a great option for both defenders and divers to use.
In the final area, the objective reaches its end at the center of the room. You can see the ends of the green and yellow routes, offering those flanking options. This room is difficult to breach since these are your only options for entry, and the defenders spawn is on the other side of the back wall.