Table of Contents
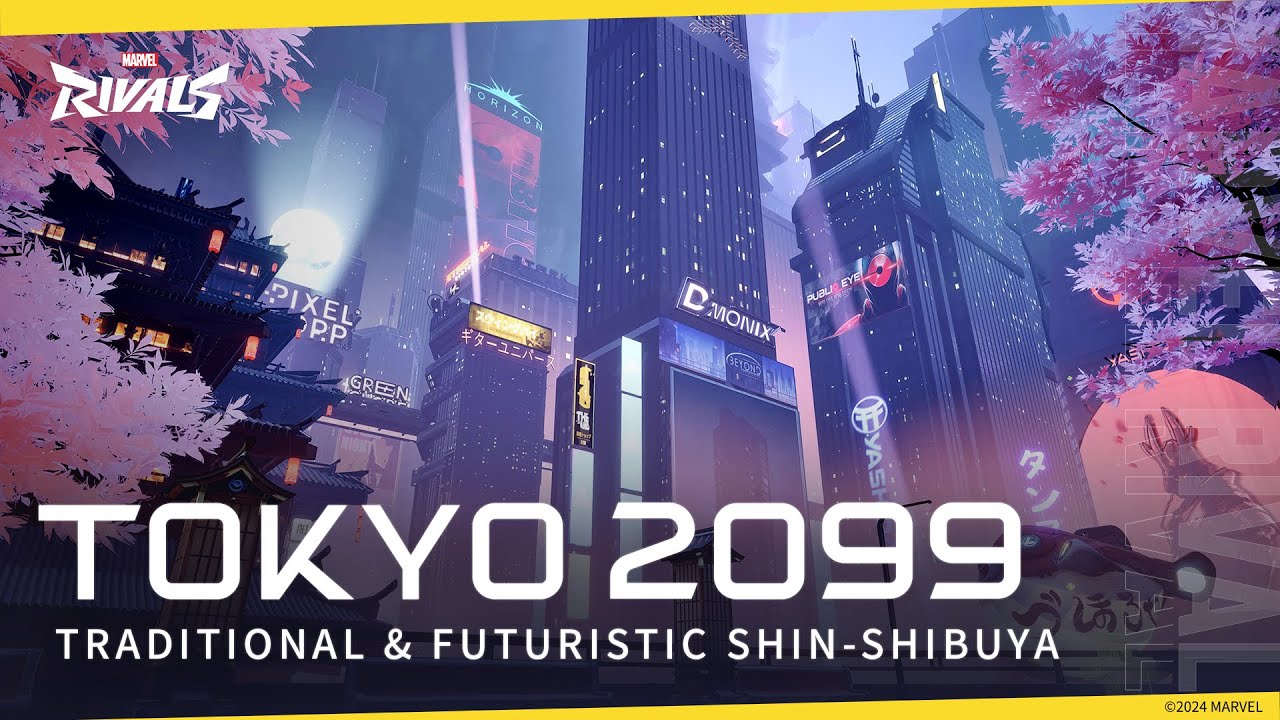
Welcome to our guide to the Marvel Rivals Map - Tokyo 2099: Shin-Shibuya! Here, we will explain the layout of the Map, and learn about each section so you can take advantage to defeat your enemies.
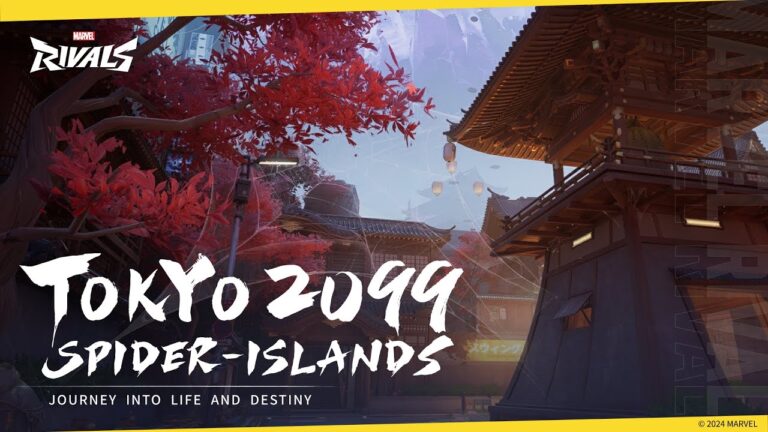
Another world has emerged from the Timestream Entanglement! It's time to have some ramen and sushi after that nature walk! I'm thrilled that these foods still retain their classic flavors even in Tokyo of 2099! But it is a pity that there aren't any Kaiju or giant robots fighting in the city anymore…
Map Type: Convergence
Shin-Shibuya is a convoy escort map with 3 sections. The first involves attackers capturing the convoy itself. Section 2 moves the payload through the city streets to the halfway point. Finally, section 3 brings the payload to its final destination. This map guide will break down each of these sections with routes you can use, as well as some helpful tips you can use to gain advantage over your opponents. The perspective of this guide will be mainly for the attackers, but defenders can use these routes as well.
Section 1: Capture the Spider
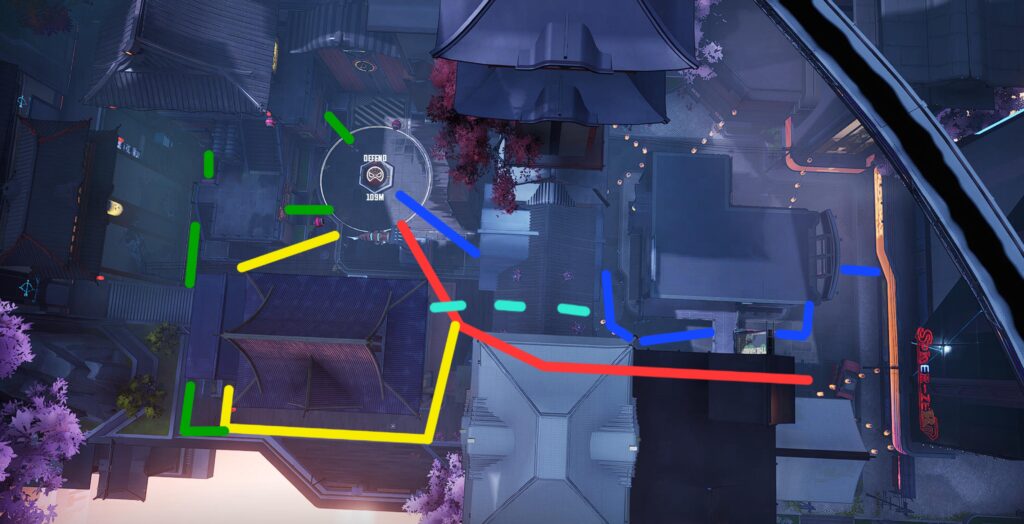
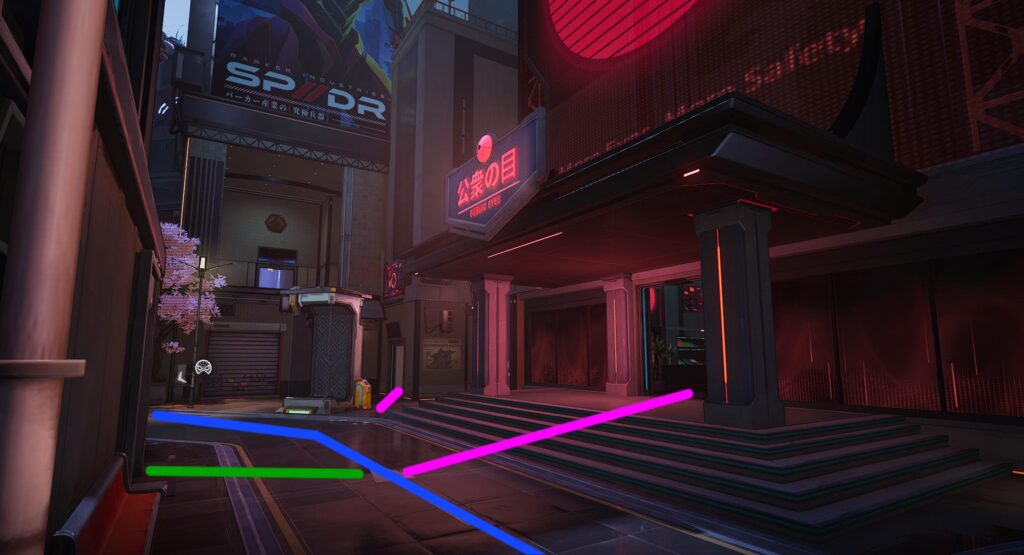
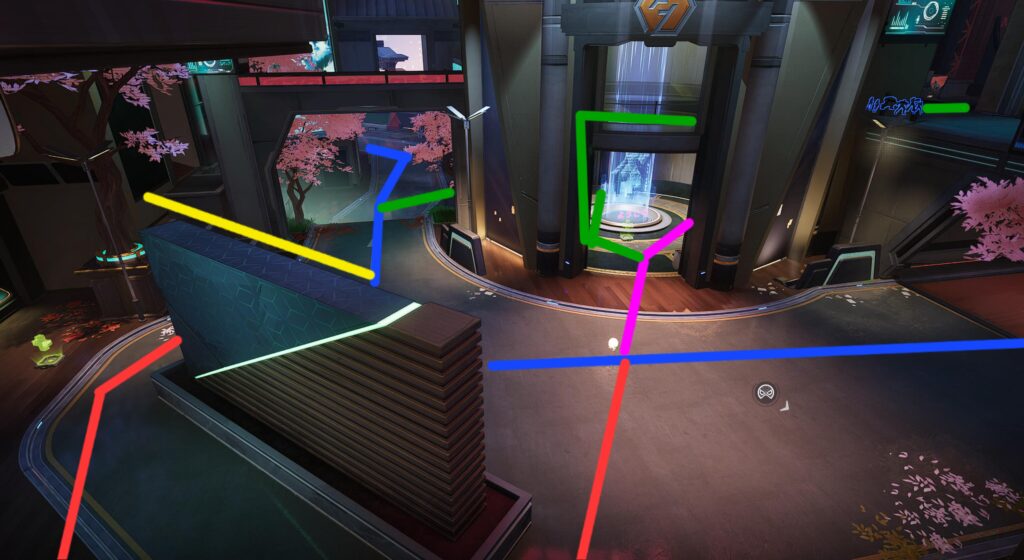
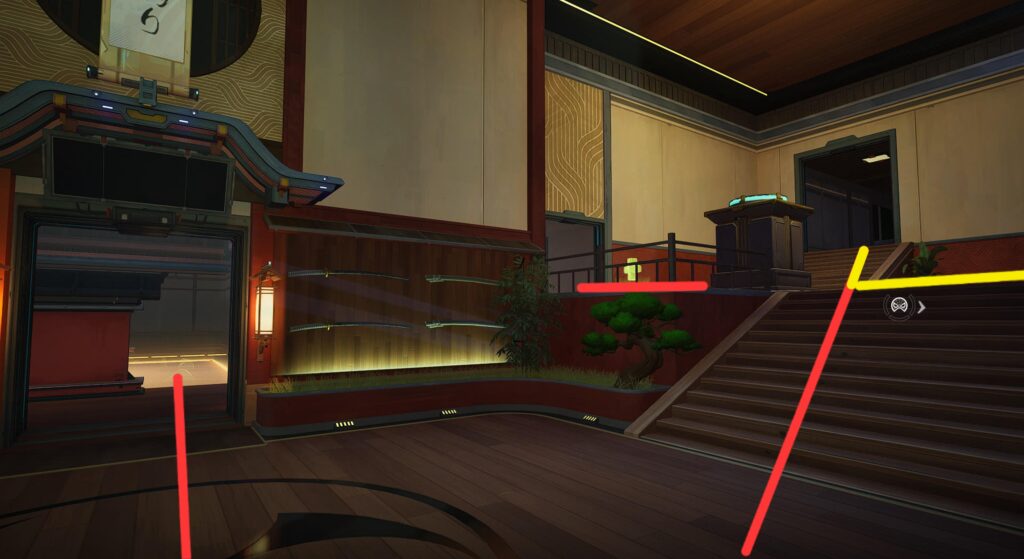
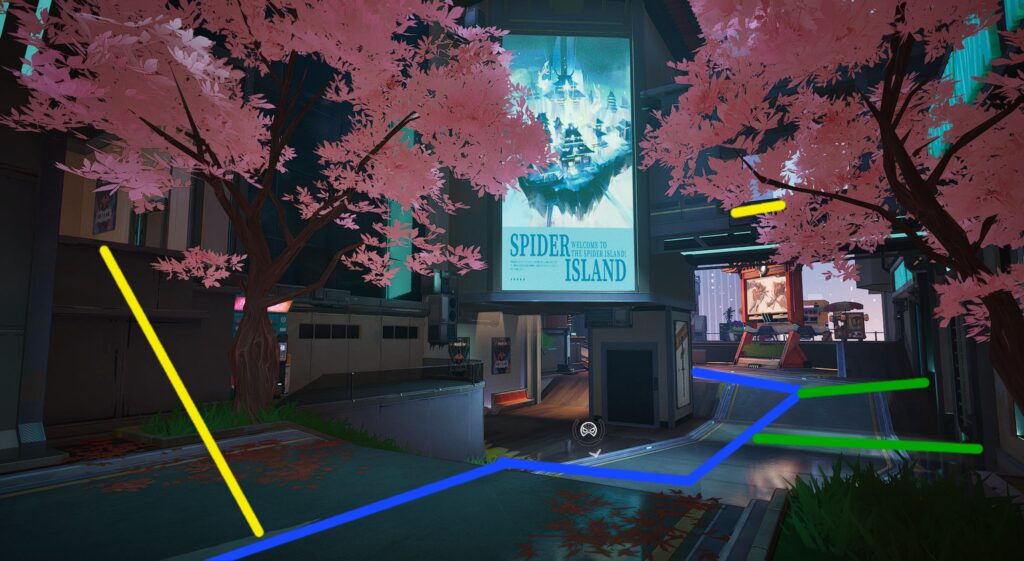
Section 1 is one of the more strict maps in terms of avalible routes. As you can see, the first half of the section just leads you toward the corridor that passes under the suspended roof. The blue path represents the standard route players will take to the objective from spawn. From the spawn, there is only 2 other ways to reach the objective, and both run parallel to the blue path. The red path cuts through the ninja shop and either goes through the elevated door, or busts through the wall. The dotted teal path is a bit different, as only airborne characters can go over the buildings to reach the objective.
The Yellow and Green paths become avalibe after you make it past that choke point. These routes will let you flank the objective instead of going in headfirst. Green specifically goes even further back to flank around the entire building next to the objective. You would likely use this route if you are trying to kill a defender perched on top of that building. The end of the route comes out from inside the building, letting you flank the objective from the opposite side as your team.
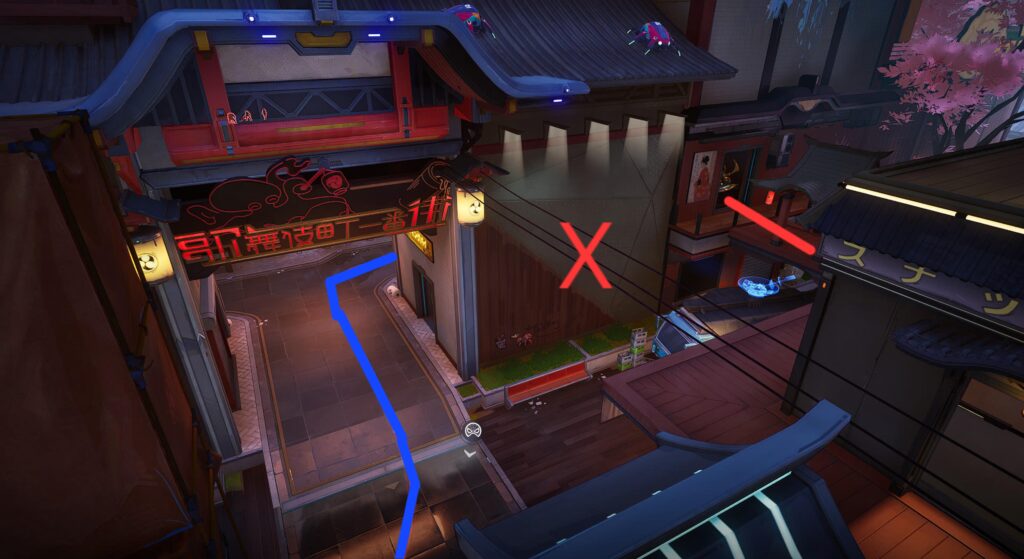
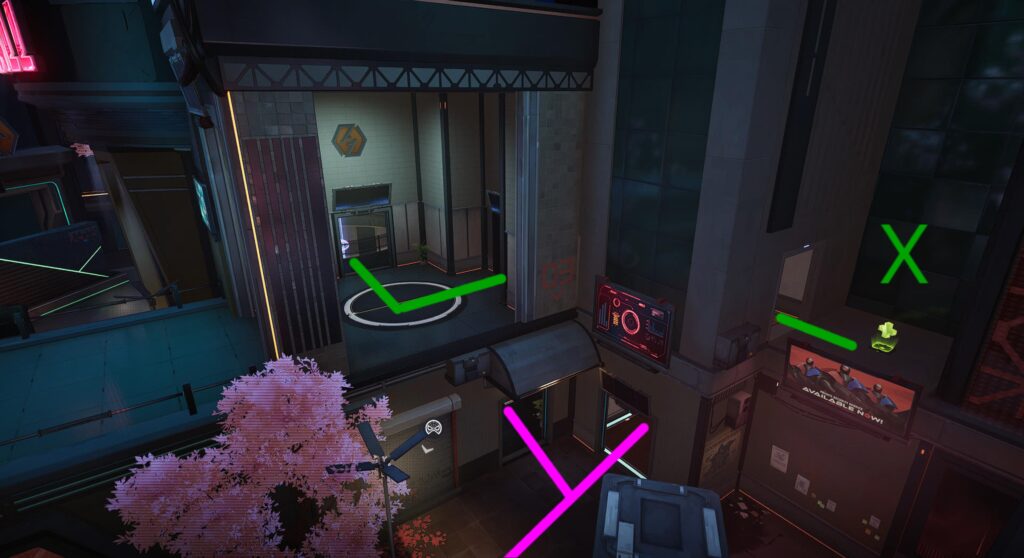
It's important to highlight the X in this image. This entire wall (and building) can be destroyed. Attackers want to break this down in order to open up extra ways to the objective. If you don't, your team has to bottleneck themselves through that narrow corridor.
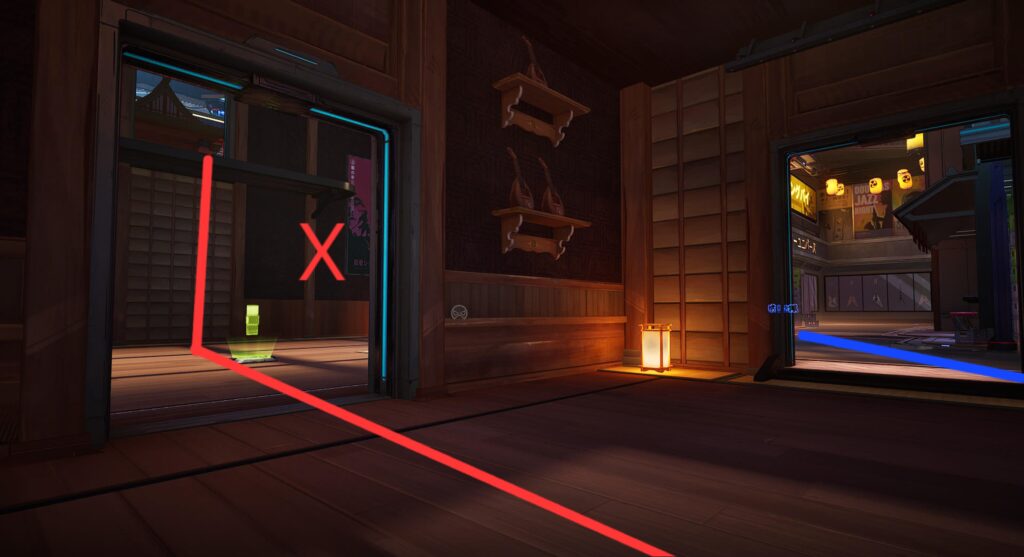
This X is the same wall as the last image, but on the other side of the wall. As you can see, there is a door that you can go through, but it's a bit too high for most characters to get through. Some divers may use this door to more discreetly flank, but any player can simply shoot any of that wall to make your own doorway.
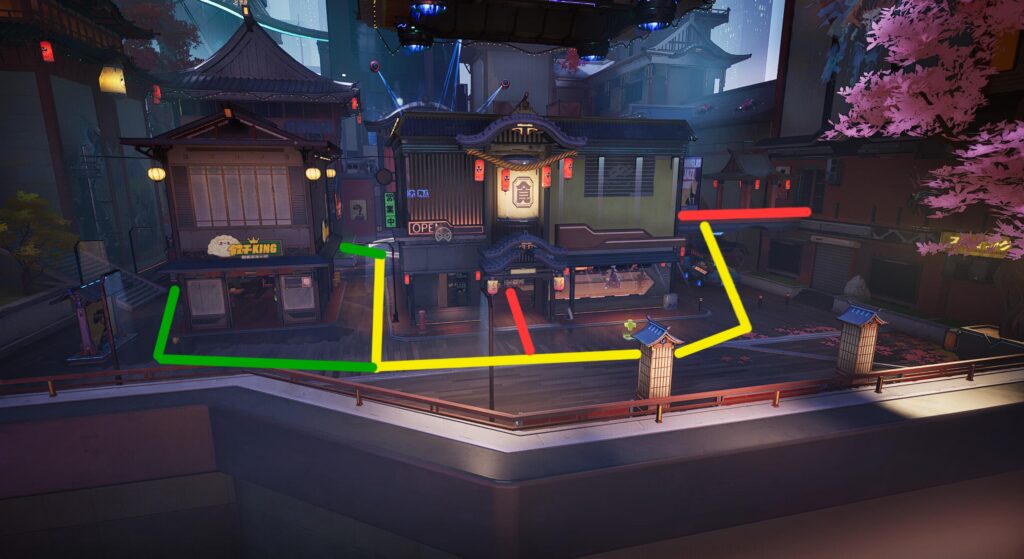
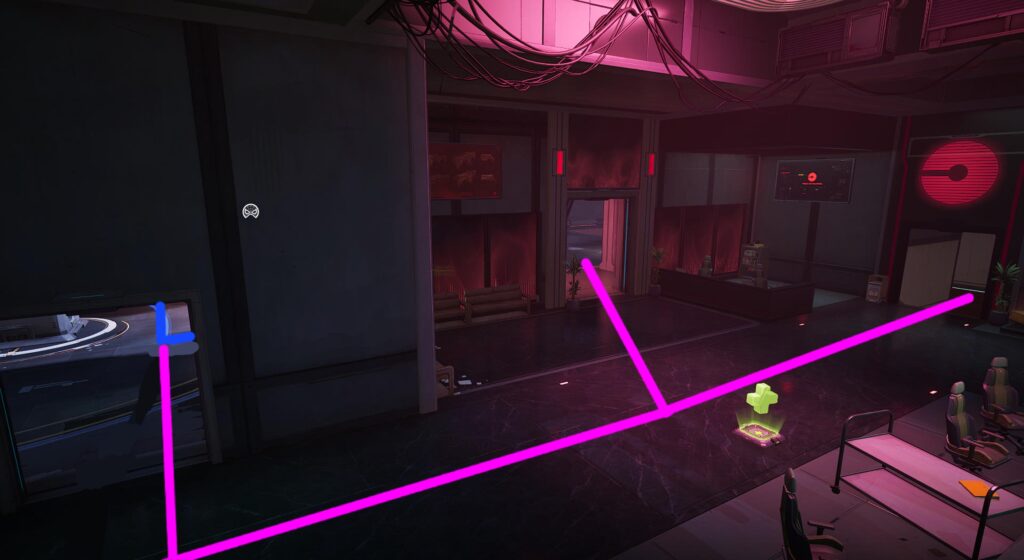
Once you make it past that wall, you gain access to these flanking routes. It's the same paths as shown in the aerial view. This angle is just a clearer view of where they go. You can also see from this angle that the red path also goes into the center building. You would use this to discreetly find a new route, push the objective directly from the building, or simply seek shelter. You can also find a health kit behind the center building, as well as in the left building.
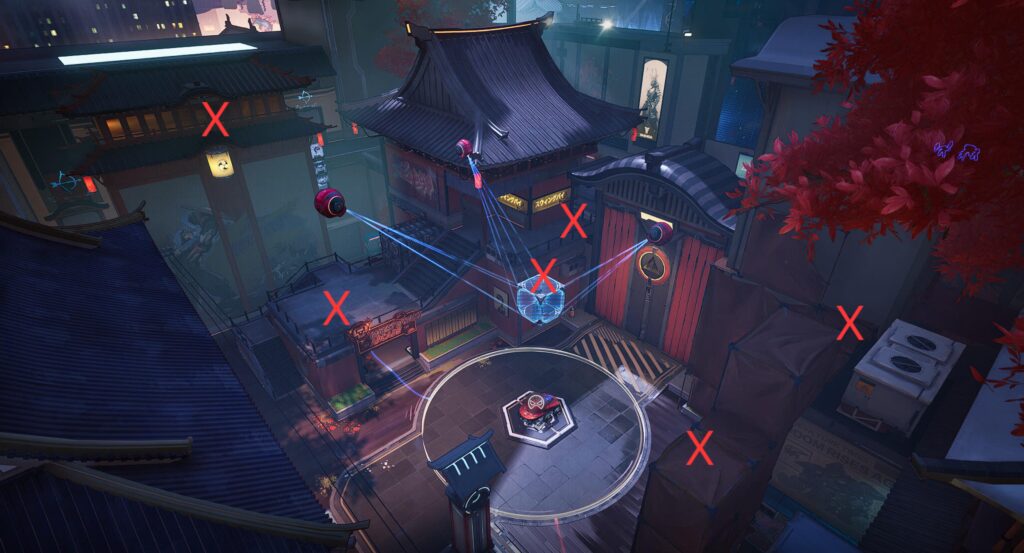
This image has a bunch of X scattered across the image. These all highlight vantage points you can utilize (often as a defender) with a range of characters. Namor and Loki can especially make use of these spots. You can add a few more marks here and there, but this gives you an idea of how to use the surroundings to anchor down a solid defensive hold.
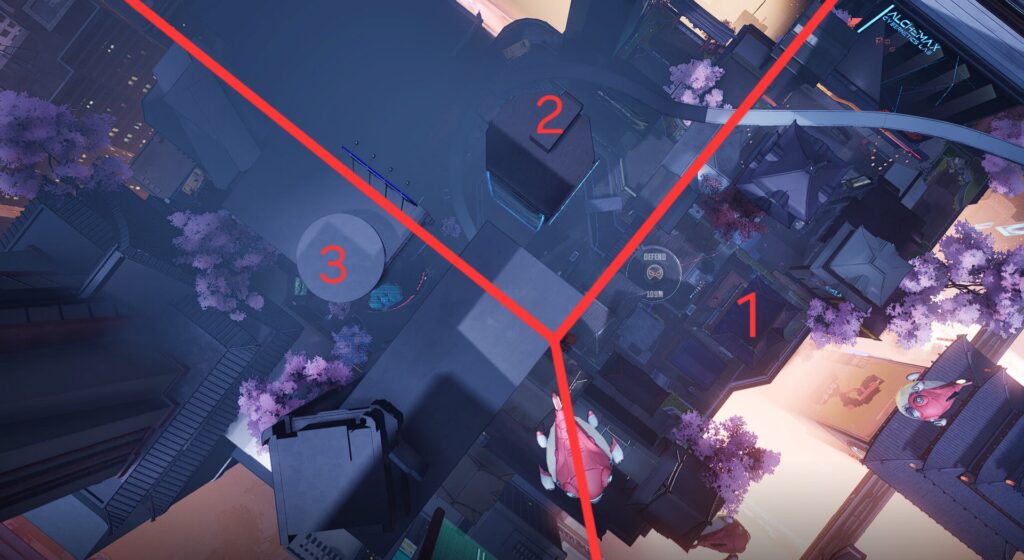
Section 2: Spider On The Streets
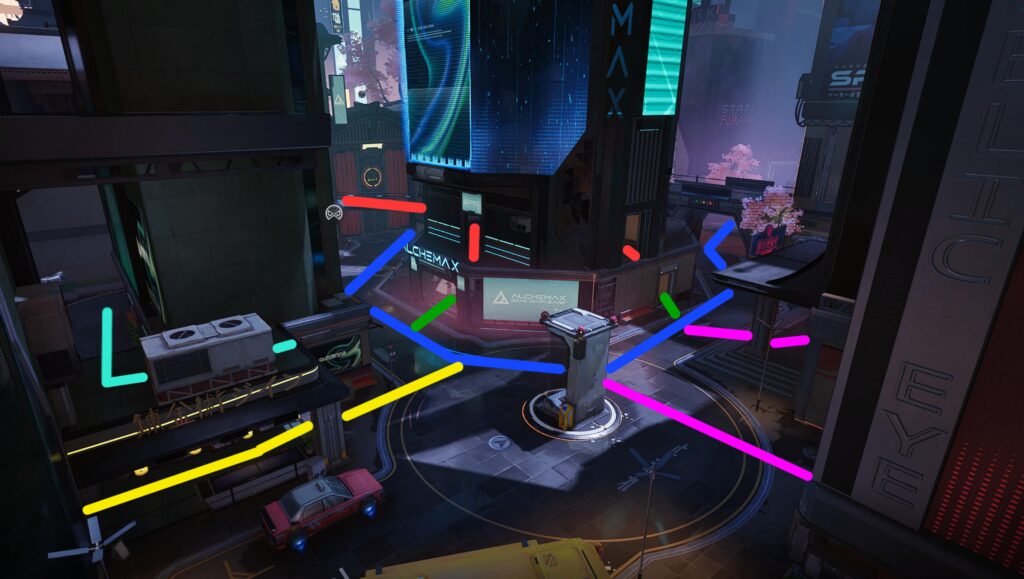
You can't get a clear top-down view of this section, so this angle will have to make do. They blue path shows the route the convoy will follow, and with it most of the team. There's a lot going on here, so let's break it down:
- Red: Connecting from the attackers new spawn, this route follows the rooftops/ 2nd floor of the buildings. It gives you access to the upper floor of the center building, as well as a lesser-used bridge that loops around to the back alley.
- Green: This is simply the path going through the 1st floor of the central building.
- Teal and Yellow: These paths both come out of the back alley, with one going up a flight of stairs, and the other staying on ground level. Both of which flank the objective up to the corner turn.
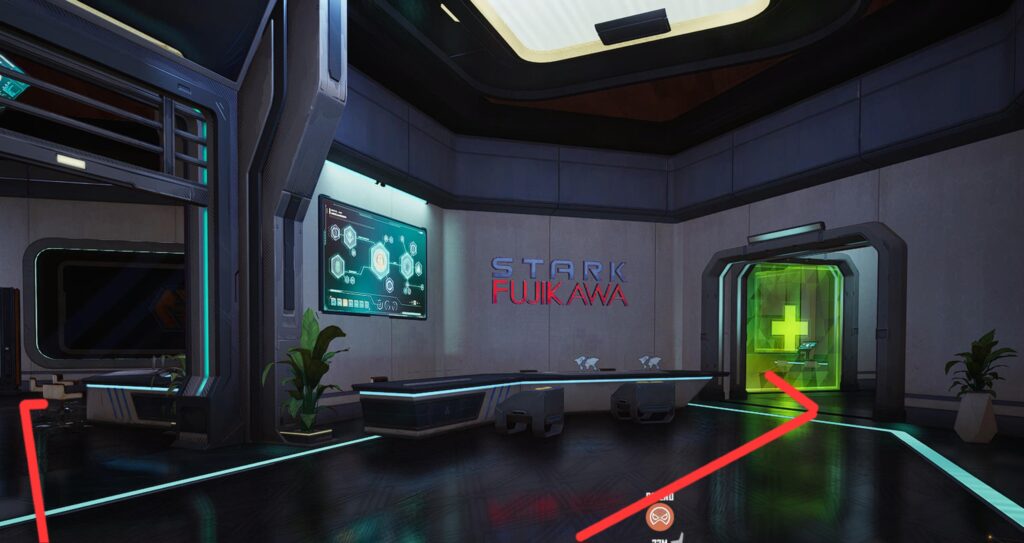
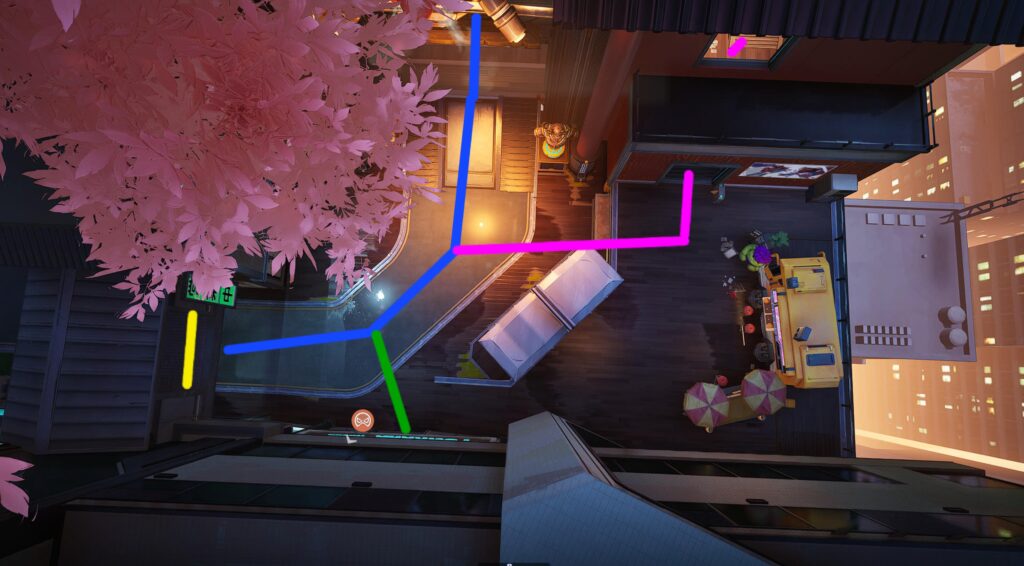
- Pink: This cuts into the back building that acts as the defenders spawn in Section 1. This area let's you quietly flank around the narrow streets at the end of the section.
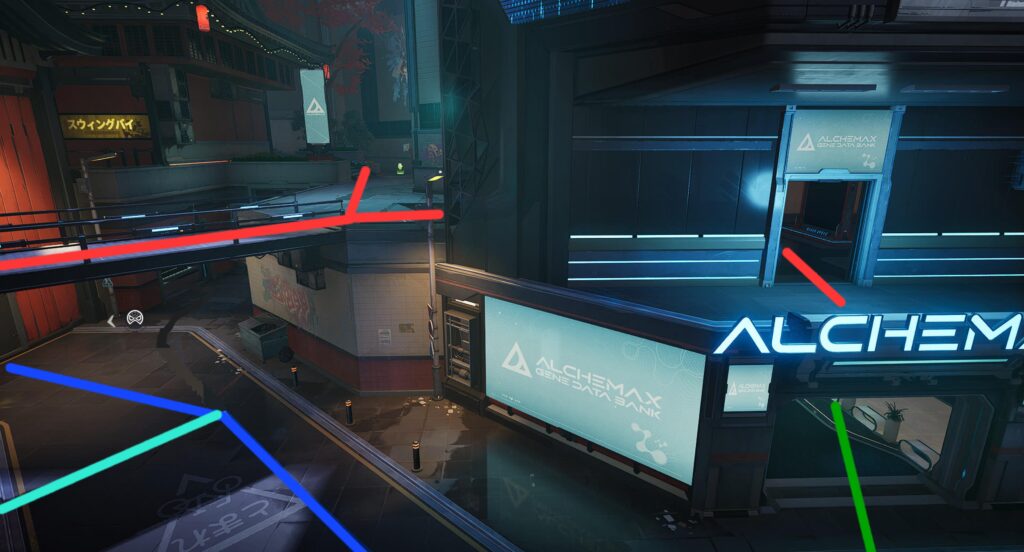
Leaving from the attacker's spawn, this gives you a better view of the path options you can start with. Red cuts through the top of the building, and gives upper access to the alley flank (see next image). Teal takes the lower path towards the back alley.
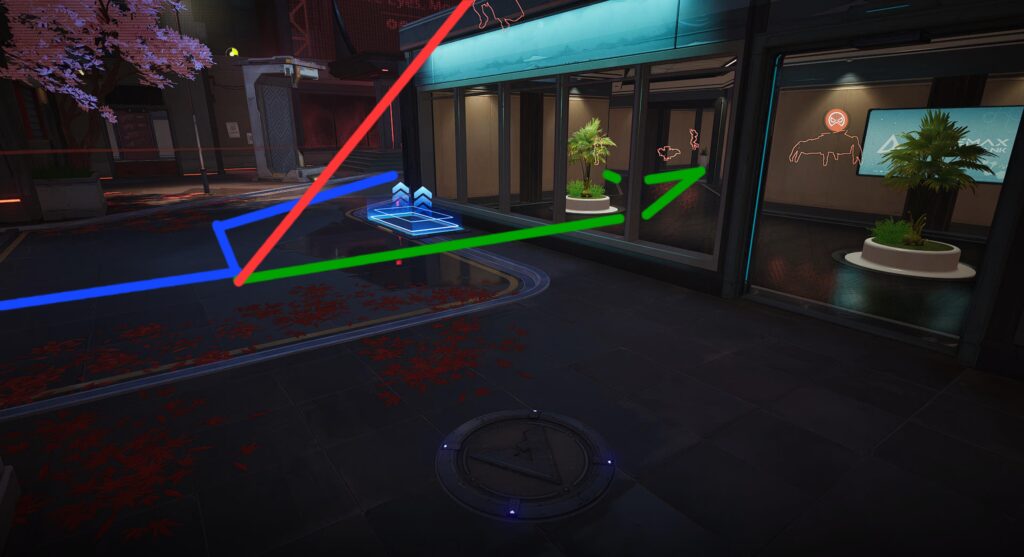
This is that back alley I mentioned, and players don't utilize it nearly enough. Not only does it give you access to push that side building from behind instead of head on, it lets you flank completely around that corner point. Most defenders set up the back line on that corner, so this gives you a prime angle to pick them off. The red path shows where the bridge from the last image turns into that upper door into that side building. You can simply jump off the ledge though to land on the teal path below.
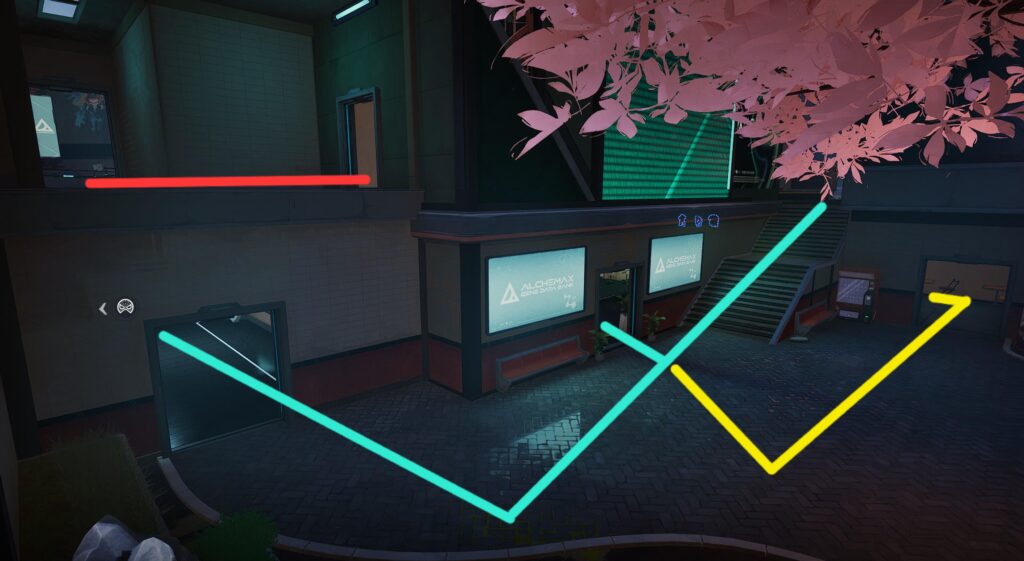
Once you make it around that corner, you come to that narrow street. This is where you can use that pink path to flank inside the building and pop out at that back doorway.
This is an angle from inside the building. Not only do you get that nice, secluded flank, you also get a healh kit to top off before going back into battle.
Once outside, you can reconnect with the objective if you want to. Alternatively, you can continue down the pink path to flank further to the defenders 2nd spawn. Defenders may want to use this upper level green path. Not only does it give you the high ground advantage, but you get that nice balcony with a health kit to yourself that you can post up at.
For the end of this section, the red and green routes return to the point. Nothing too special here. It's just important to remember you can use even the basic routes to mix up your objective push.
Section 3: The Final Push
Like Section 2, this section is difficult to get a top down view that makes sense to look at. This gives a good idea of where you can go from spawn though. The blue path will again represent the convoy's standard path that players will follow. The pink path is the continuation of the last secion's path, showing where that flanking routes ends. Similarly, Green shows how defenders can use the jump pad in that room to jump up and move to that nice elevated balcony from Section 2. Alternatively, you can follow this route down the hallway to push parallel to the objective.The red and yellow paths end up at the same destination, but start from different points.
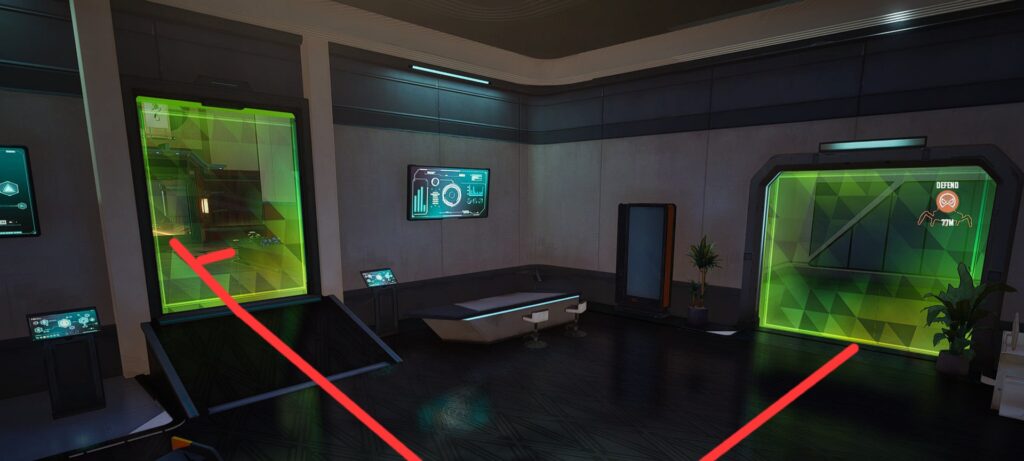
Attackers can use this red path to move through what used to be the defenders spawn in Section 2. From here, you can take a secluded route to the objective and multiple flanking routes.
This image continues from previous image, showing the next area the path moves to.
Continuing still, this shows where the red path ends at the objective's side, as well as an upper door to the same room. It connects with the yellow path, which turns and moves across the bridge that crosses over the objective.
Returning back the main objective path, this shows you where the yellow path begins. By climbing up and moving into the building here, you can reach that room in the previous image. The green paths are doorways that connect to that parallel path from before.
Finally, with a clean top-down view, you can see a few options you have to enter this final room. You can exit the green path to meet back at the objective, or go upstairs and cross the bridge to the yellow path. The pink path highlights a very under-used flanking routes into the final room.
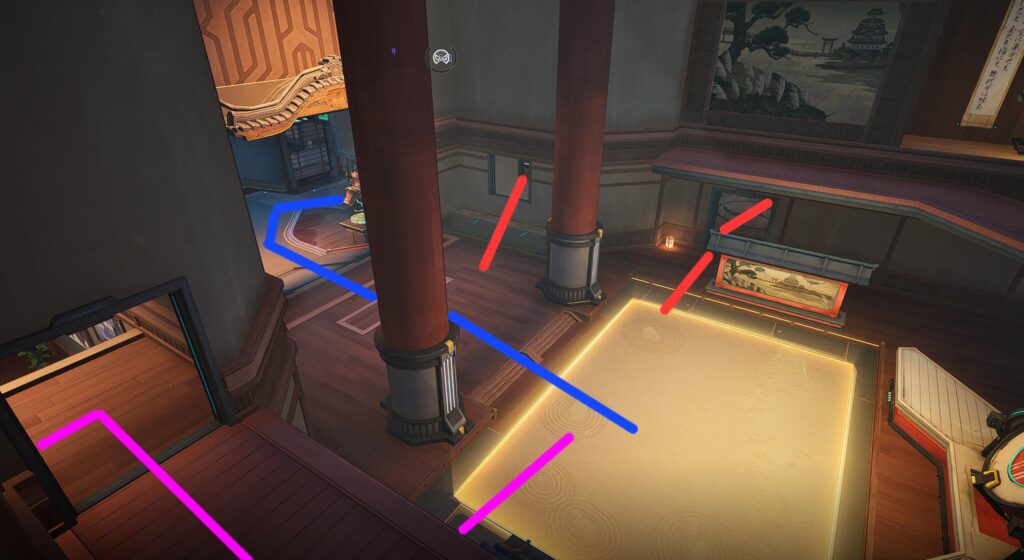
In the final room, you can see where the red, pink, and blue paths meet together again. The pink path starts on the elevated platform, but you can jump down to continue toward the objective. This room doesn't have many options to get into, so those two side paths are key to stop your team from being bottlenecked through the doorway.