Table of Contents
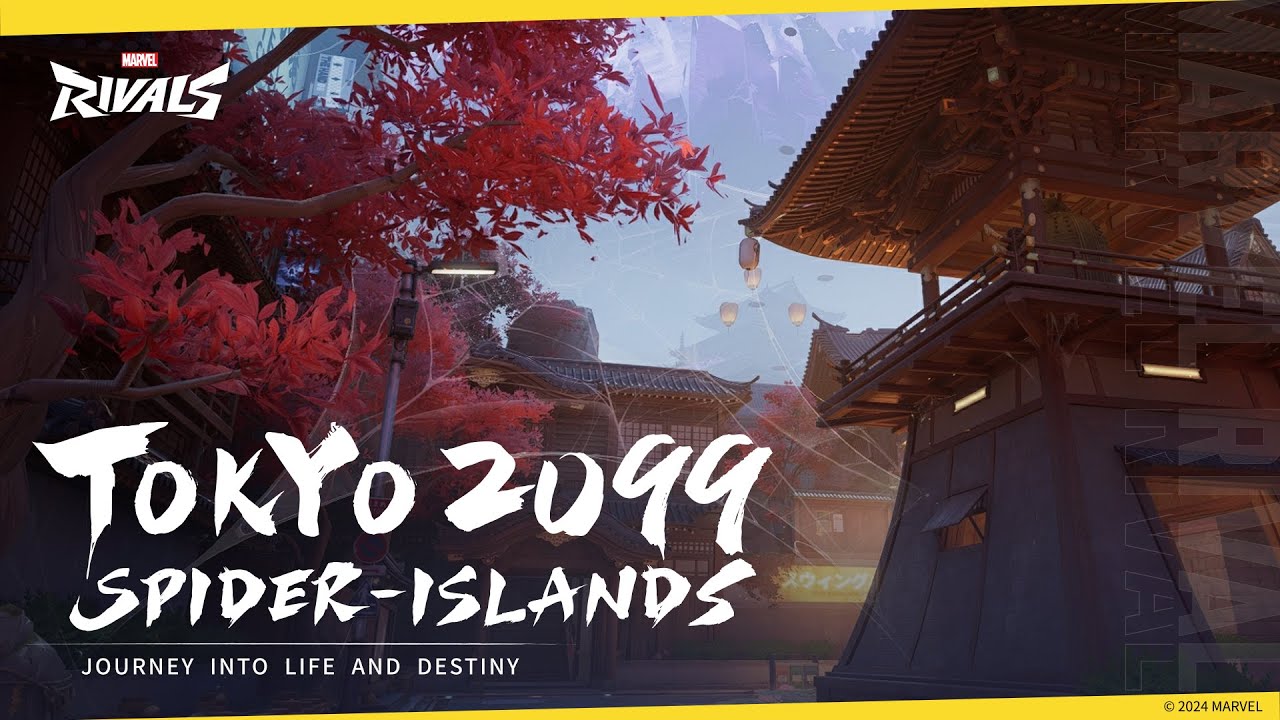
Welcome to our guide to the Marvel Rivals Map - Tokyo 2099: Spider-Islands! Here, we will explain the layout of the Map, and learn about each section so you can take advantage to defeat your enemies.
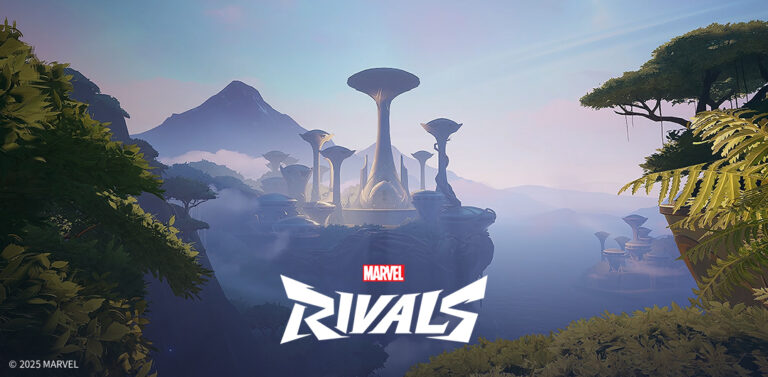
Take a journey above Tokyo 2099 into the Web of Life and Destiny!
To patch up the temporal rift, the Master Weaver is working around the clock to spin his magic while also suspending an entire network of islands aloft, far above from the urban hustle. As a lover of time, he's preserved many more classic Japanese elements, from zen gardens to his own sacred tenshu, where he protects a personal sliver of the Web of Life and Destiny itself.
It seems that weaving the Multiverse back together is difficult for one spider, so let's get Spider-Zero back in action!
Map Type: Convoy
This Convoy map challenges one team with pushing the Spider Convoy through the path, while challenging the other team to keep it from moving. In quick play, only one round will be played, so you won't have a chance to attack and defend. In competitive, both teams will have a chance to attack and defend. The team who gets the furthest wins!
This guide will highlight some helpful tips to improve your map knowledge. A good understanding of your route options can help you and your team lead better pushes, and have your team infiltrate the back line more successfully. It will mostly focus on the attacking side, but you can still utilize these routes on defense.
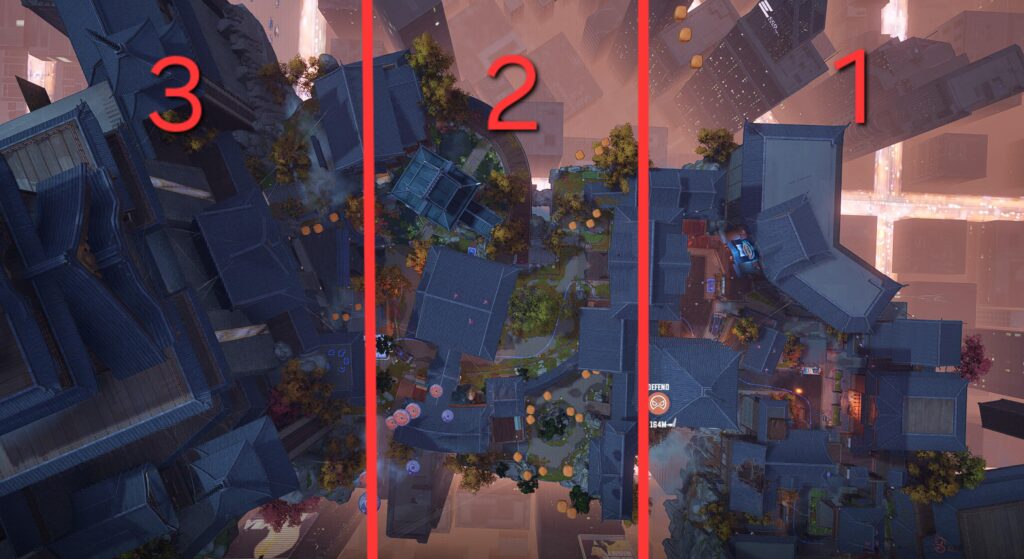
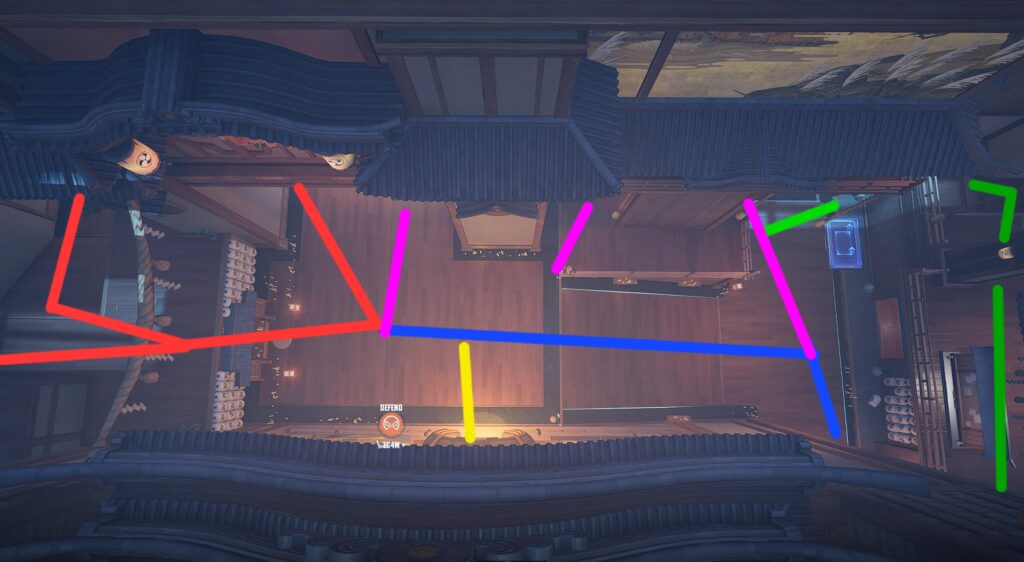
Zone 1: The Attacking Spawn
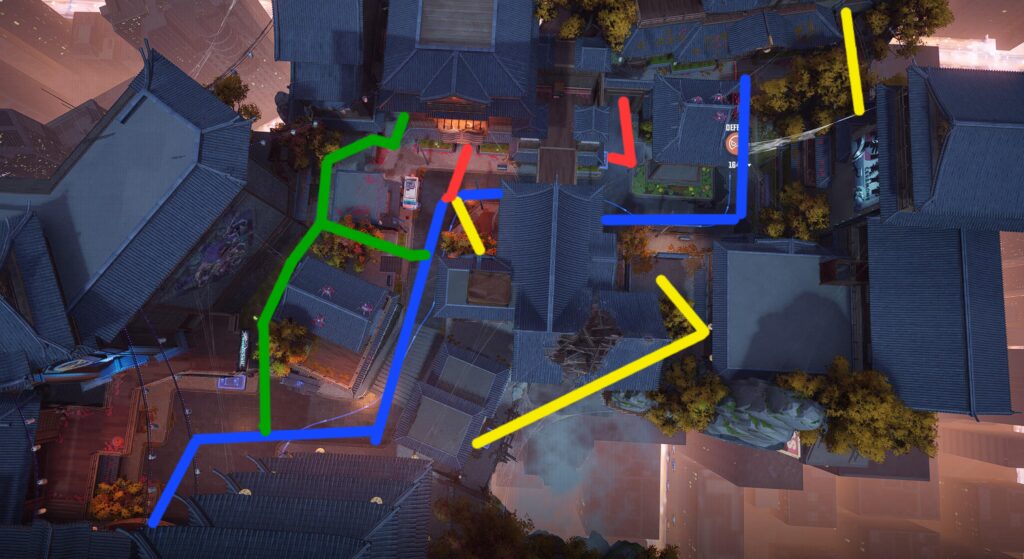
This image shows a top-down sky view of the first zone of the map. Each colored line represents a potential route you can take:
- Blue- This is the standard route that the convoy follows. Most of the team will be following this route every game.
- Yellow- This route starts at the upper exit door of the attacking spawn. It leads down a covered path that gives you access around the back side of the main route. You can use this to primarily push through the building to the typical defense position at the second bend. You can use the secondary path with characters that can cross the open map area to shortcut to a small path. Defenders might use this path to flank as well.
- Red- This route utilizes the lease used 3rd spawn door, which can lead you directly through the side building. Using this can get you rapid access to the typical defense setup without needing to tackle them head on.
- Green- This route branches off as a secondary path that lets you put pressure on the blue route from a different angle when the convoy nears the end of zone 1.

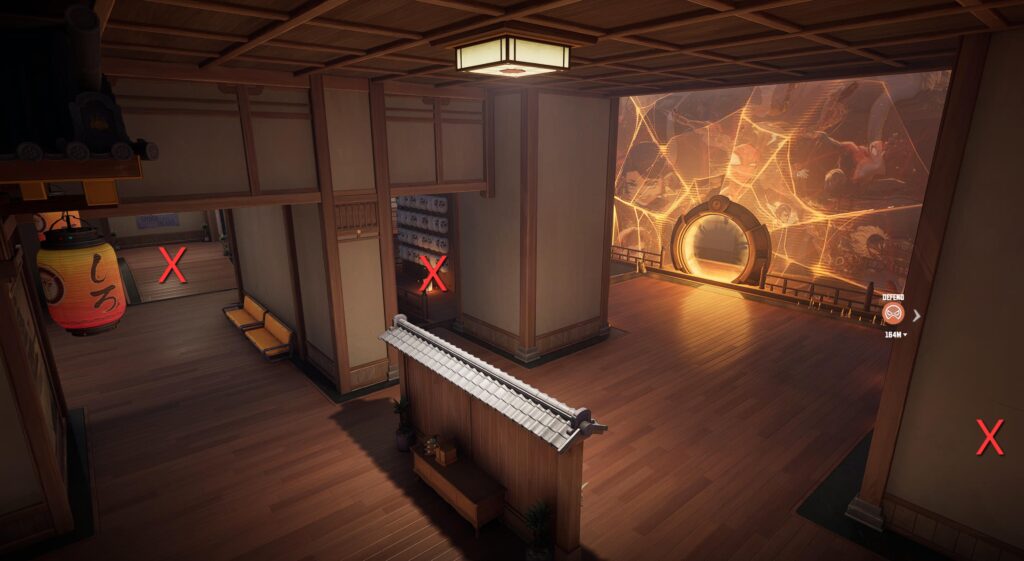
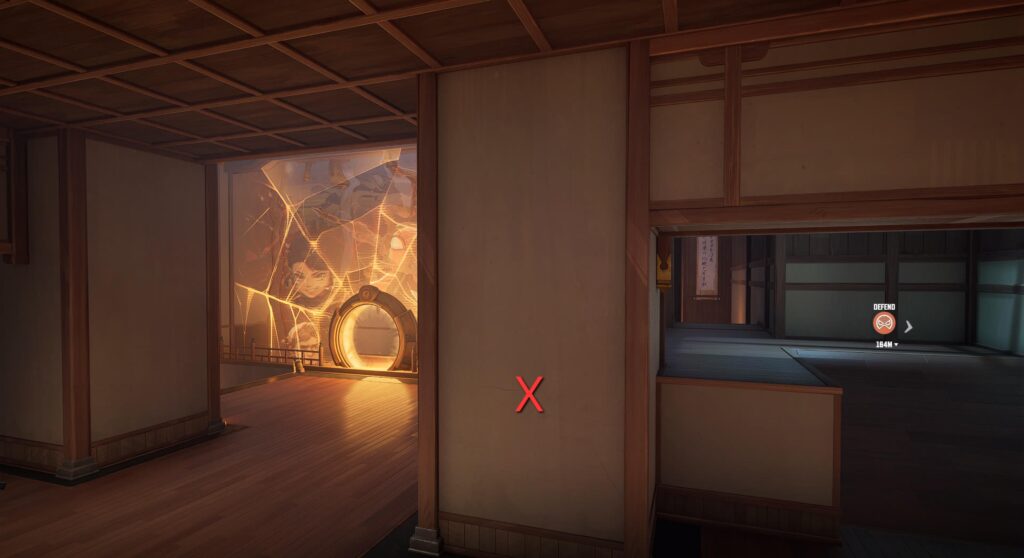
If you are unfamiliar with the 3 attacker spawn doors, this image highlights your initial route options. Each X is color coded to the route they lead to.
Zone 2: The Garden

This top-down arial view highlights the potential routes of zone 2. Like zone 1, each route is color coded:
- Blue- Like zone 1, this route is the standard convoy path that most of the team will follow. Halfway through the route is a bridge you pass under. To the left of the path is a pit of water that opponents can be pushed into. Invisible Woman can quietly sneak here at the start of the zone and push defenders off the edge with her force push.
- Green- This is a under-utilized back path that can give you flanking options for the start of the push. Late push, you can move through the building to cross the bridge, or move back toward the blue route. The next image will give a clearer view of this area.
- Yellow- This route is great for flanking during the end of zone push. It can let you get behind the enemy at the bend, as well as an extra route that pushes to their spawn door.
- Red- This small route actually cuts through a small room used as the defenders first spawn. It allows you to quickly get behind the elevated platform that guards the blue route, as well as flank the end of the blue route.

As previously mentioned, this green route is often very under-utilized. It connects directly to the attackers spawn area ans gives you discreet access to 2 different ground-level entry points. You can also use the stairs to gain upper level access to continue the route or cross the bridge to the center building.
Zone 3: Inside the Building
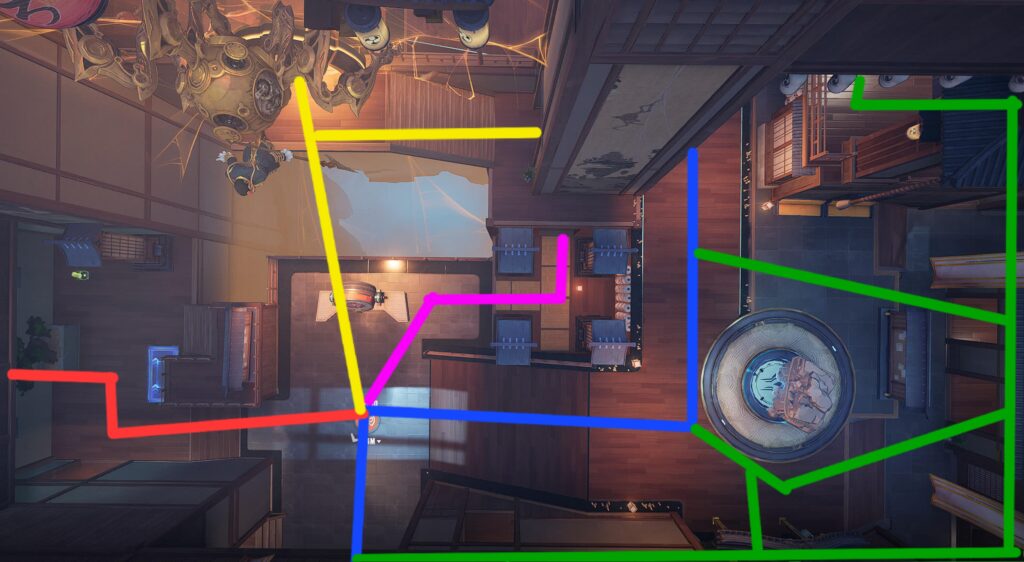
This zone is split up into part 1 and 2 because you can't get a good arial view of both sections. This image highlights part 1, which showcases the color coded routes:
- Blue- The standard convoy route that most players will follow.
- Green- This is the most common secondary route players will use. Not only does it branch off from the blue route, but it lets you cut behind to some small rooms in the back for additional options.
- Red- This route takes you to a jump pad and an elevated doorway, which takes you directly to the convoy finish line and the defenders spawn. It's perfect for discreetly moving behind the defending team. For defenders, it can be used to flank the attackers at the start of the zone 3 push.
- Yellow- Characters who can get airborne enough can use this as an extra flanking option. Many defenders will use this ledge to post up on, but attackers can use it to push the convoy from a different angle, or quickly reach the finish line to help secure the win.
- Pink- This hidden path actually cuts under the blue route, taking you to the back side where the green route wraps around. The entry point even houses a health kit, making for a great emergency safe zone.
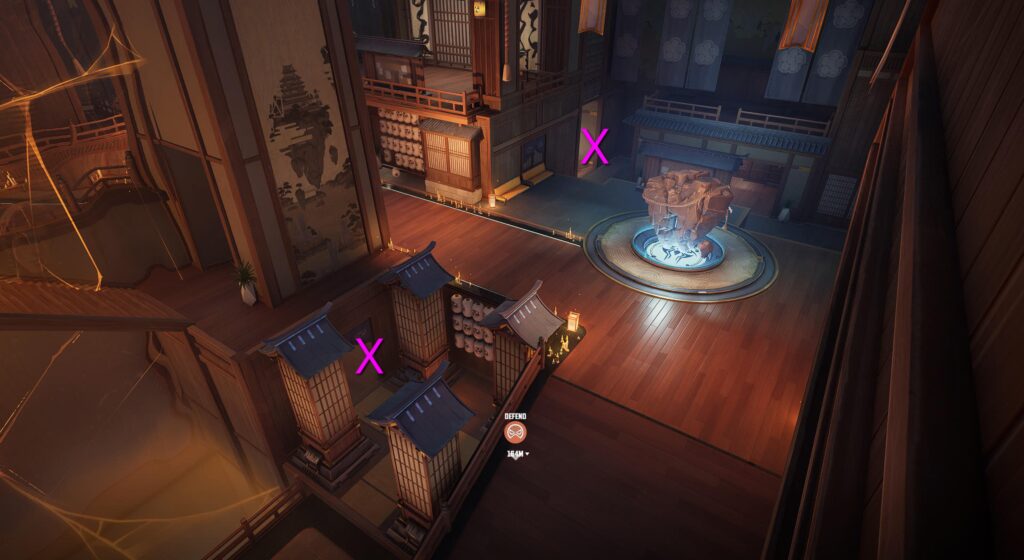
For a better understanding of the pink route, this is a different angle that shows both ends of the point with the X.
This is part 2 of the 3rd zone. Each of the routes show the continued routes from part 1. Pink route is the only exception, as it highlights a potential way you can quickly branch off the blue or green route to the side of the objective.
This image shows the defenders spawn right as you leave the spawn door. I highlight this area to show you other ways you can go other than going to the convoy head on. Each X shows a different route defenders can take from spawn to mix up their pressure points. In reference to the top-down map, the left and middle X are connected to the pink path. The right X connects to the red path.
For a better view, this image shows the 3rd X again, which highlights the red path.