Table of Contents
Welcome to our guide to the Marvel Rivals Map - Yggsgard: Yggdrasill Path! Here, we will explain the layout of the Map, and learn about each section so you can take advantage to defeat your enemies.
Beneath the sky-shutting canopy of the World Tree, Yggdrasill, lies the golden glory of Asgard, realm of the gods, now overgrown with the roots and flora. However, the throne-seizing scheme of Loki, god of mischief, threatens the ever-lasting prosperity of this kingdom and all of the Ten Realms.
Map Type: Convoy

This Convoy map challenges one team with pushing the chariot through the path, while challenging the other team to keep it from moving. In quick play, only one round will be played, so you won't have a chance to attack and defend. In competitive, both teams will have a chance to attack and defend. The team who gets the furthest wins!
This guide will highlight some helpful tips to improve your map knowledge. A good understanding of your route options can help you and your team lead better pushes, and have your team infiltrate the back line more successfully. It will mostly focus on the attacking side, but you can still utilize these routes on defense.
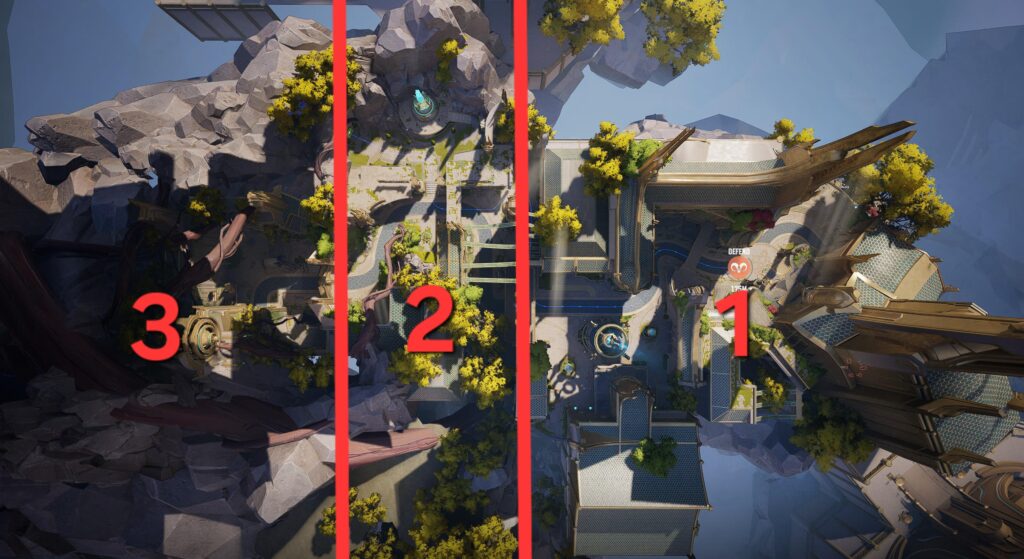
The map is divided into 3 small objectives. The first being the spawn area for the attackers. The second is the windy "choke point". The third is the final stretch to the finish line. The breakdown of the map will be divided into these 3 sections.
1. The Attacking Spawn
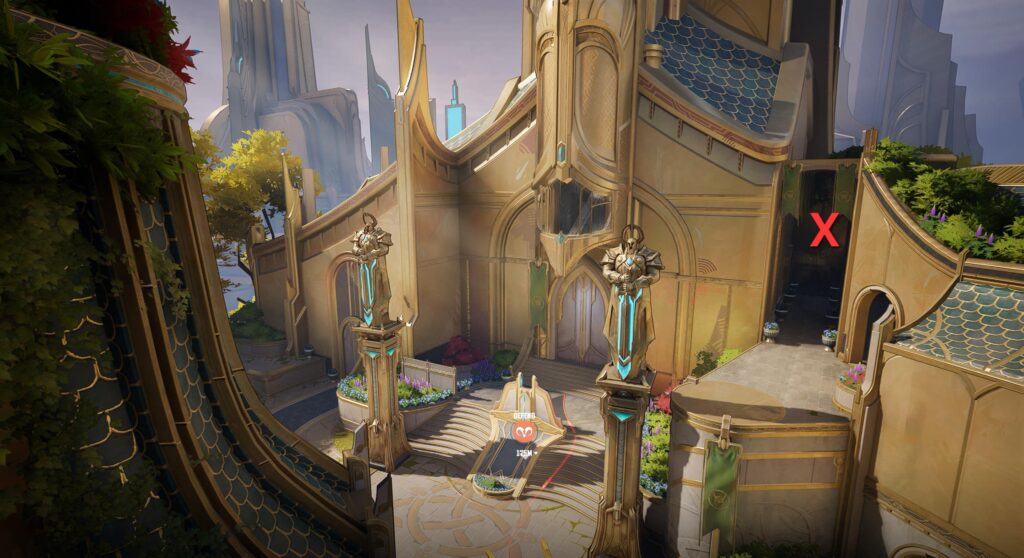
In most games, attacking players will flood out the front door to reach the convoy. The X on the image indicates a very useful side route you can use. It is out of the line of site for the typical defense setup, so you can break through much easier. Below is a layout of potential starting routes:
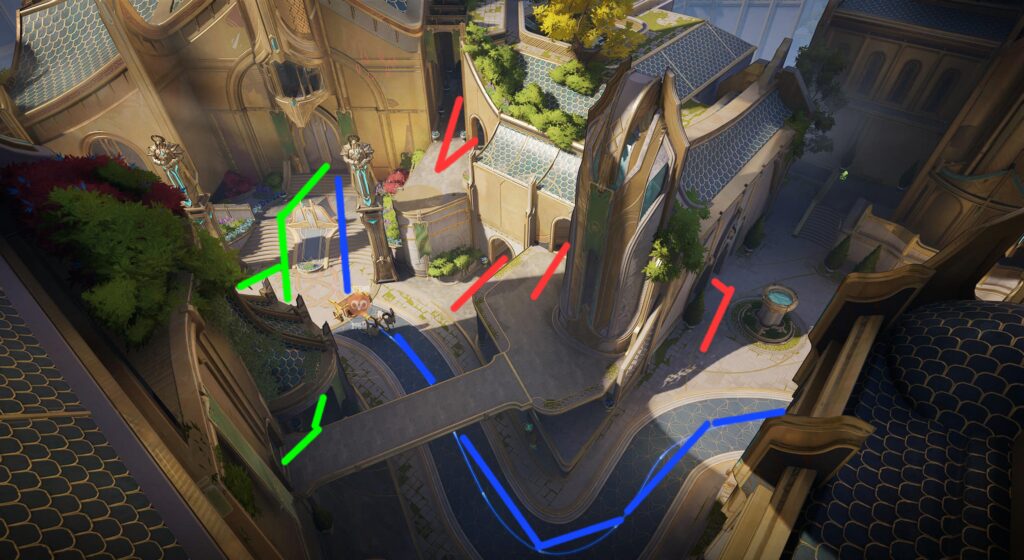
This aerial view shows 3 potential routes you can utilize:
- Blue: This is your basic route that follows the convoy directly. Most of the team will follow this to help escorts the objective.
- Red: This connects to that side spawn door from before. The path leads to a small area that gives you discreet access to 3 pressure points: behind the enemy team, above the enemy team, and beside the objective. These routes are your safest way of breaking through defenses.
- Green: This alternate route gives you balcony access directly above the enemy team. This is perfect for characters like Moon Knight to utilize to terrorize the back line. It does have a higher risk entering the door though since you have to push next to the payload to enter. The next image will highlight this area.
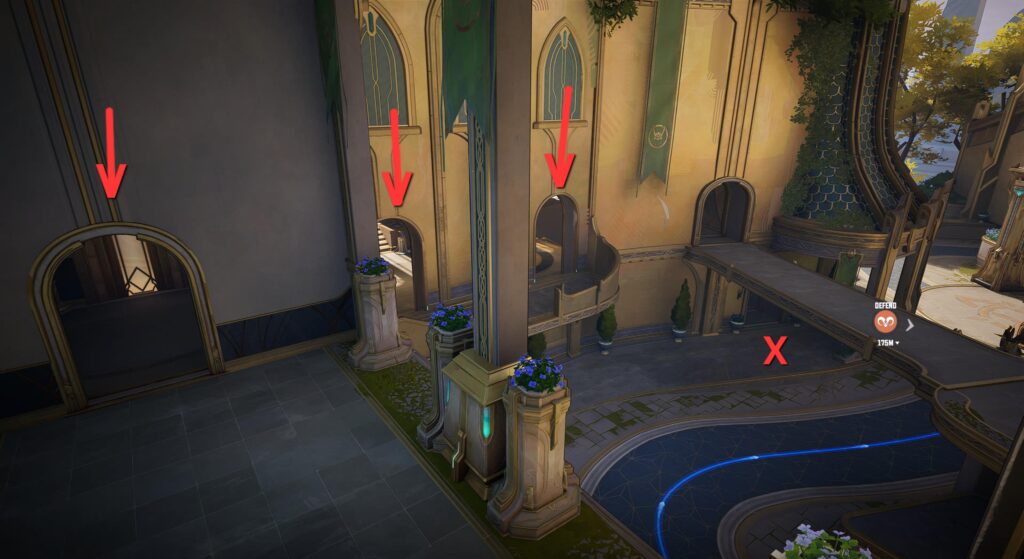
As you can see, the Green route gives you access to these 3 vantage points. You can also use this room as a typical safe space to heal if you become injured. The X signifies the entry point, while the arrows signify the vantage points.
2. The Choke Point

This portion of the map is the most intricate piece of the map. It may be small, but it has lots of different routes you can utilize outside of the regular convoy route. Here's a breakdown of the potential routes you can use:
- Blue: This is your basic route that follows the convoy directly. Most of the team will follow this to help escorts the objective.
- Purple: This is an extension from the blue route, but a noteworthy option. You can veer away from the convoy to this side path as a flanking option. It also houses a health kit, making it a great retreat option as well.
- Red: This route is the largest, but flexible route. This is mostly useful at the start of the push for this section. You can move behind the enemy defenses and position yourself in a variety of end positions. Once your convoy reaches the purple path, this route becomes a bit obsolete.
- Green: This is a hidden route, but one that can be very advantageous if used properly. The section and image below will explain more:
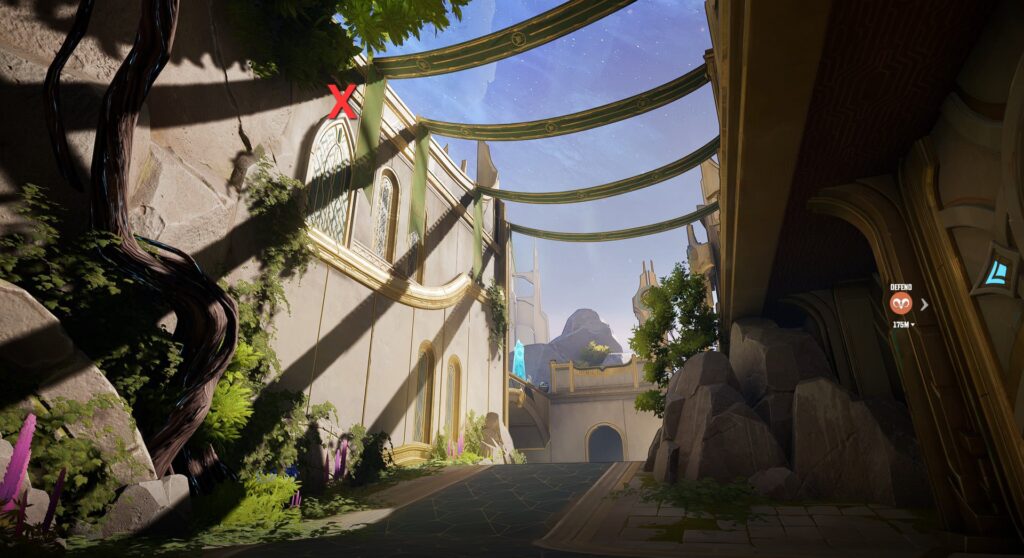
This is the start of the second section, and you will notice the X marked on the image. This glass pane is destructable, and covers an elevated walkway you can utilize. Characters like Punisher, Moon Knight, or Loki could use this to gain tactical vantage points without making yourself obvious and setting up directly from the convoy. As an additional note for defenders, you can use this ledge as a sneaky flanking option at the start of the offensive push.
3. The Final Stretch
This section is the simplest of all the sections. It doesn't have many routes and is mostly a straight convoy push. The bends in the road make it difficult to push without good coordination or well timed ultimates. The route does have one under-utilized route though that is important to learn.
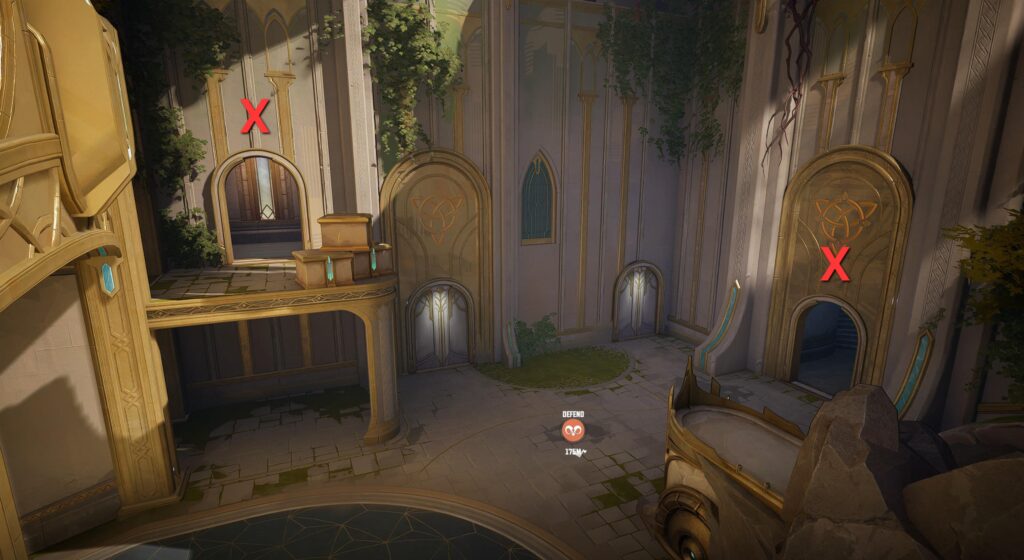
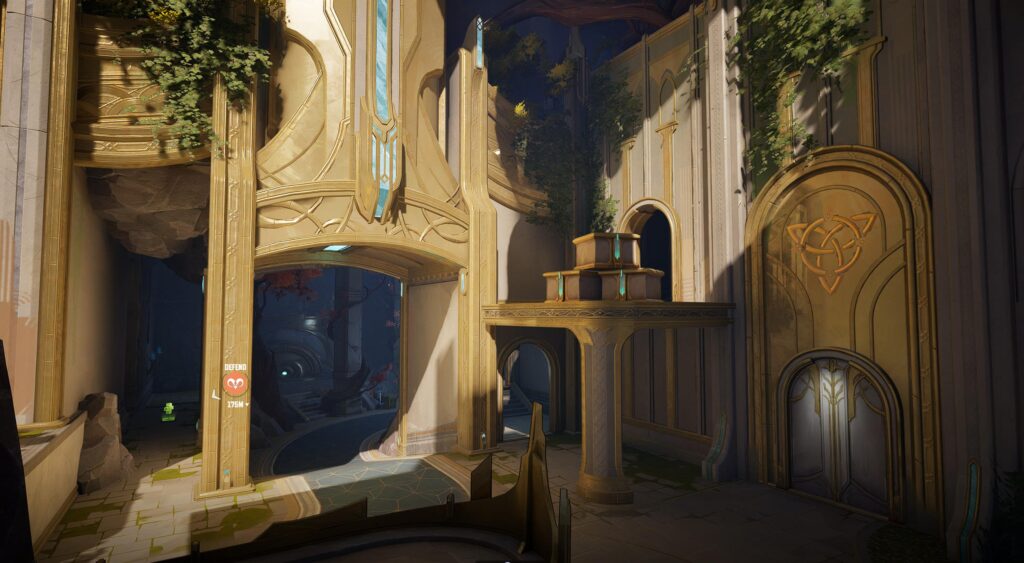
Right as you enter the third area, you have access to the doors marked with the X in the image above. These doors lead to the same hallway, which gives a direct path to an extra flanking route. The next image shows the exit side of the path:
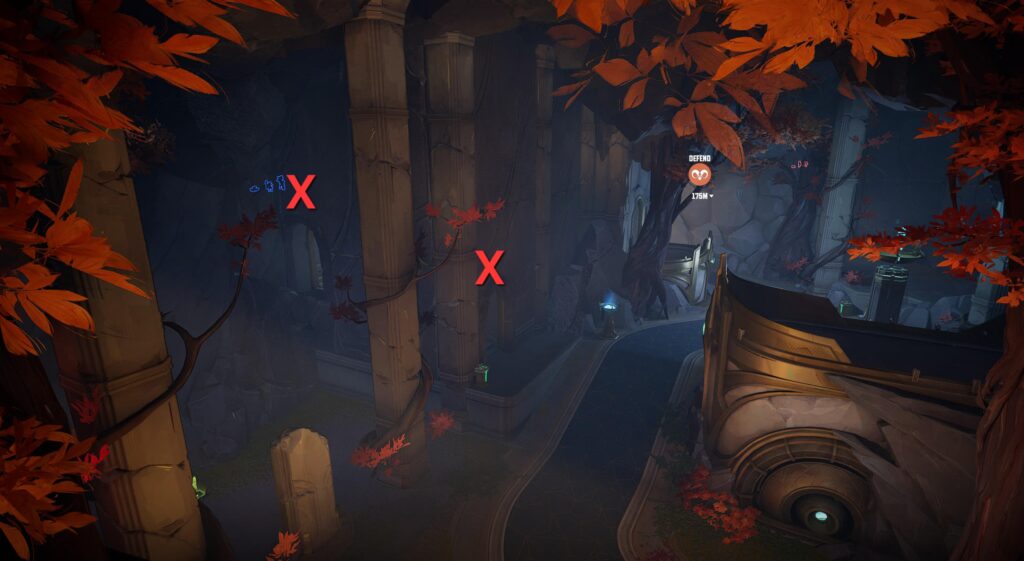
Both of the X marks are doors you can exit (or enter) from as the other side of the previous image. For attackers, you can use this to break past a heavy defense, or offer enough distraction to let your team break through. For defenders, you can use this path to get behind the attackers very easily.