Table of Contents
Welcome to our guide to the Marvel Rivals Map - Empire Of Eternal Night: Central Park! Here, we will explain the layout of the Map, and learn about each section so you can take advantage to defeat your enemies.
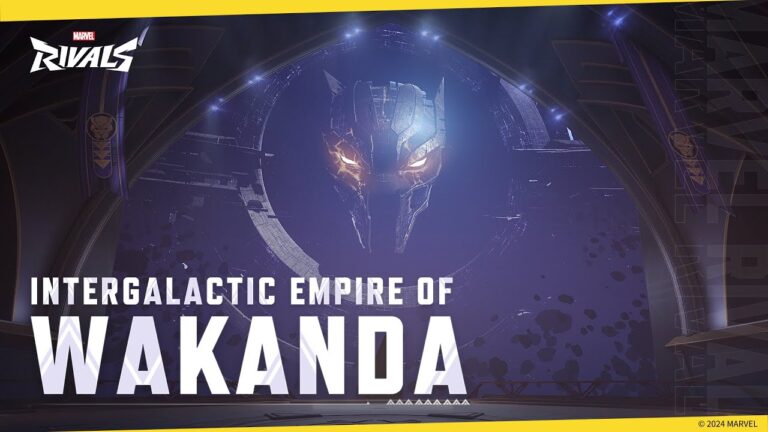
When the Timestream Entanglement swept over New York City, Dracula seized the opportunity with Doctor Doom's gift, stopping the moon and declaring an eternal night with the power of Chronovium! Now, the heroes are ready to take the battle to his gothic headquarters within Central Park..
Traverse into complete darkness to discover the imprisoned powers on the path to Dracula's Castle.
Map Type: Convergence (Convoy)
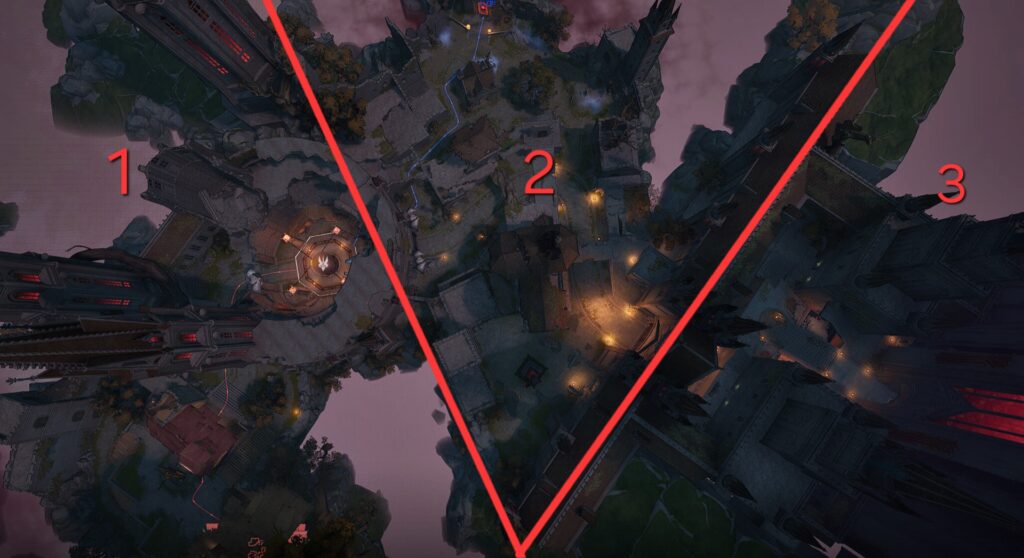
Central Park is a convoy map with an initial domination style beginning. Attackers begin by ambushing the ritual site and attempt to capture the objective. If successful, the convoy will appear and begin section 2. After moving the convoy to the castle, it will move to section 3 where the convoy must move all the way to Dracula himself to win the match.
This guide will break down each section, offering detailed routes you can take. This will let you and your team strategize how to approach the objective in different ways in order to break through the defense's hold. This guide will mostly be from the perspective of the attacking team, but defenders can use these routes as well to flank behind the attackers.
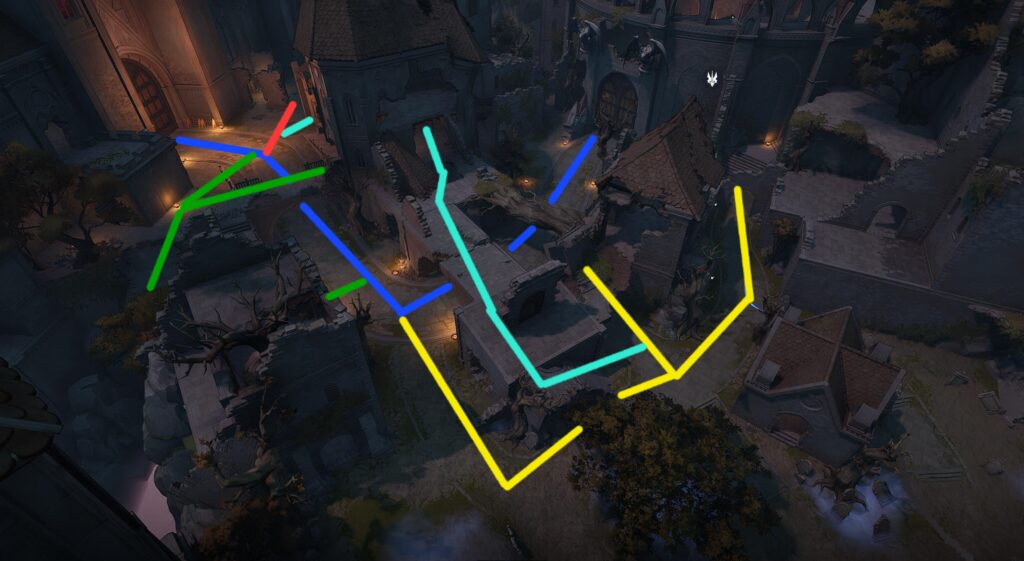
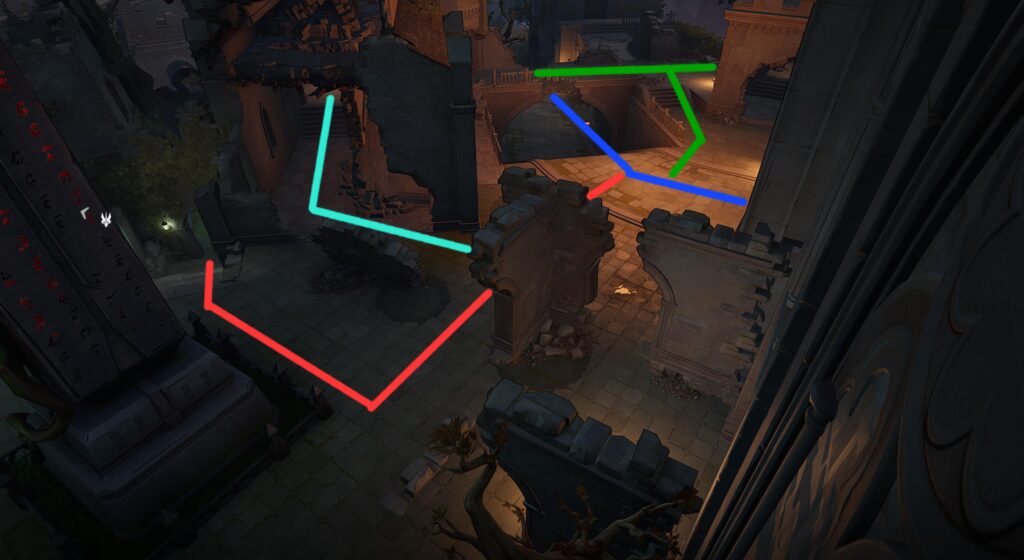
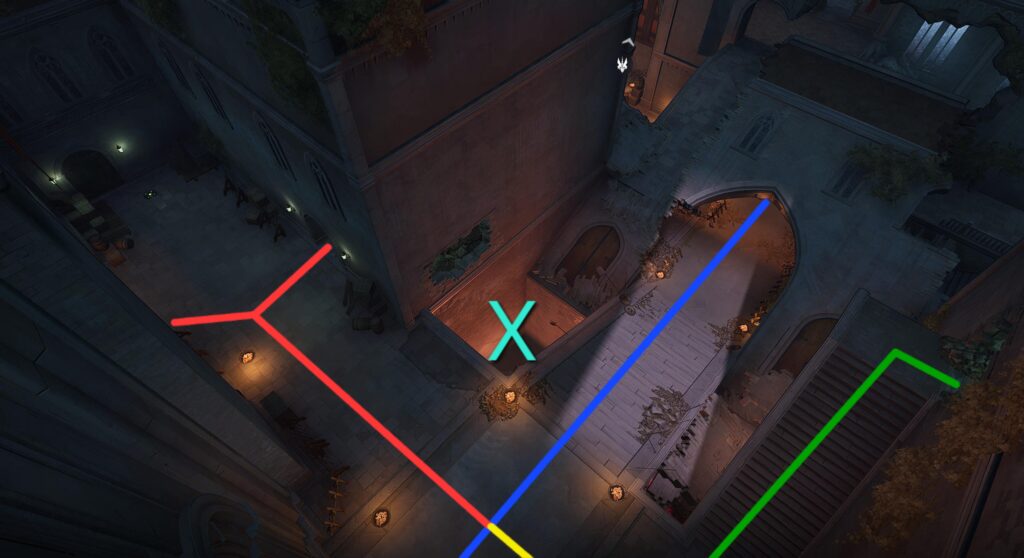
Section 1: The Ritual Site
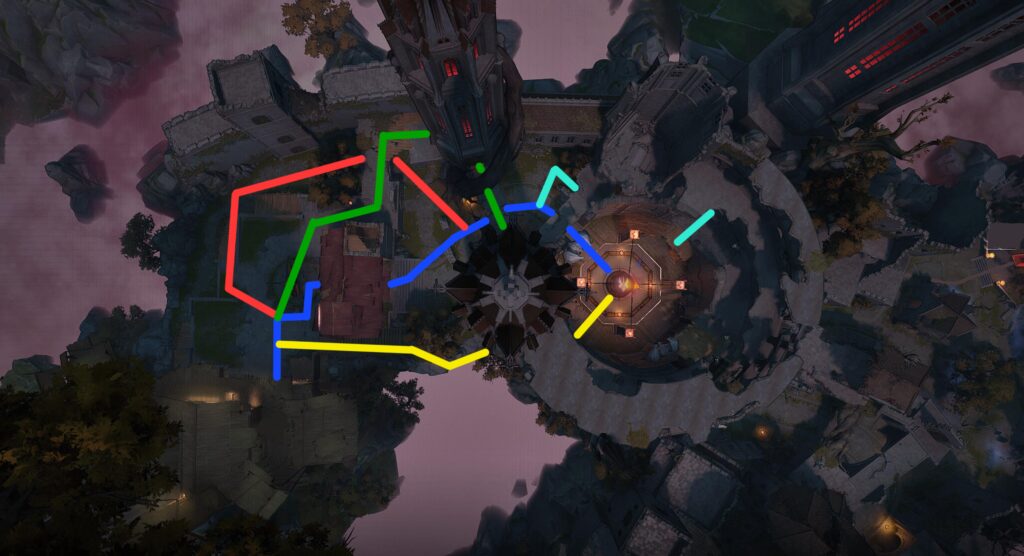
This top-down view of the first section highlights multiple routes you can take from the spawn area. The blue route will always indicate the convoy path / the default path. As for the other routes shown in the image, below is a description of each option. Images for the routes will follow.
It's also good to note that if defenders can successfully keep attackers from capturing the point, you can unlock one of the game's achievements to get some free credits and costumes!
- Red: This route is a simple alternate route at the start of the match. Most defenders have focus on the blue path, so by flanking around the red side, you can get an alternate angle on those defenders.
- Green: This is the high ground route, which let's you use the tower and bridge as a way to push opponents back.
- Yellow: For a secret route, you can move across a dangerous gap to flank the objective. Not all character can safely use this path though.
- Teal: For a very underutilized route, this path will let you push to the objective by cutting through a fallen tower (that you can repair thanks to the rewind interaction)
This is a side view of the main spawn. It shows how the red path cuts behind cover to approach the blue path from a safer position.
Similar to the last image, this shows the green paths arial view. It gives you multiple locations where you can pressure defenders with plenty of cover to shelter behind. There is also a helpful heath kit at the tower door along the green path, giving you a chance to heal without needing a strategist.
As for that secret yellow path I mentioned, you can take a quick right out of the spawn to find yourself at the cliff in the picture above. Any character who can fly, wall climb, jump long distances, or use utility for movement can make it across the gap. So for example, Captain America can spring jump across the gap to flank the objective, but most healers except for Loki and Rocket Raccoon can follow him. If you have a Groot, he can place walls along the cliff to form a path, allowing any character to safely make the jump. If you have a coordinated group, this can let the entire team flank to the objective, forcing defenders to fight their way back to the point.

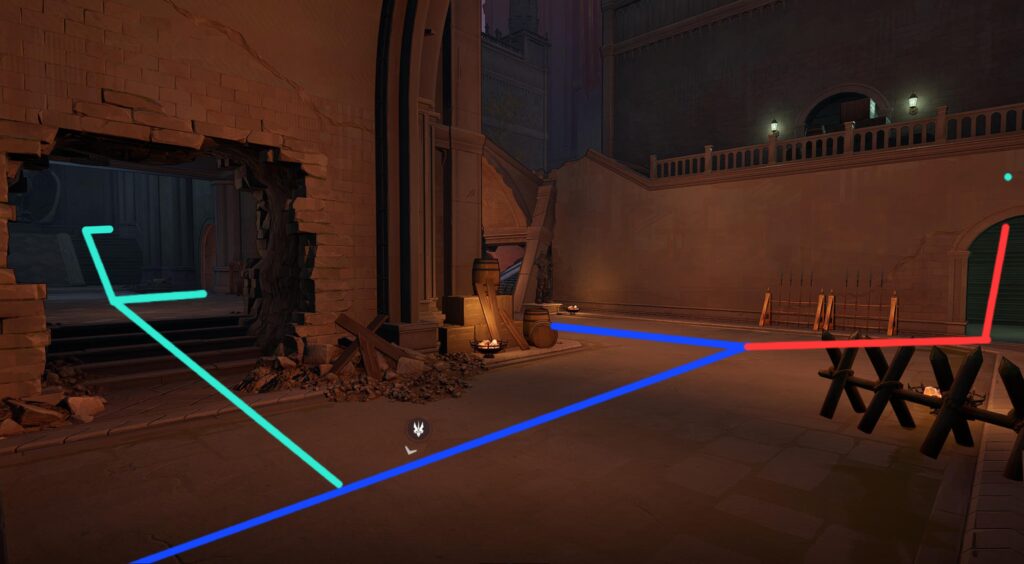
This is a close up to the entrance of the teal path. While it looks like a dead end, shooting the tower will cause the rewind to trigger, which rebuilds the tower and lets you inside. This will give you a chance to flank, as well as climb up the tower to a vantage point on the bridge or above the objective.
As you can see, there teal path gives you a very easy flank route to help your team capture the point. You can also see where the yellow route is able to flank into the point.
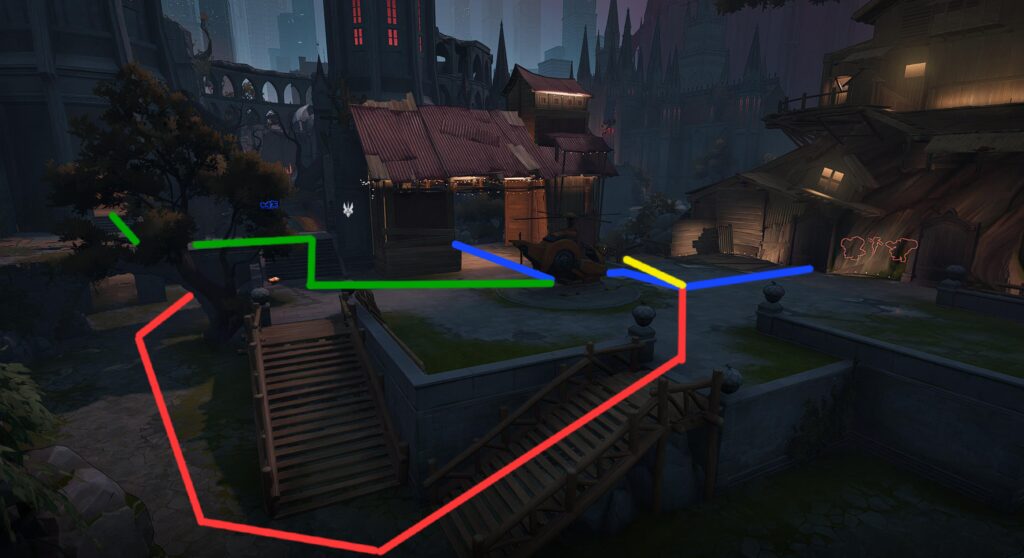
Section 2: Storm the Castle
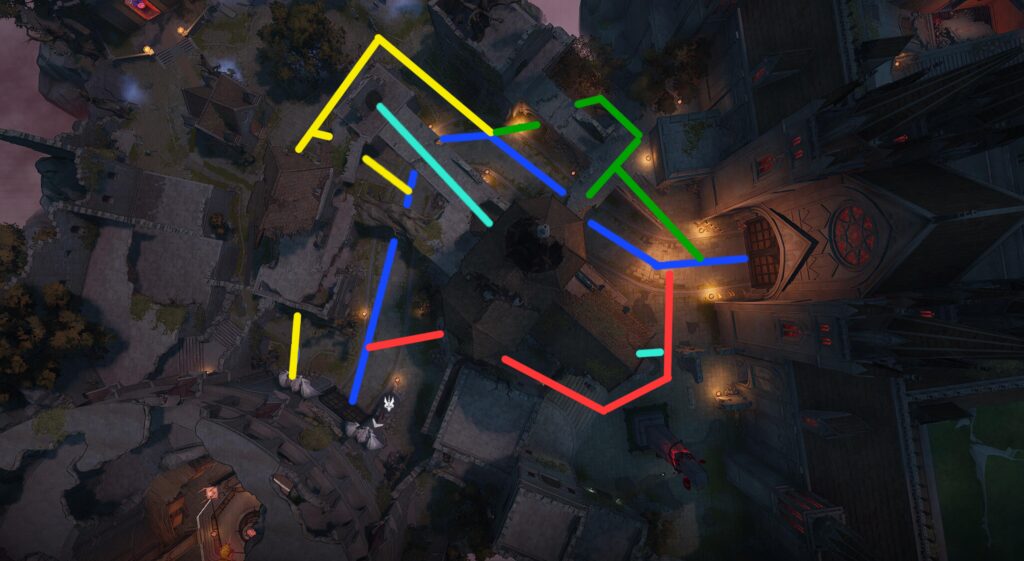
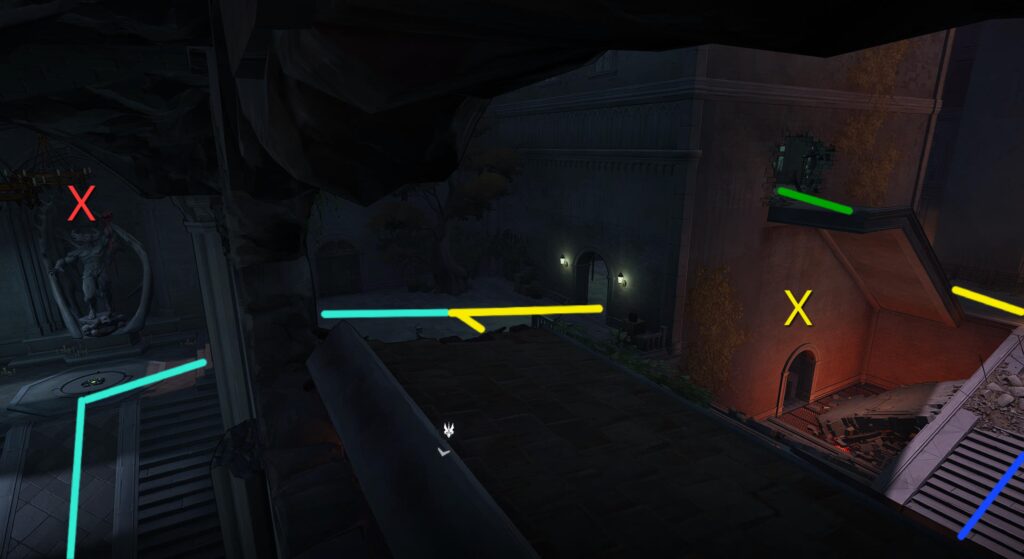
This is a top-down view of the second section. The blue line will again represent the convoy's route that the team will have to follow. The red and yellow routes give you 2 flanking options to pressure defenders. The teal path branches off yellow to move to higher ground, which cuts into the building. Finally, the green route is a small back path that lets you push the left flank once the objective reaches half way.
Here is a better angle of the yellow and teal paths. This is the most common flanking route since it leads directly from the attackers spawn. The teal path, however, isn't used as much as it could be by attackers.
This is a viewpoint from the castle walls as the end of section 2. This gives you a clearer view on how those flanking routes connect and give you ways to push the enemy back line.
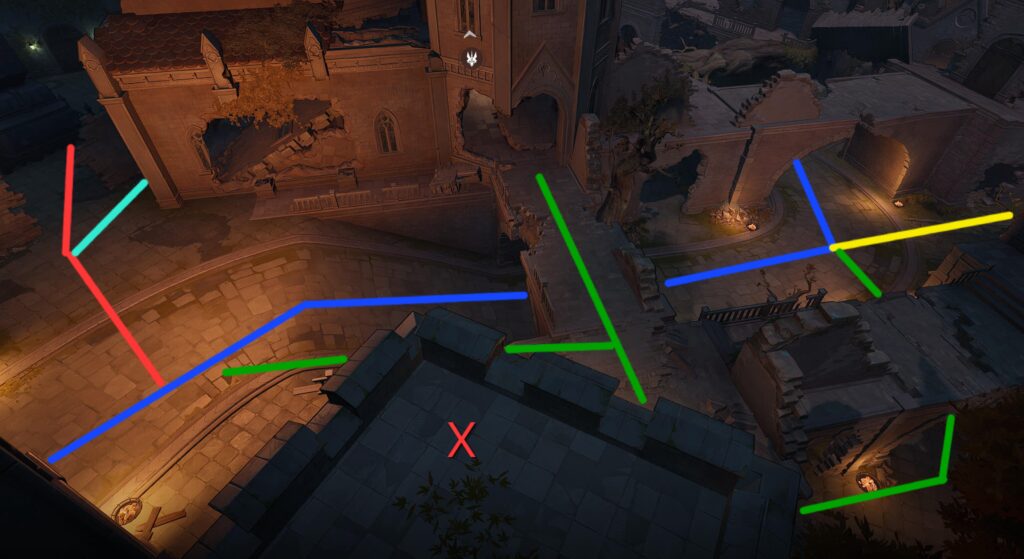
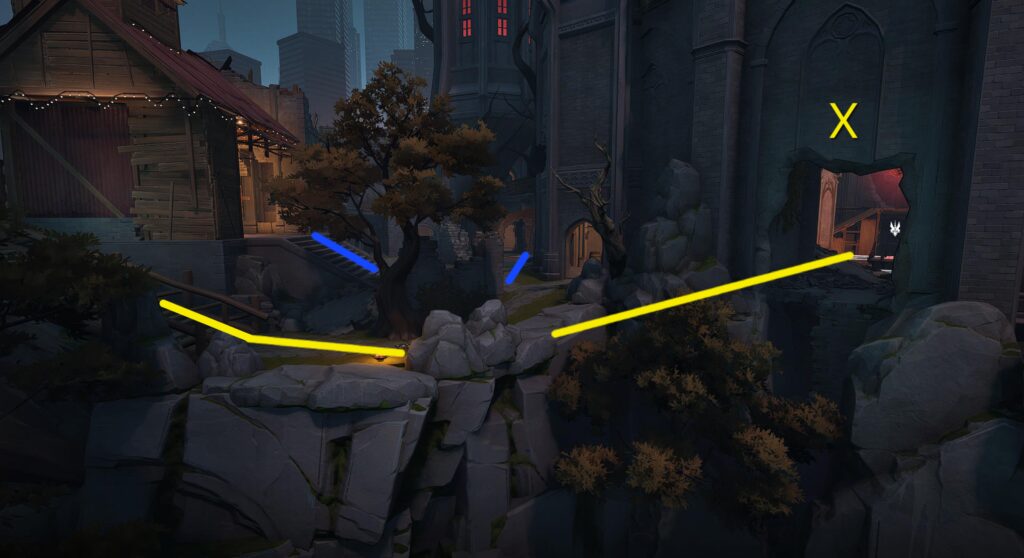
Hey defenders, see that X? It shows you a very good vantage point that you can utilize. It requires you to use a specific path to get to it, which I will show you next:
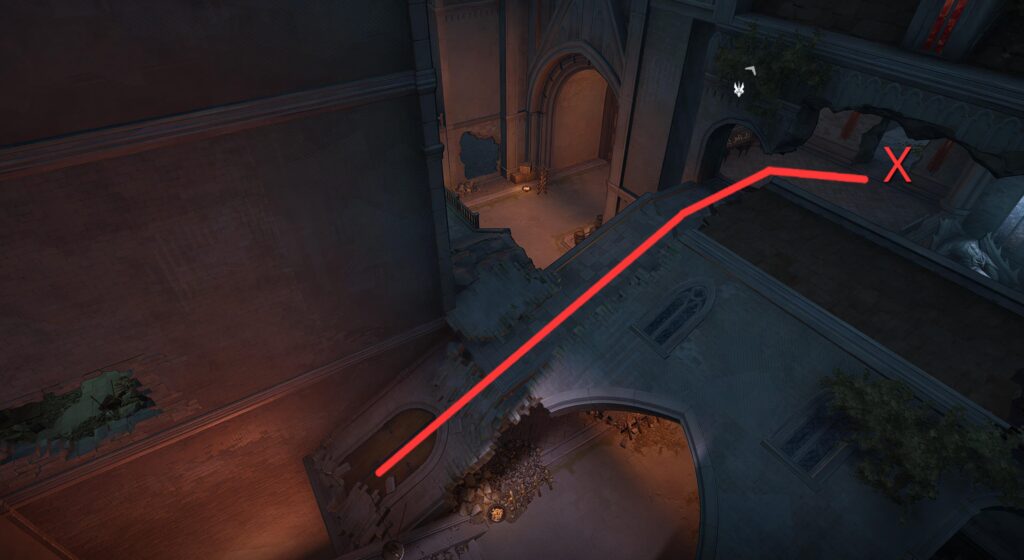
By running up this collapsed wall and through that opening, you get a great vantage point over attackers. There isn't a way to climb it without using this route, so it's difficult for attackers to flank behind you. It makes for a nice perch for a Sniper or healer like Loki.
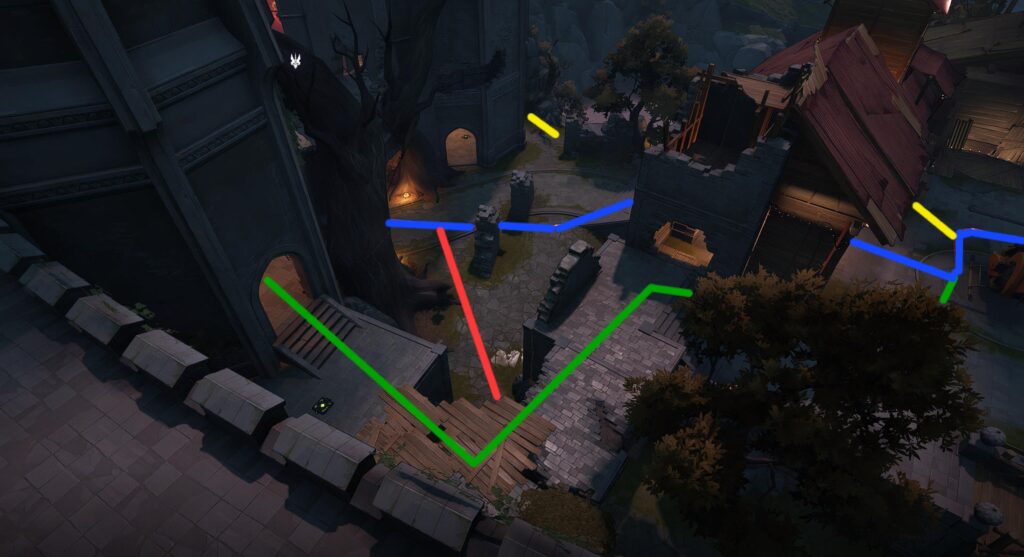
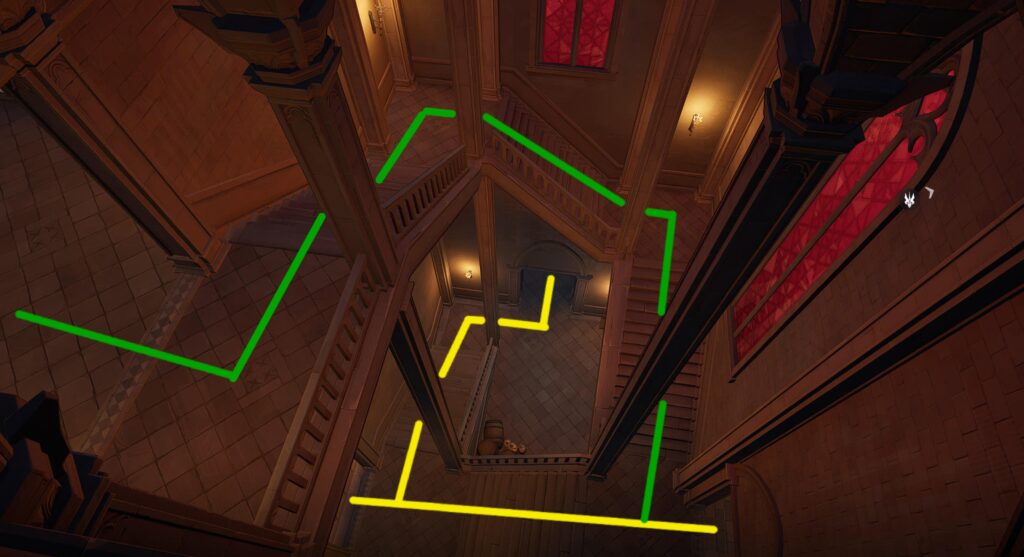
Section 3: Dracula
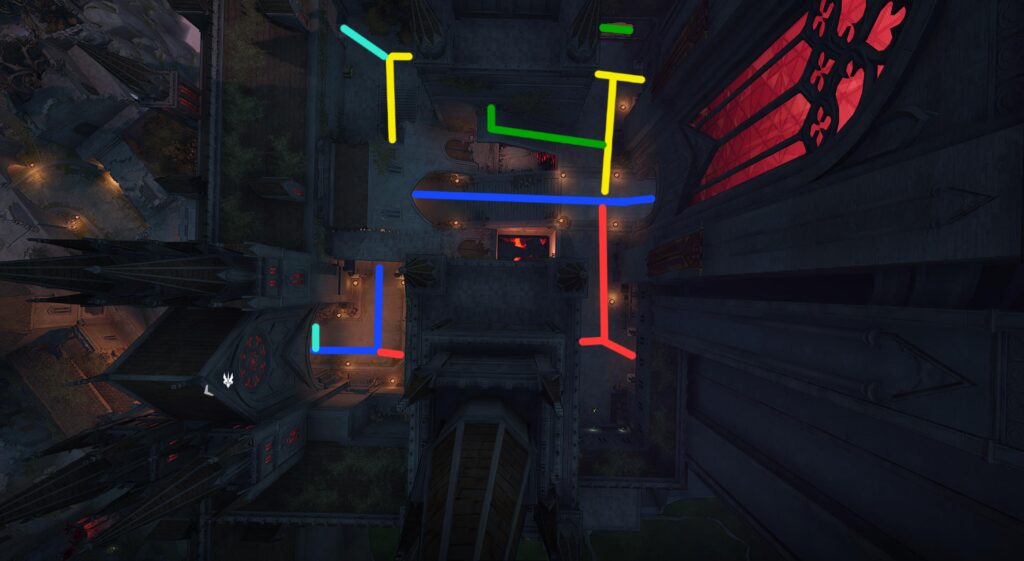
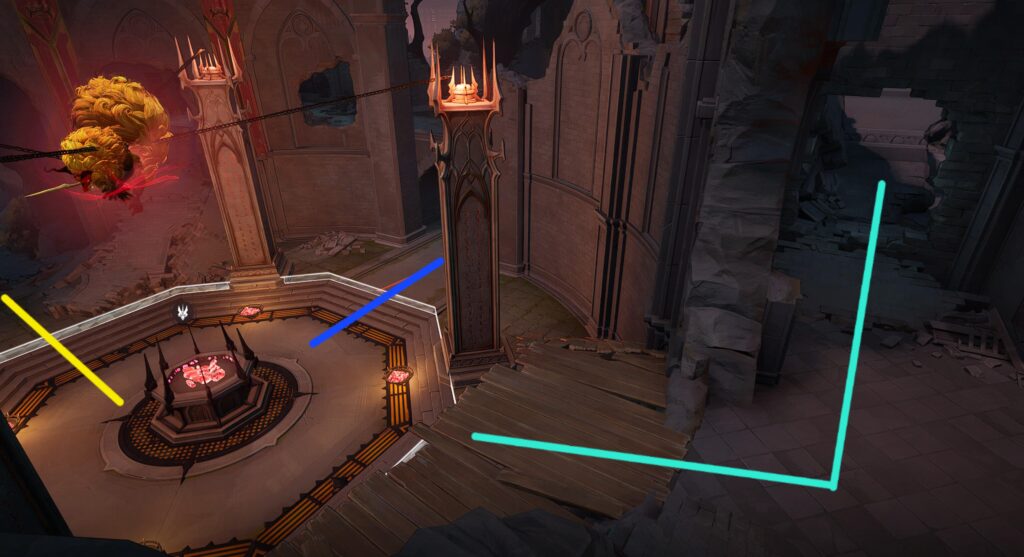
Finally, we have a top-down view of the final section. Since the castle (cathedral?) is actually where the objective ends, a separate image will showcase inside the building. Blue will again show the objective's path you have to follow. Red offers a quick flanking route with very little exposure. Yellow is a branch off blue that cuts into the tower to flank from the left side of the objective. Green is a staircase that is only accessible by the yellow path, but it leads to a very underutilized vantage point inside the building. That little teal path is just an alternate route to the blue that doesn't offer a huge advantage, but it does house an achievement!
At the convergence of the routes, there is a pesky ledge marked with the X. This pit is prime real-estate for characters like Invisible Woman to push opponents off the stairs to their inevitable doom. You can climb the green stairs for a nice angle to pull it off. If you have a groot, he can use his ultimate over this pit to pull attackers (or defenders) off the objective and into the pit of death.
These back to back images show the entry points for both the teal and red paths. That X marks a statue you can destroy. Doing so will get you this map's second achievement. That X shows a small, lower door that gives you access to the tower, or a way back to the main objective if needed.
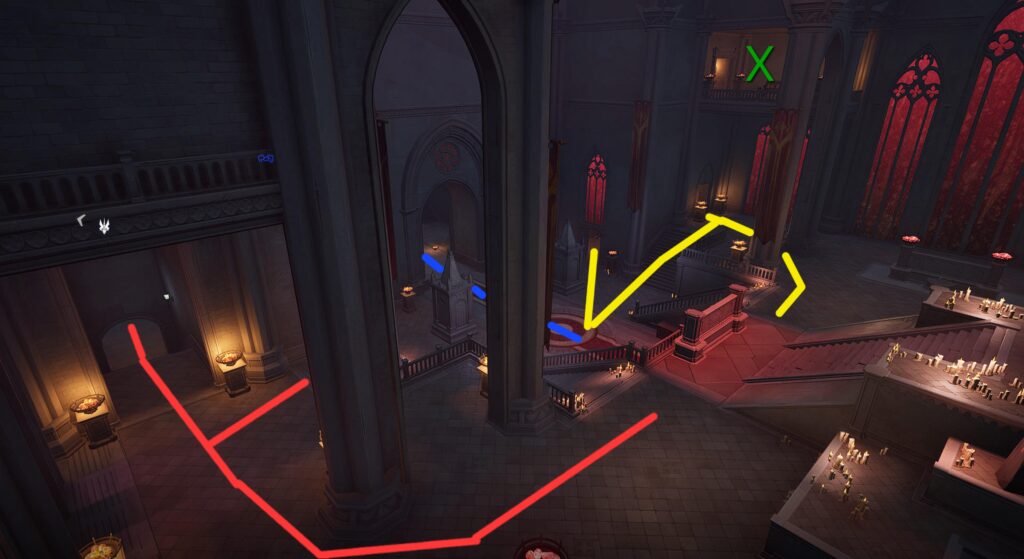
Once inside, those earlier routes get to continue and give you additional flanking options to disrupt defenders in their last stand. While both yellow and red paths give simple left and right flanking routes, yellow also gives you access to that nice X vantage points.
Either by using the green route or by the yellow, you can climb the stairs to reach that X vantage points. It's another perfect spot for snipers or someone like Loki who likes to sit at a distance.